A dangling drum is a clear reason to take any measures to eliminate the malfunction, since the breakdowns associated with this can subsequently ruin other components of the apparatus. But do not rush to contact the service center, first try to find faults. You may be able to fix them yourself. We recommend that you study our reviews, in which we examined the error codes of the self-diagnosis system of washing machines in order to quickly identify and eliminate some malfunctions in time, for example, "Hans Washing Machine Codes" or Whirlpool Washing Machine Codes.
Causes and their detection
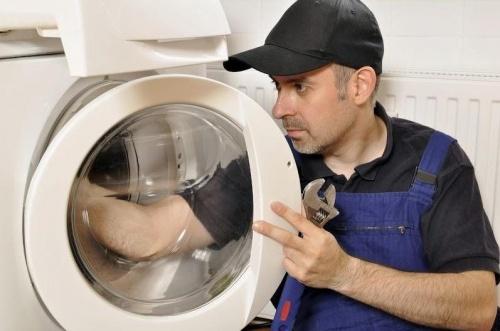
When the drum at the washer dangles, then most often washing machine hums when spinning and vibrates a lot. You can feel the "chatter" by moving the drum to the sides.
There are two reasons for this error:
- worn or broken bearing.
- shock absorbers are dead.
How to determine what is out of order? Very simple.
Bearing problem
To determine this malfunction, it is enough to move the drum in different directions with your hands. Play (strong or weak) indicates bearing wear.Usually such a problem is accompanied by a strong hum and slight vibration.
If you find such a problem, then do not pull, but replace all bearings as soon as possible or take the unit to a workshop. It is not recommended to use faulty equipment.
Shock absorbers broke
To identify this problem, you will also need to dig with your hands in the machine, but do not move the drum, but slightly pull it towards you and release it. If it does not fall into place, but starts to swing / hang out, then this is a clear sign of the failure of the dampers / shock absorbers.
Breakage of shock absorbers leads to increased wear of all mating components in the apparatus, including the bearing. Therefore, it is recommended to immediately fix the problem at home or contact a service center.
How to change the bearing yourself?
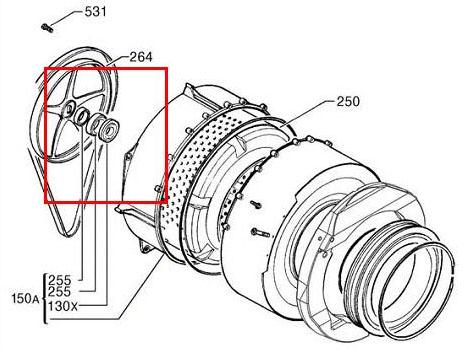
First of all, evaluate your strengths. If you are not sure of yourself, then it is better to call the master. Also note that Repair requires specialized tools..
Training
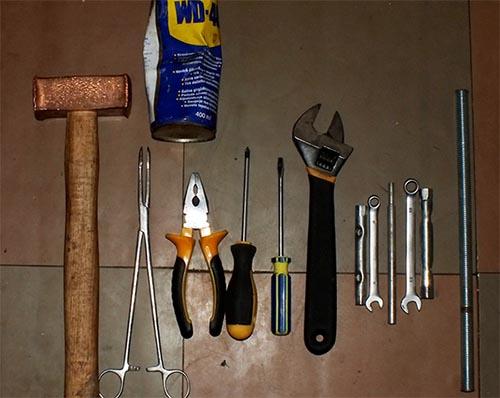
Required tool:
- sets of keys (end, open-end and hex);
- hammer ordinary and rubber;
- various screwdrivers;
- a pair of wrenches;
- grease for the bearing (as a rule, LITOL-24 is used);
- spare bearings and seals;
- chisel.
Prepare your workspace first. Disconnect the washer from the network and communications. Move it aside so that you can easily reach the back of the machine.
Disassembly process
This stage includes the following items:
- First of all, unscrew all the bolts on the back panel and remove it.
- Remove the dispenser.
- Remove the control unit by unscrewing the screws that fix it.
- Remove blocking.
- Remove all remaining fasteners and remove the front panel.
- Now you need to loosen the clamp, but first remove everything that interferes with this.
- Dismantle the counterweight, and then the heating element.
- Disconnect all wires, pipes and belt from the tank.
- Unscrew the engine and remove it from the mount.
- Now you can freely remove the tank with the drum.
The stage of disassembling the tank and replacing bearings
This stage is easier, so it should not cause you any difficulties. Sequencing:
- Remove the rubber seal (cuff) to avoid damage during disassembly.
- Install the tank so that the pulley is on top, and unscrew all the bolts holding the pulley. Remove the last one.
- Now the crucial moment - knocking out the shaft.This must be done with a rubber mallet by gently hitting the shaft.
- When the shaft is free, unscrew all the bolts connecting the two halves of the tank. After that, separate them (halves).
- Now the bearing is visible. But before taking it out, remove all excess grease and dirt that has stuck on top.
- Knock out the bearing with a chisel, then remove the seals.
- Wipe thoroughly and lubricate the area with grease.
- Install new seals and bearings and press them in with a hammer and chisel.
The work is over. Now you need to assemble everything in the reverse order, connect and test in action.
Replacing shock absorbers
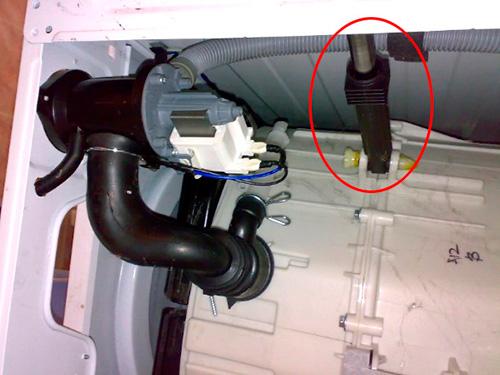
In modern washing machines, classic shock absorbers have been replaced with dampers, so disassembly will be described in accordance with the design of new devices. The tank in the device is hung on springs, and shock absorbers are placed from below.
Replacing shock absorbers (the method does not work on all models)
In order not to disassemble the machine in vain, it is better to be 100% sure that the dampers are out of order. To do this, lay the equipment on one side, gaining access to the shock absorbers. In some models, damaged elements can be replaced in this way.. Unscrew the fixing bolts with which the dampers are attached to the body (plastic pins can be used instead of bolts). Disconnect the element from the tank in the same way. Install new ones.
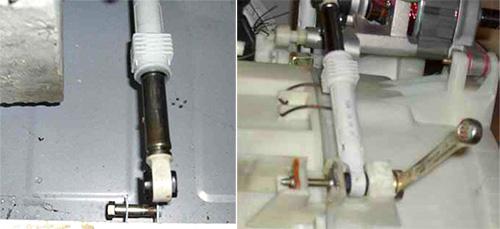
If you can't get to the dampers from below
In some models, the shock absorbers can only be reached by removing the front panel. For this you need:
- remove the top cover from the washing machine: unscrew the fixing bolts at the back of the device and slide the top panel;
- remove the powder tray and remove the bottom plastic panel covering the drain filter;
- dismantle the control panel - unscrew all fixing bolts, disconnect the wires;
- remove the rubber cuff, after removing the clamp from it;
- unscrew all the bolts that hold the front wall, and remove it.
Having gained access to the dampers, dismantle them, then replace them with new ones and assemble the constructor in the reverse order.
Verdict
If you are not sure or if you have difficulties in the process of replacing parts, it is better to leave your idea until the arrival of the master. Incorrect manipulations and incorrect connection of the device to the system can lead to breakage of parts vital for the equipment. Complex repairs are best left to the experts..

Comments
Good afternoon! Very good detailed instructions! Just did not figure out how to check the damper. Can you check it when it's taken?
Good afternoon!
The bearings were replaced on the Zanussi ZWD 685 washing machine. But after 2 washes, vibration and knocking began. It turns out that as a result of repeated failure of the bearing. Is it possible that the cause of the malfunction is due to their incorrect installation, or were the parts still defective?
Please tell me, in the picture of the replacement of the shock absorber, there is a circle in which the shock absorber itself and the yellow mount, is it possible to replace this mount simply with a bolt with a nut, so it just flew and the drum sometimes knocks very loudly, thanks in advance.
Hello, my eyelid machine broke down, the drum began to spin in a figure eight, I watched the video, I thought the bearing was broken, but it turned out that one of the upper ones burst, the rib of the tee stiffness material is duralumin, I’m sitting here and I think the drum is going to be replaced, can you tell me