Any malfunction in it can make us remove the drum on the washing machine. Most often, this is a bearing failure, which requires a procedure for disassembling the tank and removing the drum. In some cases, this may be the ingress of foreign objects into the space between the tank and the drum, or the failure of the tank itself. In any case, it remains for us to decide whether to remove the drum of the washing machine with our own hands or entrust the work to the master.
Of course, the ideal option would be to call a professional and forget about this problem. But for the majority of citizens of our country, there is an eternal crisis in the yard and there is no way to give an extra few thousand for work. Therefore, we will do it ourselves at home.. Let's get started.
What do we need from the tool
To start repair need to prepare a tool. Fortunately, something exclusive is not required here. We will need:
- Screwdrivers - Phillips and slotted
- Pliers
- Set of wrenches
- A hammer
- Hacksaw - if the tank is non-separable
If you have all these tools, then you can proceed.
Dismantling the washing machine
First thing remove the top cover of the washing machineTo do this, unscrew the two screws that hold it. They are located behind the washer. Push the cover to the back of the washing machine and remove it.
Now we need to remove the front wall of the washing machine, but before that remove the top panel with buttons - unscrew the bolts securing it (some bolts are under the powder tray, so pull it out).It will remain hanging on the wires, put it aside, for this, on some washing machines, there is a special hook. You can also simply disconnect the wires by pulling the plugs out of the panel.
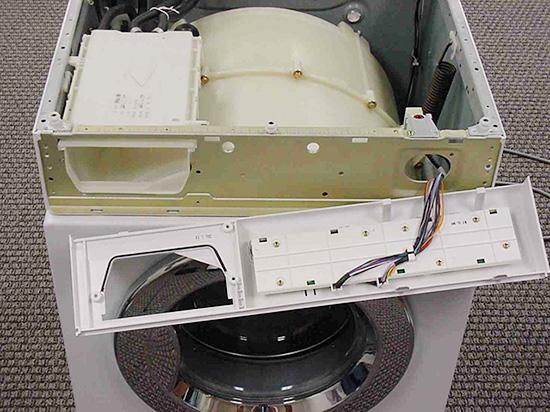
Now you need remove bottom panel, to do this, simply click it and remove it.
Next you need remove the cuff of the washing machine from the front wall. The cuff is held with a special clamp, which can be removed with a slotted screwdriver. Find the junction on the clamp (usually a spring, less often a bolt with a nut) and use a screwdriver to pull the spring and remove the clamp.
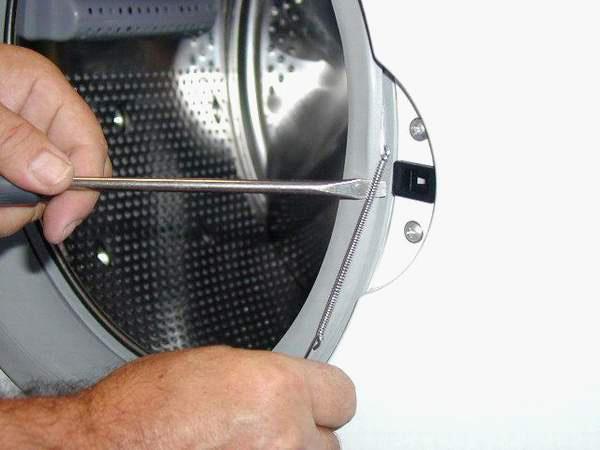
Next, you need to remove the edges of the cuff from the wall and fill them inside the drum. Then you can start unscrewing the front wall.
Unscrew the bolts that secure the front wall, they are located on the top and bottom of the washing machine in the places where the top and bottom panels were. Farther remove the front wall, to do this, lift it up a little and pull it towards you.
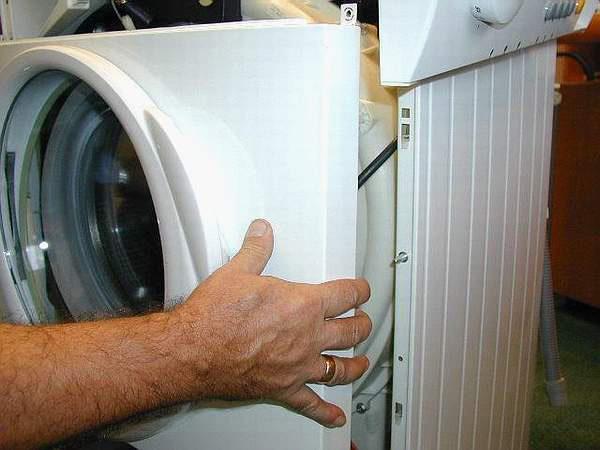
Next, you need to disconnect all the parts from the tank of the washing machine. To do this, disconnect the wires of the heating element, the engine and the pump of the washing machine, as well as the wires of the sensors that are connected to the tank must also be disconnected.Then unfasten the entire bundle of wires that is attached to the tank and put it aside.
Next, we need the top panel, if it has not been removed earlier, because it will interfere with us pretty much when removing the tank. To do this, unscrew the bolts securing the inlet valve, as well as the bolts securing this panel. Next, you need to disconnect the wires that are fixed to the panel.And also disconnect the pipe, which is from the box for receiving the powder to the tank of the washing machine.
When removing the panel, the pressure switch, as well as other wires and pipes, may interfere with you. Just disconnect them.
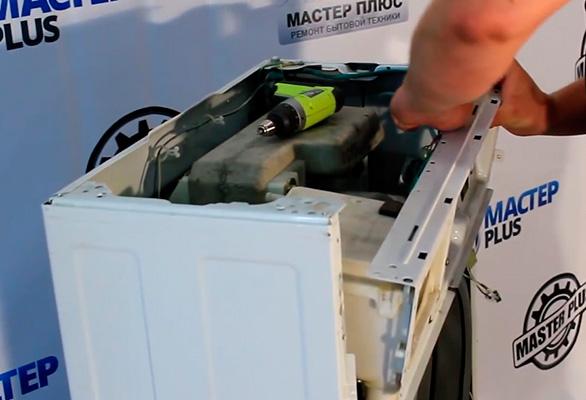
Now, for convenience and lightening the weight of the tank, you need to unscrew both counterweights (upper and lower) and remove them away. Next, disconnect the pipes that connect the tank to the rest of the washing machines. This is a pipe that goes to the drain pump of washing machines and a pipe for the water level sensor.
Now the tank with the drum remains with us to stay on shock absorbers and springs, everything else must be disconnected. The first step is to unscrew the shock absorbers from the base of the washing machine and pull out the bolts so that they do not hold the tank.
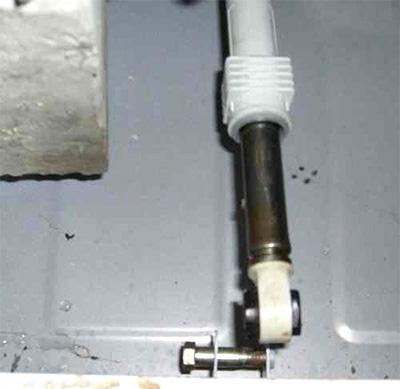
We do this work with both shock absorbers, and then remove the tank from the springs and put it on the floor with the pulley up.
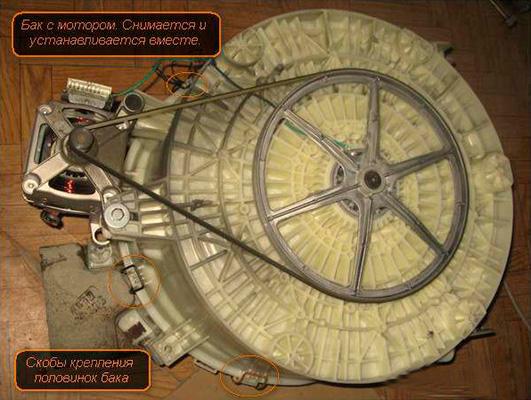
Now we need to disconnect the engine, for this we remove the belt and unscrew the motor, removing it to the side. Together with the engine, we remove the shock absorbers that remained attached to it.
How to disassemble the washing machine tank
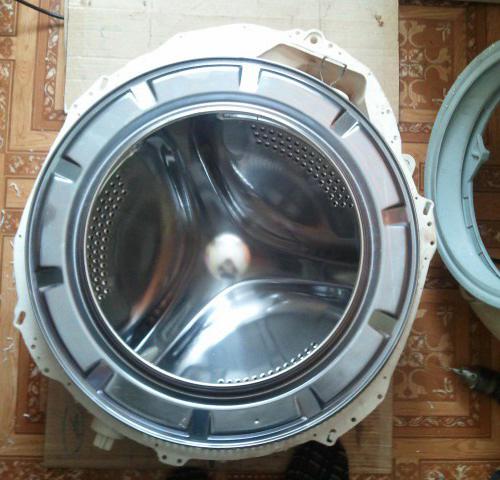
Well, half the battle is done, now we need to disassemble the washing machine tank itself. Washing machine tank material it can be different, but most often it is plastic, which is disassembled in one of two ways:
- If the tank is not collapsible - on some models of washing machines, in particular on Hotpoint-Ariston models, the tanks are not collapsible, so they must be cut with a hacksaw. The cut must be done strictly along the seam of the connection of the two halves of the tank. Further, if you want to assemble such a tank back, then you will have to drill holes and use bolts to connect these two halves, having previously smeared them with sealant.
- Collapsible tank - in our case, this is exactly the case. In order to disassemble it, you need to disconnect the brackets that press both halves of the tank to each other. A slotted screwdriver works well for this.
After the tank is sawn in half or the latches are disconnected, the front half of the tank can be removed. Now you need to disassemble the drum of the washing machine, and more specifically, disconnect it from the second half of the tank.
Pulling out the drum of the washing machine
In order to pull the drum out of the "remnants" of the tank, you must first remove the pulley by unscrewing it with a wrench. Next, you need to screw the bolt that held the pulley back until it stops. Then, with light hammer blows on the shaft with this bolt, knock it out of the tank.
That's all! This completes the removal of the drum from the washing machine.. Then you can do whatever you want with it, for example, from an old drum you can make such a brazier.


Comments
I am very grateful for this video to the author, intelligibly and clearly.