"Window to Europe" for Russian investors

Our compatriots have always actively invested in European real estate. The Western market offers great opportunities: the purchase and lease of elite properties on favorable terms, affordable financing and full legal protection. And even in the current crisis, Europe still holds a strong position.

All pandemics out of spite
In the past 20 years of the 21st century alone, the world has experienced several serious economic downturns. And it is Europe that has been demonstrating enviable resistance to the consequences of crises all this time. Of course, for her "hard times" did not pass without a trace. But compared to Russia, Asian countries, and even the United States, during the period of economic depression, Europe retained and retains:

1) Relatively stable GDP growth. Recall that this is the gross domestic product, which reflects the market value of goods and services. Its performance is directly related to the economic situation in the country, including trends in the real estate market.

2) A low level of inflation - less than 2%, while in our country and in other countries it is at least 4% (and this is even in a good scenario).

3) Evenly developed infrastructure: that is, the main "benefits of civilization", which are in megacities, have a place to be on the periphery.

4) More or less stable labor market: in general, employment in the region is about 80%, and in our country this figure is 20% lower.

5) Favorable rates on residential and commercial mortgages from - 1 to 3% (in Denmark, for example, they are 0% at all).

6) More favorable financial conditions for entrepreneurs when looking for real estate for business. For example, buy retail space in Moscow somewhere in the center sometimes costs more than in a European metropolis.

Market prospects

It is clear that the crisis caused by the pandemic has outplayed a lot in Old Europe as well.Somewhere, the unemployment rate has risen significantly, somewhere inflation has increased and interest rates on loans have increased. But in general, it endured the situation with the coronovirus more easily than many other regions. Here, already in early May, consumer services enterprises, shopping centers and restaurants (of course, with partial restrictions) began to work. Accordingly, by mid-summer, the European economy somehow began to recover. At the same time, experts give at least a year for its full restoration. Nevertheless, significant “post-crisis” shifts have already been outlined in the real estate sector.

City to city does not fall

However, you need to understand that the real estate market operates locally. That is, not only in different regions, but even in different cities of the same country, he experiences the crisis differently. Even such “giants” as London and Paris have shown low GDP figures over the current time. But the following cities in this indicator became leaders:

— Amsterdam

— Vienna

— Stockholm

— Brussels

— Berlin.

In recent months, construction has been actively going on here and the maximum volume of transactions for the purchase and sale of commercial and residential properties has been recorded.

Not all real estate is profitable

However, in the light of the current crisis, selectivity must be shown not only when choosing a region, but also a market segment. Now it is clear to everyone: it makes no sense to invest in retail (retail outlets) and hotels in the near future. In some European cities alone, the total losses of trading companies amounted to $4 billion. And for the hotel business, this whole year has become a "dead season" at all. Russian realtors note: “In 2020, it turned out to be more profitable to rent in rent a room for a machine wash in Moscow than investing in a prestigious hotel.” A similar picture is observed in Europe.And it is difficult even to predict when the situation will improve.

Among the actual options for investing money, experts name: office space, premium warehouse complexes, as well as student dormitories and hostels. The first two segments are still in demand in Europe: due to the demand, they are quickly restored after quarantine downtime. As for hostels and hostels, they also promise good prospects for investors. The latter are a kind of alternative to classic apartments and hotel complexes. They offer affordable temporary accommodation for clients of various categories: from the same students to tourists who save on accommodation while traveling.

However, as analysts themselves emphasize, all these schemes are rather conditional. This information only gives food for thought: which cities and objects should be paid attention to first of all.But there were no exceptions either. Even in the most unprofitable region at the moment, you can find a profitable object for investment. Any good investor knows that every trade requires an individual approach and professional flair.

Using a semi-automatic washing machine with two tanks is extremely easy. Pour hot water into the main tank, pour washing powder into the same place. After that, we send the laundry to the tank, turn on the main wash cycle by setting the time on the mechanical timer. As soon as the machine finishes washing, we send the laundry for rinsing (in a basin, in a bath with clean water). The next stage is spinning in the second tank (there is a centrifuge). After stopping the centrifuge, we will only have to hang out the laundry for final drying.

It would seem that everything is simple, but the inexorable practice broadcasts that loading laundry into a centrifuge is a whole art. Laundry should be laid evenly, leaving no gaps. Dumping in a heap is prohibited - otherwise we will observe strong beats of the centrifuge.

It is also necessary to clarify the features of the spin cycle - it is performed at very high speeds, so there is no place for delicate fabrics in the centrifuge tank.

As for semi-automatic machines with one tank, the washing process is similar here. The exception is that users do not need to transfer laundry from one bin to another. By the way, some models of semi-automatic washing machines have built-in heaters, which eliminates the need to prepare hot water in other ways.

The presence of drying is a definite plus, because it solves the problem with the lack of space for the final drying of the laundry.In this regard, the owners of wide loggias and balconies, as well as people living in the private sector and having their own spacious yards, benefit. If there is no balcony in the apartment or it is very small, it remains to dry the clothes on a room dryer. And such a dryer takes up a lot of space and slows down the drying process.

Protecting a tablecloth from stains is easier than washing them off after a New Year's feast. But, such incidents are also possible. Depending on the origin of the stain and the material from which the textile is made, there are different ways to eliminate them.

The technique for removing stains from a polyester tablecloth is different from how to remove red wine from cotton. Synthetics are not so prone to pollution, but there are fewer ways to clean them.

How to get stains out of a tablecloth

Tablecloth fabric, during table holidays, often suffers from carelessness of guests or unpleasant accidents. Often the reason is the cat jumping on the table. If it was not possible to prevent the incident and a noticeable stain has already formed on the tablecloth, then measures must be taken immediately to eliminate it or reduce its spread.

Most often, traces of the following types remain on matter:

  • tea and coffee;
  • stains from wine (usually red);
  • juices and fruits;
  • fatty and oily sauces.

Food, cutlery can be dropped on the table during the holiday, or just turn the glass over. If the clothes of guests rarely suffer, then uncovered textiles always remain in traces.

There are different ways to remove stains from a tablecloth at home - the choice is tied to the material and type of pollution. It is better to eliminate them immediately, due to the growth of stability over time.

Grease spots

Grease marks on tablecloths and cloth napkins are common.They appear on textiles by negligence during a holiday or when using individual items for their intended purpose. To protect textiles, it is better to cover the table with a film and replace paper napkins, but this is not always acceptable, as it spoils all the impressions of the event.

To eliminate greasy stains from textiles, you can treat the place with such means:

  • starch with gasoline;
  • kerosene and soap solution after;
  • dry table salt;
  • chalk with heating;
  • talc;
  • toothpaste.

On a note! Lipstick grease can be removed from the surface of the tablecloth with makeup remover.

Wine and cognac stains

These products are characterized by a strong coloring effect. This is especially true for red wine. If an alcoholic drink from grapes gets on textiles, then it is very difficult to eliminate traces.

To save it, it is recommended to immediately blot everything spilled with a paper towel on all sides of the matter, and leave the absorbent material under heavy pressure.

Textiles after the celebration are soaked in a warm powder solution for 30 minutes, and then washed as usual. Remaining traces of wine stains from a white cloth can be removed with hydrogen peroxide, a solution of citric acid, or a raw egg.

The yolk must be mixed with glycerin in equal proportions, applied in the area of ​​marks and simply washed in the washing machine.

Coffee and tea traces

Traces of tea or coffee are difficult to remove from the fabric, especially when they are old.The first action to be performed when such a stain appears is to get wet with a clean piece of cotton cloth or a paper napkin. In this way, we remove the remaining liquid with coloring substances.

To completely eliminate traces from a white tablecloth, you need to proceed as follows:

  1. We wipe the place of spilled tea or coffee with a cotton swab with peroxide.
  2. Discolor with a mixture of salt, baking soda and glycerin.
  3. We wash in a thick solution of laundry soap.

After these steps, we send the matter to the washing machine - the usual washing mode will do. If the contamination is still preserved and it is noticeable on the white cloth of the tablecloth, then more severe methods can be adopted - bleaching, boiling or dyeing. If the fabric is synthetic, then much depends on the overall stability of the stain - it should not be overheated in hot water.

Traces of juices and fruits

There are many ways and means to remove fresh fruit stains or juice spills. White tablecloths made of natural fabrics are recommended to be soaked in milk for 1-2 hours immediately after the holiday, and then washed as usual. Also, such traces are eliminated with ammonia.

For a colored tablecloth, it is recommended to rinse in water, after soaking in a mixture of the following components:

  • salt;
  • soda;
  • water.

Attention! It is not recommended to use powders when washing after stains from fruits and juices - a cool solution of laundry soap is better.

melted chocolate

Chocolate marks on textiles can occur for various reasons - a sloppy child, a fallen candy or a spilled tile. Such traces can also be attributed to fat, but it is much easier to eliminate them. It is enough just to wipe the place with a solution of ammonia or rinse in a weak saline solution.

Often they resort to the use of hydrogen peroxide according to the following method:

  • soak the place with peroxide;
  • we wait 10-15 minutes;
  • rinse in cold water.

After fixing the main problem, you can send the tablecloth to the washing machine and wash it in the standard mode. The temperature must be chosen according to the composition of the textile matter. Such information is often found on a sewn-on tag or on packaging. If it is not clear what the textiles are made of, then it is better to be careful and set the low-temperature wash without spinning.

Wax and paraffin traces from candles

Paraffin or natural wax often leaves noticeable stains on almost any material after the holiday. It is guaranteed to secure the tablecloth from a candle only by setting the candlestick away. There are only 2 main options for removing paraffin or wax stains.

If the candle is ordinary, without the addition of dyes, then it is enough to use an iron and a paper napkin according to the following algorithm:

  1. We remove the main layer from the surface of the tablecloth with a sharp knife - so as not to damage the fibers.
  2. We lay paper napkins on both sides of the material near the stain in 3-4 layers.
  3. We warm up the place with a hot iron several times, turning the sides alternately.

After applying this method, you can immediately send the tablecloth to the washing machine. If there is a stain from a colored candle on the fabric, then it is better to freeze it after cleaning from the surface - we pack the fabric in a bag and leave it in the freezer for 1-2 hours. Rub the rest of the paraffin and just shake it out. After that, you can degrease the place and wash it in the standard mode.

Attention! After paraffin and wax, persistent fatty traces remain, which are subsequently difficult to remove from the fabric, therefore it is recommended to put something dense in the candlestick area.

difference between materials

Synthetic fabrics are resistant to dirt and, in case of stains, are easier to wash off. But, for each of the materials there are conditions. Natural textiles can be washed at high temperatures.But, before washing red wine from a white cloth, the place must be soaked in a bleaching agent.

No less common are tablecloths made of matter of other compositions, when cleaning which you need to take into account the following points:

  1. Polyester - it is not difficult to erase traces from such a tablecloth. But, high temperature will only damage the product. This tablecloth is not recommended to be ironed, and can only be washed at 40ºC.
  2. Cotton with Teflon is protected from staining, but when washing, you need to set the minimum temperature and turn off the spin cycle. Ironing such a piece of furniture is not recommended.
  3. Linen tablecloths from repeated washings only look more beautiful. But, if monophonic matter can even be boiled, then if there is a pattern, the regulator indicator is not more than 60ºC.

Tablecloths made of natural fabrics with a pattern are not recommended to be boiled or overheated due to the low durability of the coloring components. After such exposure, the pattern simply blurs and fades.

In the case of linen tablecloths, the importance of rinsing must be taken into account - the remnants of the powder destroy the fibers. It is better to dry the canvases in the fresh air, carefully hanging them without folds - so, the fabric does not have to be ironed.

Methods for removing old stains

Often, the remaining traces of celebrations that have not been completely eliminated turn yellow and stand out brightly on the tablecloth. The presence of such spots spoils not only the mood of the hosts, but also any event in general.

It is difficult to remove yellow marks from fat and other products from natural and synthetic fabrics in the case of home conditions, but some methods are effective:

  1. Soak the tablecloth in clean cool water for 1-2 hours, and then wipe all the yellow spots with laundry soap. After soaping, leave it in a plastic bag for 30-40 minutes, and then wash it as usual.
  2. You can restore the purity of a white tablecloth made of natural fabric by boiling. Additionally, we add soda, household soap, a mixture of washing powder with dry silicate glue, hydrogen peroxide or starch to the solution.
  3. Linen tablecloth from old stains can be washed off with vegetable oil. Refined is better for this purpose. In water, when boiling, add 2 tbsp. oils, 1 cup cleaning agent and 1-2 tbsp. bleach.

Attention! The estimated amount of funds is calculated on the standard size of the tablecloth and 10 liters of water.

A reliable way to avoid stains on the tablecloth is to cover it with plastic wrap directly on the table. It will cover the festive textiles from the ingress of dyeing and greasy products. If a noticeable mark has already been placed on the fabric, then measures must be taken immediately, since over time, such marks become more resistant to various methods of elimination.

Resins and asphaltenes, which are part of fuel oil, do not dissolve in gasoline. Unfortunately, it is rare, but it still happens that clothes can be stained with this composition. For example, the machine was driving along the road, where there was liquid fuel oil, and the spray that flew from the wheels fell on trousers, a raincoat, a coat or a fur coat.In such an unusual situation, the question arises: how to remove fuel oil from clothes? The main tips below do not apply to those contaminants that are considered “old”, since they cannot be removed on their own.

How can oil be cleaned:

  • dishwashing liquid;
  • gasoline or diesel fuel;
  • essential oil: eucalyptus, fir, pine;
  • Machine shampoo;
  • mixture: clay, starch and ammonia;
  • tar soap;
  • caustic soda.

Use of household chemicals

Dishwashing liquid

Rub a little detergent into the stain thoroughly. Enough 2-3 drops. Leave for 30 minutes. With a soft brush or rubbing with your hands, clean the area. Rinse thoroughly. Only after that, you can wash with powder.

Gasoline or diesel

Before using the selected substance, always remember that it is a highly flammable product and such manipulations are strictly prohibited near open flames.

This is where you need gloves. Take a cotton pad and soak it with a combustible agent. A thing from a denser fabric, soak completely in a container for 2 or 2.5 hours. Usually, from dense textiles, work clothes are soaked. After the appointed time has elapsed, take and ventilate the thing in the fresh air. This is necessary in order to weathered the smell of fuel racks. Then you need to send the clothes to the washing machine. Shake gently and hang to dry.

Essential oil

How to get oil out of clothes? One of the most pleasant compositions among those proposed for removing fuel oil, since contact with it is favorable for breathing, the nervous system, skin, and nails. Of the essential oils offered on the market, purchase eucalyptus oil.

The processing process is as follows: moisten a cotton pad abundantly with aroma oil. Treat the fabric from the wrong side. Press the disc to the contaminated area and rub gently. Do not forget to change the cotton wool to a new one during the cleaning process. After this procedure, turn on the machine, put the contaminated product in the drum, and select the temperature regime from 60 degrees and above.

High degrees when washing will destroy bacteria and rid the product of unnecessary dirt.

Machine shampoo

For a little dirt, take a cosmetic cotton pad that absorbs liquid well and moisten it with machine shampoo. Rub gently. If the area is large, soak completely in the solution: water plus auto-shampoo. After soaking, rinse well under water. After hand rinsing, put the product in the wash, selecting the desired mode. When using soap bubble compositions, additionally add the number of rinses. This is necessary in order to completely rinse out the product from the fabric.

A mixture of clay, starch and ammonia

First we need an iron and paper.Paper must be laid on both sides. Pollution must be closed. With a hot iron, iron the contaminated part of the product through the paper. Iron until you can see that there is no stain. Result: The dirt should show up on the paper. But the stain itself will not leave the fabric at all, it will remain.

After ironing, it is necessary to dilute the mixture. Of all the components of the mixture, the clay should be white. Mix all 3 components in equal proportions in one container. Ammonia has the chemical property of destroying fabric threads. Before using it, it is advisable to study the tissue composition to be cleaned.And only after that proceed to rubbing the stain.

Apply the diluted mixture to the contaminated area. Let dry. Then take a brush and gently clean the dried composition. We clean from the edge to the middle! After all the steps, the thing must be washed with powder.

Tar soap

Tar soap is a natural soap. It can be purchased at large hypermarkets, pharmacies or hardware stores.

The smell of this soap is specific. The application process is as follows: soak the contaminated product in water for about 1 hour. When the soaking time has elapsed, it is necessary to wring out. Rub the stained area with tar soap and leave for 15-30 minutes. After the elapsed time, wash the product in a basin and rinse under running water.

Caustic soda

Very toxic ingredient! Safety precautions must be observed! According to the instructions before use: put on a mask on your face and gloves on your hands. There are two different ways to apply caustic soda. In dry form - just pour it on the contaminated area of ​​\u200b\u200bthe product. Leave for 15 minutes. Then wash. For wet application, dilute the solution in proportion: 2 tablespoons per 1 liter of clean water.

Caustic soda is not suitable for fabrics such as wool and cotton! If you have never heard of this type of soda, and even met it on sale, this option is better not to consider.

How can you wipe off oil marks from a bologna jacket, down jacket

The synthetic fabric of the jacket and down jacket is not resistant to chemicals. Damaged instantly. You can clean it: tar soap, dishwashing detergent, soda.

If oil stains are on a sheepskin coat, fur coat or coat, then in this case it will not work to clean at home.In this case, it is better to take things to the dry cleaner immediately. Dry cleaners without damage, will do their job very well without damaging it.

How to wipe fuel oil from shoes: leather, rag, suede

You can also get dirty what is on your feet - shoes. Consider three options for the type of shoes from which you can wipe off the fuel oil:

  • with leather;
  • with a rag;
  • with suede.

Removal from leather sandals

Take laundry soap and a sponge. Rub the sponge with soap and then treat the contaminated area. Wipe dry with a clean sponge. One of the easiest cleaning methods.

Removal from "rag" shoes

For this type of shoes, the following chemical compounds are suitable, such as: gasoline and ammonia. It is important to consider the following, before applying them, try on an invisible area of ​​\u200b\u200bthe shoe. This process is necessary so that an undesirable chemical reaction does not occur, after which a white spot may remain. Such material can be washed by selecting the desired program mode with an additional spin.

Removal from suede boots

Such shoes are delicate in care. These shoes must be handled with great care. If the shoes are dark in color, gasoline is suitable for cleaning. For light-colored shoes, a cleaning method using soda or starch is suitable.

Important Rules

Oil pollution is practically unremovable at home. In this case, the question still remains: how to wash the fuel oil from clothes? If the thing is of good quality and not cheap, then the following would be correct: contact a specialized dry cleaner. Where employees do their job correctly and quickly.

The solution to be used for cleaning must be tested on an invisible area of ​​the area. Apply and wait for a reaction.If there are no changes in: color loss, thread structure, you can safely apply it to remove dirt from clothes.

After processing, it is necessary to wash the thing separately from all things, as some compositions have a pungent smell of chemicals.

In the video, examples and tips are clearly demonstrated: how to remove a fuel oil stain from clothes.

Let's summarize the information presented in this article. Any contamination that appears on clothes is not pleasant. A person whose profession is directly related to the performance of those tasks where the contact of the worker with the chemical in question occurs daily is constantly exposed to the fact that his work clothes will be soiled. Fuel oil that has got on the fabric is important to remove immediately.

The more time passes, the more difficult it will be to remove it without a trace. To ensure that the original appearance of the product is not spoiled, the cleaning process should be performed very carefully. Fabrics such as velor, viscose and knitwear will not tolerate alkali. About this, carefully study the information on the Internet. And here the outcome is one of the proposed information: to know how to remove fuel oil from clothes, and at the same time not ruin it. Accuracy certainly does not hurt.

Useful video tutorials on how to remove fuel oil:


How to determine the code

In technology without a screen, the washing modes will correspond to digital values. Are the lamps illuminated in which the numbers 1, 2 are encrypted? Look for the sign F03, F3. Remember, not everything can be repaired with your own hands, in order to avoid aggravating the situation, contact support! In non-display models, other indicators are used to indicate problems. For example, not the backlight of the modes, but the light signal of the temperature value.

Motor or control circuit problems

If you can't fix the situation yourself. Probably the reason is the wear of the parts. Need help from a specialist center.

Code F02

When starting work or during spinning, in the avsl 109 model, the display will indicate a possible problem. The signal makes it clear that the problem is with the motor or the motherboard.

How to solve:

  1. Try resetting the control system - disconnect the plug from the socket and let the machine rest for 15 minutes.
  2. Nothing should interfere with the rotation of the drum. Check if small, random objects interfere with movement?
  3. The boards may have come loose from the motor. See if everything is in place.

Other reasons for not functioning ariston avsl may be more serious. For example, a breakdown of an electric motor or a tachogenerator. In this case, use the workshop.

Codes F09, F18

Basically, these numbers indicate a firmware failure. The algorithm is violated, the technician does not know what to do. In Ariston Margarita 2000 models, the start start lamp will flash 5 times. The "key" and "lock" indicators are on, the mode setting relay scrolls and makes a clicking sound. In Ariston Aqualtis, the 40 degree indicator flashes for washing in cold water.

How to solve:

  1. Remove the plug and insert into the socket, wait a couple of minutes.
  2. Check the contacts, they could move away!
  3. If the problem persists, return the device for repair!

Code F18

Ariston margarita 2000 will report a defect with a series of 18 flashes with a short break of a few seconds. This will indicate that the contact between the controller processor and the asynchronous motor board has been broken. It is impossible to solve the problem without special equipment! But attempting to turn the machine on and off may reset the control system.It saved even in the most hopeless situations. Did not help? So it needs a refurbishment.

Water heating problems

Sometimes clothes can be washed only with hot or warm water.But the system does not respond to the given commands, instead of filling the tank with liquid, it drains it and stops washing ahead of time. In this case, the problem lies in the heating parts. This "household friend" will tell with the help of such symbols: F04, F07.

The heater or pressure switch is broken, signals F04, F07

The trouble is inside the device - in the breakdown of the heating element. To check, you need to find the heating element, check whether everything is in place in the structure. Use a multimeter for this. If the device simply consumes electricity, collecting and draining liquid, this is probably a pressure switch failure.

The processor does not receive data and because of this - a failure. Inspect the fluid collection tube, it may be clogged or leaking. If you see the inscription F04 - it's time to change the part. It is possible that the root of the malfunction lies in a small board, circuit and other information sensors. If you find the source of the failure, replace them.

Symbol F08

Ariston avsl models will signal with a delay timer about incorrect heating. High humidity is not only a source of mold, but also one of the reasons for the incorrect operation of the pressure switch. Check it out and dry it with a hair dryer. The hotpoint ariston device, when issuing error 08, most likely, will require the replacement of the heating element, or the flashing of the board.

Video:

Signals about problems with drain or water intake

The machine does not draw water, or vice versa, completes the process with a full tank, and the interface shows the codes F05, H20 or F11, let's figure out their essence.

Codes F05 or F11

The washing process started normally, but then you found that Ariston hotpoint stopped the work process. But before the output of the explanatory figure, the device made strange sounds! Similar to crackling or loud hum.An attempt to use the drain function will not be crowned with any success, and the same inscription is error f05 in the Hotpoint Ariston washing machine. In another variation - Ariston Aqualtis, the drain problem will be visualized by flashing two interface keys. They are designated as 40 degrees, wash in cold water.

You can help the machine earn in the following ways:

  1. Electrical engineering makes mistakes. Power reset may help!
  2. The filter is clogged! The fluid flow cannot overcome the obstruction. Thick fabric from clothes or hair from pets is often the cause. Clear the blockage in the hose yourself. Open the small door, you can find it at the bottom right. Remove filter and remove debris.
  3. Ariston Hotpoint issues F5 due to a traffic jam in the sewer. Especially if the liquid is drained directly into the sewer pipe. Redirect it to a bathtub or a convenient container, and turn on the spin. That way you will understand the reason. If the inscription is gone, then it's in the sewer.

Video:

H2O combination

Ariston Margarita 2000 was released at the beginning of the 21st century and marked a new era in the world of washing machines. But she had her own problems - with water. This code reports problems with water intake, and the device signals this by displaying the H2O formula on the display. The designation of the water molecule is used for a reason, marketers have moved away from the usual labeling in order to evoke a simple and understandable association among their users. This visual signal can be obtained a few minutes after the launch.What is the reason?

  1. The water is turned off or the pressure is not strong enough. Wait until the water supply to the apartment is normalized. Or check the supply valve, it may be closed!
  2. The valve is damaged. Faults and their elimination - replace the component with a new one, it is more reliable than self-winding with electrical tape. There is a risk of flooding neighbors at the most inopportune moment!
  3. The pressure switch is faulty or broken. He repeats the same action - he collects and drains the liquid. And on the screen H2O.

Video:

Other signs

The washing machine can also reproduce other characters.

Let's look at their decoding:

  • F03 - the temperature sensor is defective. Replace the part or check the electrical resistance of the sensor, no more than 20 ohms.
  • F06 - Something is wrong with the sunroof lock on older models. Or the buttons are not activated on the new ones.
  • F10 - the device does not understand the amount of water level. Occurs when the hose is not properly connected to the fluid outlet.
  • F12 - the relationship between the controller and the indication is lost. Reboot your device!
  • F13 - drying temperature meter refuses to interact correctly with the device. The solution is to replace or repair.

Summarizing, it is possible to deduce a pattern, most malfunctions are caused by loss of contact in the microcircuits of the device, incorrect installation of the drain pipe, problems with the power grid, or a utility factor, for example, turning off the water supply to the house, weak pressure supply. Remember, most problems are solved by rebooting the device. This will help in case of failures of the control module, but serious breakdowns are best resolved in a service center.

Video: all error codes + error indication without display

Malfunctions and their elimination are better understood and learned if you watch the video instruction. On it you will see how many commands this household assistant can display on the screen! Thanks to visual information, the material read will be easier to perceive.

Due to the difference in the models of the Italian company, confusion in decoding is not ruled out. The video will eliminate misunderstandings and help you get in touch with your washing machine.

When equipment breaks down, the easiest way is to send it to a landfill or sell it for spare parts for a penny.If you show a little imagination and make an effort, even a failed washing machine engine will come in handy on the farm. Using photos and videos of creative masters, you can make crafts from a washing machine with your own hands, for example, a fully functional animal feed cutter or a brazier for a summer residence.

Wood lathe

What can be done from an old washing machine? For example, a lathe, for its base of a homemade lathe, it is good to use an asynchronous motor, with two adjustable speeds. The main thing in the device is to make a stable base. The frame is usually made of profiles and metal corners.

The support structure and the motor shaft must be in the same parallel. Wood processing requires precision and accuracy, which will be impossible with a poorly fixed base.

When disassembling an old washing machine, there is no need to rush. Carefully remove each of the parts so as not to violate its integrity.

With prolonged contact with water, scale accumulates on the surface. It is dissolved by special means or removed mechanically.

In addition to the motor, a drum, a loading hatch, a body, counterweights and springs are suitable for the manufacture of home-made devices.

The engine will become the basis for a lathe or concrete mixer, and the hatch can replace an ordinary window in a room decorated in a custom style. And this is not all that can be done from an old washing machine.

Simple picking machine for home use

Plucking chickens by hand is long and tiring, and buying a factory-made feathering machine is expensive.

The problem is solved by having an old washing machine, ideally with top loading:

  • On the shaft from the machine, we make cuts for the pulley, process the thread.
  • We select an adapter from another device, for example, the steering finger of an old UAZ.
  • We use the cap from the centrifuge for clamping.
  • We assemble the frame on which the engine will be fixed.
  • We fix the pump with a reliable adhesive.
  • On the reverse side we mount the pulley.
  • Check the operation of the belt drive.
  • We connect the tachometer, windings from the collector to the anchor.
  • We hide the control unit under the tabletop.
  • We attach the container for carcasses with rubber “fingers” to self-tapping screws.
  • We lay the bottom of the machine up, fix it with a cap.

Consider strong vibration when processing the carcass. An unstable structure will quickly fail.

Grinding machine or sharpener

For equipment for sharpening knives, scissors, garden tools, it is not necessary to go to the store. Like a lathe, a grinder is easily made with your own hands from an old motor. A ready-made flange is suitable for fixing the emery wheel - it is easiest to handle.

Among the different types of engines, it is worth giving preference to models of low power.

The grinding wheel is fastened with a washer and a threaded nut, directed in the direction opposite to the rotation of the shaft.

lawn mower

A lawn mower is a homemade product from an engine from a washing machine, in terms of functionality it is in no way inferior to the factory model. In addition to a stable and strong frame, a casing is required here to protect a person from injury and the motor itself from foliage and dirt.

The base can be made from scratch or you can take a frame from a cart, an unnecessary stroller. A sheet of metal is attached to it, then a casing and a special bumper in the front and rear parts.

Before the first start, you must make sure that all elements are isolated and connected correctly.

Animal feed cutter

If you take a drum with the motor, you can make a device for grinding animal feed. A washing machine without a top loader is worse than with it. The body is made of metal sheets.

The walls should not interfere with the free rotation of the blades of the unit. It is worthwhile to provide for a clamp in advance, which is indispensable when working with beets and similar vegetables.

Generator

It is impossible to make a generator based on the engine of a washing machine without a turner. At a minimum, you need to have basic turning skills. On the motor core, grooves are required to fit the purchased neodymium magnets.

For their fixation, tin samples are prepared with dimensions corresponding to the grooves and the core. Magnets are placed at the same distance from each other, attached to the glue.

Concrete mixer

If drain holes are soldered in the drum, it can be used as a container for concrete. In front-loading machines, you will have to redo the minimum, they are in priority.

The solution significantly increases the weight of the structure, so it should be equipped with wheels. A specially designed mechanism is required to rotate the barrel. It can be based on the principle of a bicycle chain.

If the angle of inclination of the barrel is chosen incorrectly, the unit will jam after loading the cement mass.

Useful video tutorials for crafts from an old washing machine:

Diesel fuel is quite actively used as a solvent and fuel for diesel cars, has a strong, corrosive odor and leaves a greasy stain on fabrics, which is quite difficult to get rid of. How to get rid of the smell of diesel fuel on clothes and save a thing, is it possible to clean clothes at home using folk methods? This article will discuss in detail the various available methods for dissolving a trace of diesel fuel.

General Tips

There are many ways to remove such pollution, but you need to consider some points that will help you achieve the result. For example: ammonia, citric acid are recommended for use only on white things, soda, salt, gasoline, paste and dishwashing liquid often require repeated use, especially if the area of ​​contamination is large and diesel fuel has dried up. If the stain removal method is not chosen correctly and if the cleaning composition is rubbed too hard, streaks may appear on the fabric.

It is also important to observe safety precautions when removing the stain - this type of oil is highly flammable. Cleaning is carried out away from open sources of flame and in a room in which an air flow is provided for ventilation.

Try not to put off washing.Clothing stained with diesel should be kept separate from other items to prevent the spread of greasy fuel stains.

Laundry is carried out separately from the rest of the linen. Thin things that require delicate care are best washed in a cover. When cleaning, place a board wrapped in paper on the back side - this will help absorb grease. Cleaning pollution in different directions can increase the size of the trace from diesel fuel, while working, try to move from the edge to the center of the stain.

It is better to dissolve the oil trace from the wrong side, if you notice a change in color or structure during cleaning, washing off the product that is not suitable for this fabric will not ruin the clothes.

Effective ways to deal with fresh pollution

A fresh oil mark can be removed using folk remedies, which are often found in the house. We offer you to get acquainted with many ways how to wash diesel fuel from clothes at home.

Salt

This method of washing a fresh stain from diesel fuel has been used for a long time. The procedure for this type of cleaning:

  • on the surface on which the soiled fabric will lie, you need to lay a bag or oilcloth;
  • we spread a thing on top;
  • pour plenty of salt on the stain and leave to soak for an hour;
  • then wash in the washing machine using laundry detergent.

If the contamination is large, a second procedure may be necessary.

dish detergent

The simplest option than to remove the stain is liquid soap. The fabric is either soaked in a soapy solution of hot water, if the nature of the structure allows it, or it is moistened liberally with liquid soap and left to be absorbed.

Lemon juice and vegetable oil

Lemon juice can only be used on white things, as the possibility of fading of the cleaned area is allowed. The stain is left in the solution for up to 15 minutes, then brushed off without effort, as this can cause the diesel oil to rub into the structure of the fabric and ruin your clothes. After that, the thing is erased in a way convenient for you.

Vegetable oil in the proportion of 1 tablespoon with the juice of one lemon will not only remove pollution, but also get rid of unpleasant odors. Clothes are soaked for half an hour, then washed with powder.

A mixture of laundry soap, baking soda and dishwashing liquid

The soap is rubbed on a grater, a tablespoon of dishwashing liquid and the same amount of soda are added. This mixture is dissolved in hot water, applied to the stain. After one and a half to two hours, you can start cleaning with a soft brush. Further, it is washed with washing powder.

Also, soda diluted to a gruel state can separately remove the stain. To do this, apply the mixture and with smooth movements from the edge to the center, wipe off the soda after it dissolves the diesel fuel. If suddenly soda was not found in the house, plain white chalk will serve as a full-fledged replacement.

Special Cleansing Paste

In addition to toothpaste for cleaning, you can use a special paste for motorists. The mixture is applied to the stain, left to dry completely. After brushing, clothes are washed by hand or in a washing machine.

chronic pollution

How to wash diesel from clothes? Heat treatment with an iron and a sheet of paper is enough, then dried old dirt requires more attention and effort. Both folk remedies and specialized stain removers and pastes will help.

Stain removers

Stain removers can help you deal with stains. The compositions of highly specialized solutions include additives that help dissolve fatty surfactant fuel compounds and a solvent.Soak the item for 2 hours in three liters of hot water with a stain remover diluted in it. Wash after that.

Petrol

Ordinary gas from a gas station will not help you clean diesel from clothes at home. In this case, a purified type is used, it is freely available in stores with household goods. A cotton pad is wetted with it, dissolution is carried out in the direction from the edge to the center of the stain. After cleaning, the clothes are thoroughly rinsed and washed. Before rinsing, it is recommended to wipe the contaminated area with dishwashing liquid - this will avoid the formation of streaks after washing.

Solvent

White spirit or acetone can also dissolve the fuel trail. Remember, this method must be used very carefully, aggressive solvents can damage the fabric structure. Before use, be sure to check whether this method is suitable on a small piece of pollution. The liquid is applied to a small sponge or rag and with gentle movements, without rubbing into the fabric, the stain is erased. Repeated washing in a washing machine with rinse aid is required. The smell of diesel fuel and solvent is corrosive and difficult to wash off.

Ammonia

This method is suitable for treating minor stains on light-colored clothing. Ammonium chloride should not be used in a concentrated, undiluted form. When working, a solution is made with water in the proportions of 1 part of alcohol to 4 parts of water.The area is treated with the resulting liquid with periodic wetting of a cotton pad until the darkening disappears, then the clothes are washed. How to wash diesel fuel if there is nothing at hand from folk remedies? There are household liquids that can remove oil stains.

Glass cleaners

They may also contain ammonia in their composition and will serve as an ambulance in removing pollution. This method is suitable for cleaning bulky items. The stain is abundantly moistened with the product and wiped with a clean cloth.Manipulations are repeated until the oily trace is dissolved.

White

It will also remove oil marks, but is not recommended for use on colored items due to the risk of damaging the fabric structure.

thermal effect

Removing stains with an iron is an effective, but rather lengthy process. From the wrong side, a sheet of paper is laid on a solid base, and the front side is also laid with paper. With a hot iron, the trace is ironed until it disappears, with periodic replacement of sheets. After that, the stain is processed by any of the proposed processing methods, followed by washing. A qualitative result is achieved if the contamination is fresh.

How to get rid of the smell of diesel fuel

The easiest way to remove the smell of diesel fuel from clothes is to hang the item in the open air and leave it for a long airing. If this does not remove the smell, a layer of toothpaste with the addition of mint is applied over the area of ​​​​the former stain, left to dry. Subsequent washing will remove odors from the fabric. You can also soak the laundry in the fabric softener solution for a while.

The most effective in this case are air conditioners with citrus, coniferous and winter freshness aromas. Soaking the garment in an aqueous solution of the juice of one lemon in several liters of water overnight will also remove the odor. Spraying vinegar on clothes from a spray bottle is used with caution. Soaking in a solution of water and mustard powder is one of the favorite folk ways to eliminate odor. Remember that synthetic fabrics are more prone to deterioration.

Before cleaning the product, it is recommended to study the composition of the fabric and study the washing recommendations in order to avoid damage. Exclusively local application in ammonia, gasoline, vinegar, citric acid. It is not recommended to try to clean suede and leather things at home, it is better to entrust this complex procedure to professional dry cleaning.So you save not only your time and nerves, but also do not spoil such fabrics that are prone to damage.

It is better to wash the stain from the wrong side, be sure to test it on a small area that is inaccessible for viewing.

Useful video tutorials:

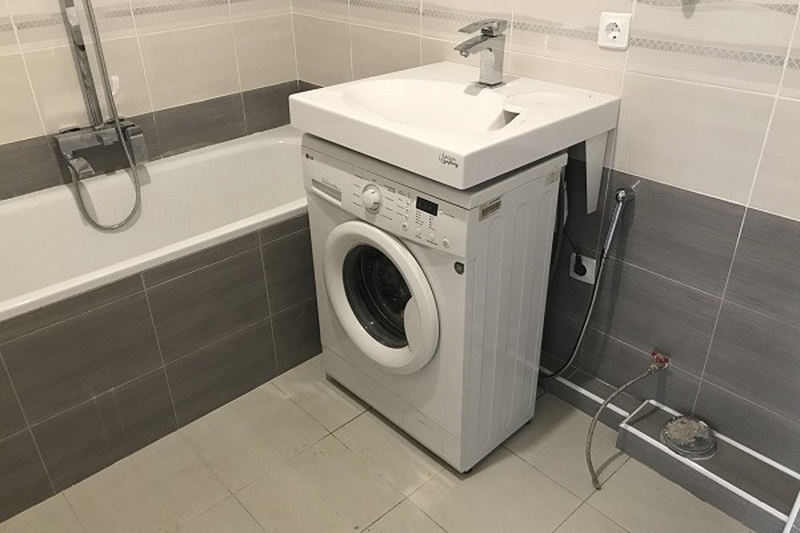
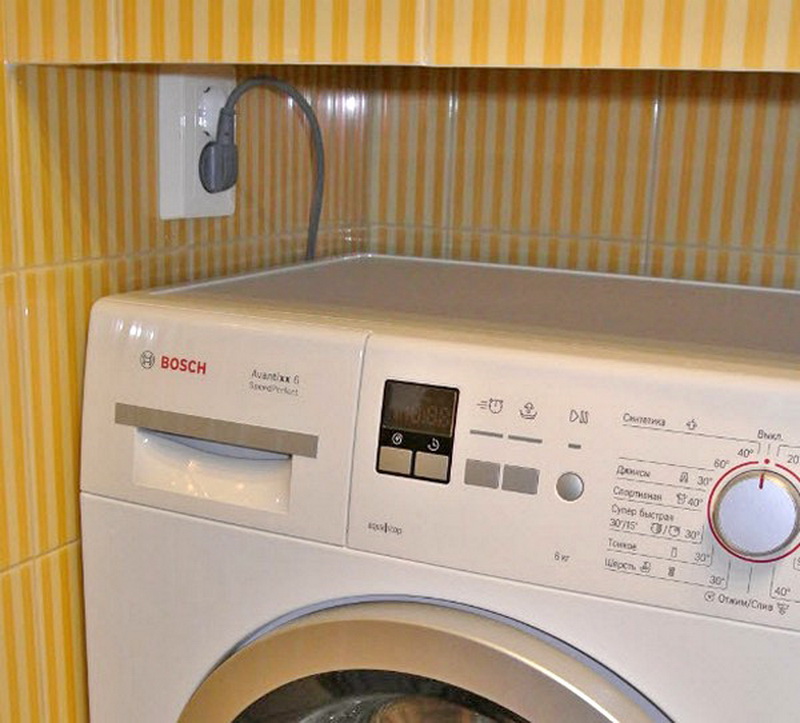
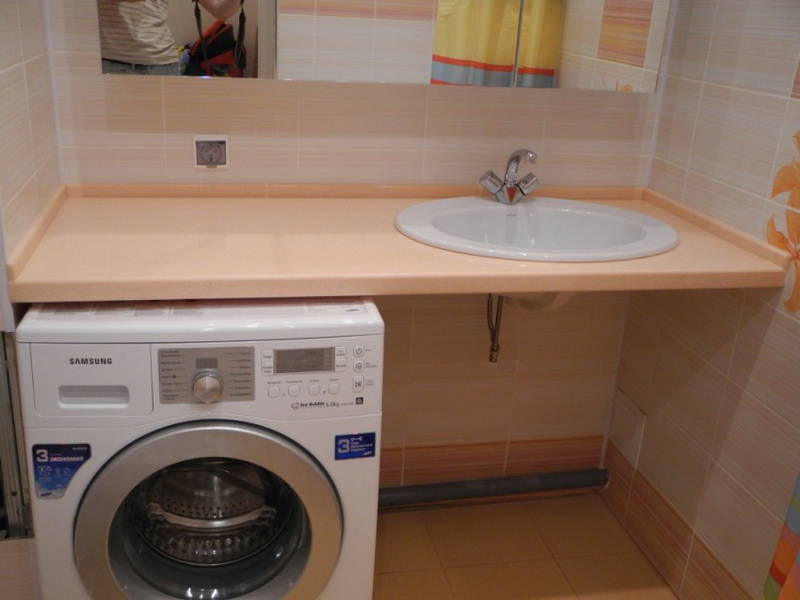
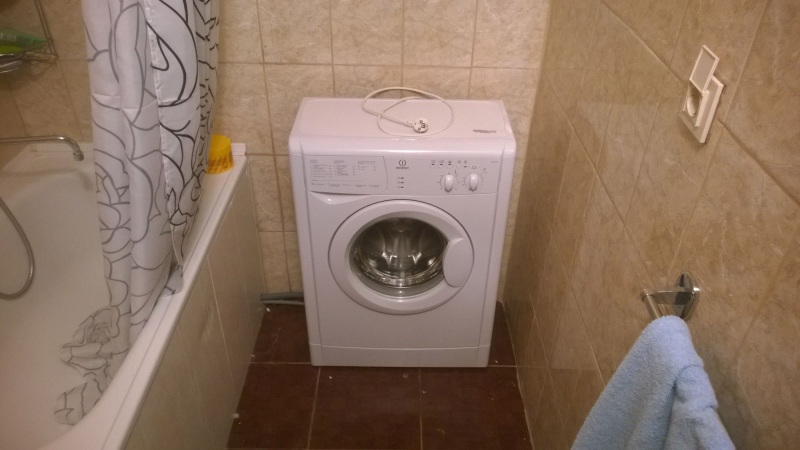
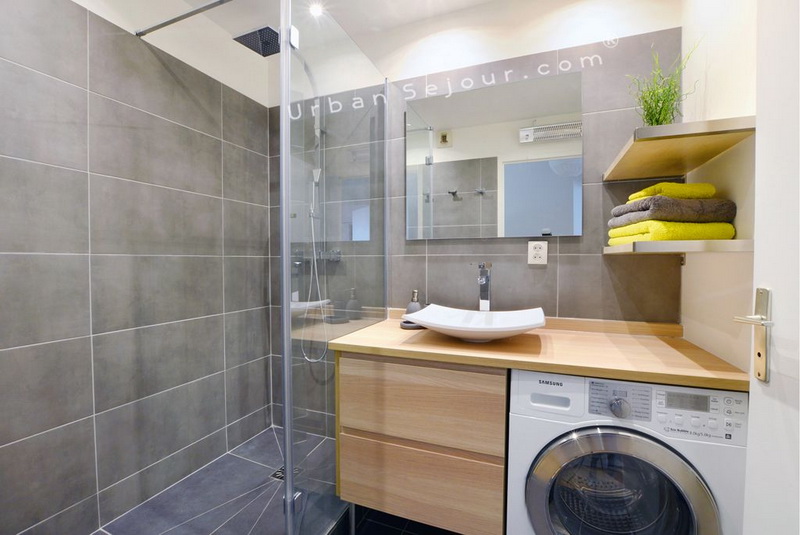
The outlet in the bathroom for the washing machine must be separate. Many masters do not recommend completely disconnecting the unit from the network, therefore, when planning the location of the points, this must be taken into account. The socket is placed behind the bathroom set if its back wall is open. This allows you to hide the wires coming from the washing machine. At all stages, the technology of the connection device must be observed. Its violation is dangerous, a fire hazard may occur.

Attention! The device of the socket located in the bathroom must be taken seriously. If there are no skills in performing such work, it is better to entrust the matter to a professional.

Number of bathroom outlets

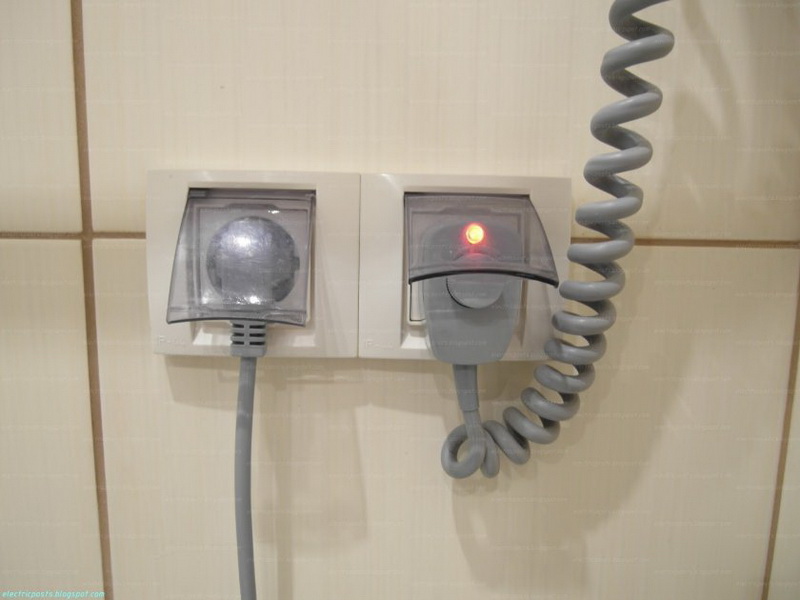
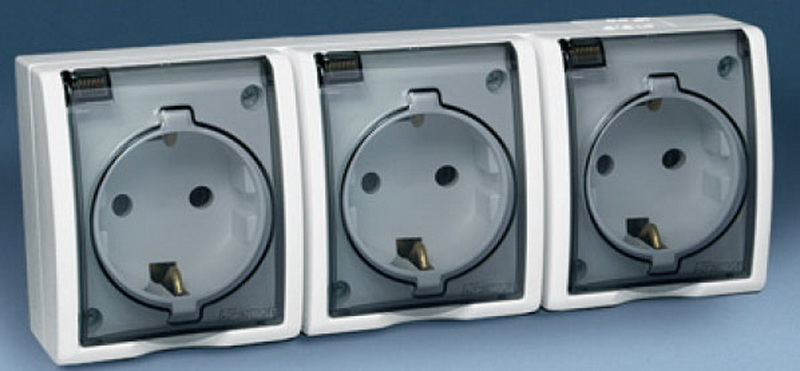
First you need to decide which devices can work constantly and simultaneously. You definitely need two waterproof sockets with a cover. They are provided for a washing machine and a heated towel rail. The degree of protection must be at least IP4.

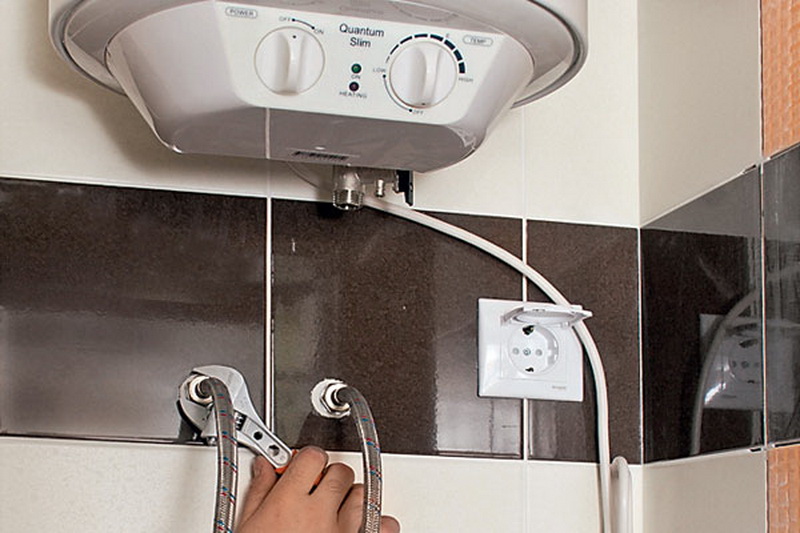
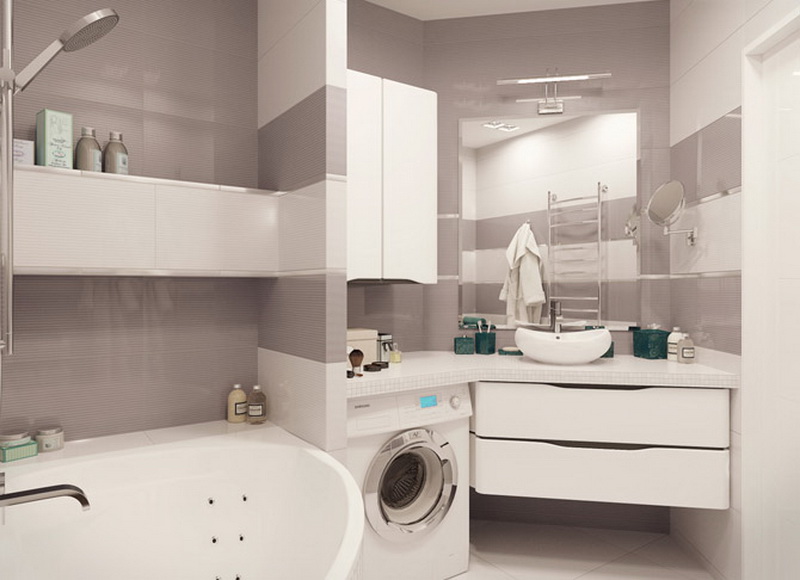
The points must be connected to the residual current device on the shield. If the bathroom needs a hot water tank, a regular outlet may not be enough. There is a risk of accidents. Such a powerful electrical appliance, it is better to connect directly using a cable outlet. Sockets for additional appliances, such as hair dryer, hair straightener and electric shaver, can be placed in drawers under the cabinet or in the middle of the cabinet. This will hide the hanging wires.

Secure connection

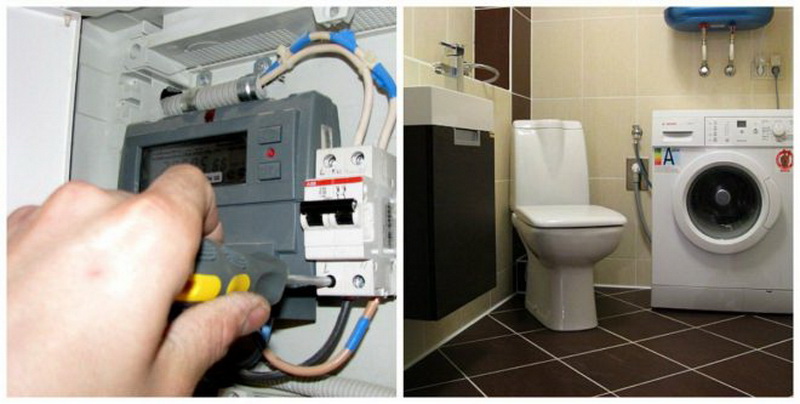
Before installing the machine in the bathroom, you need to make sure that the wiring is functioning flawlessly and is safe. The line supplying the socket to the device is equipped with a toggle switch and a protective device.These are the key rules for the full functioning of units with increased energy consumption in rooms with high humidity.

Cable cross section and power line: requirements

A separate power supply line is connected to the unit installed for connecting the washing unit. This is due to the high energy consumption at the time of heating the water with the heating element of the device. This figure is 2.5 kW, but in older washing machines it can reach 4 or more kW of electricity.

In addition to the volume of energy consumption, it is necessary to take into account the cross-sectional dimensions of the wire used. When calculating, it must be taken into account that for 4 kW of power it is necessary to lay a cable with copper conductors with a cross section of at least 2.5 mm.For higher consumption, a powerful cable is needed, that is, reinforced.

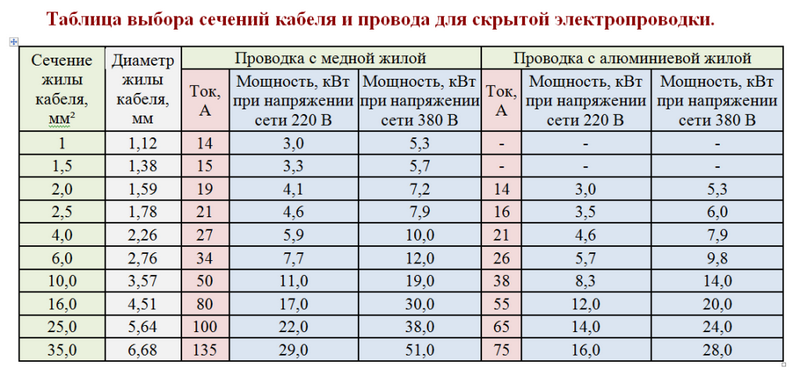
But, most often in bathrooms, appliances are used for which a cross section of 2.5 mm is sufficient. They provide a current supply of not more than 16 amperes. Under these indicators, an automatic machine is equipped on the line (with the same volume). It is unreasonable to use a stronger section, because its cores may not fit into a standard outlet. In such cases, the device must be connected directly to the machine.

At the start of the line, not far from the switchboard, a protection device is installed. The operating current of this unit should be no more than 30 mA. The most suitable is only 10 mA. Instead of an RCD, you can use a differentiated machine for 16 amperes. This ensures complete protection against electric shock when touching the housing of installed units in the event of a current leakage.

The above schemes are implemented in private homes, where the laying of additional lines does not cause difficulties. Boards with outdated equipment have been installed in old high-rise buildings with common front doors.In such cases, it is very difficult to install the machine, and it is almost impossible to connect the ground. It is not recommended to perform such work on your own, it is better to consult an electrician.

Attention! Old buildings used old aluminum cables. They are not designed to transmit electricity in the volumes needed for machines.

Socket Compliance Criteria

The marking, containing the Latin letters IP and two numbers, characterizes the ability of the outlet to withstand exposure. The first number reflects the dust resistance rating of the assembly, and is often omitted, denoted as 0. The second number applies to the degree of protection against moisture.

Zero group with the most minimal security.For installation in a standard bathroom with average humidity, it is allowed to use devices of class IP 4. This designation indicates that the product is protected from moisture.

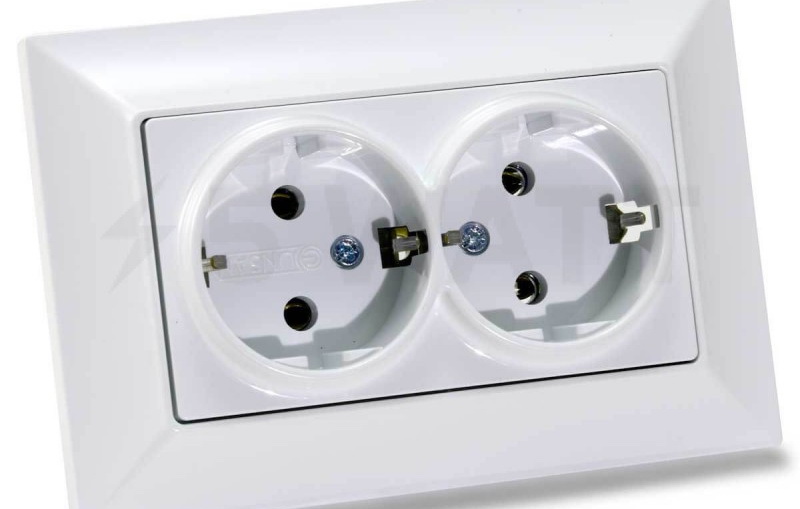
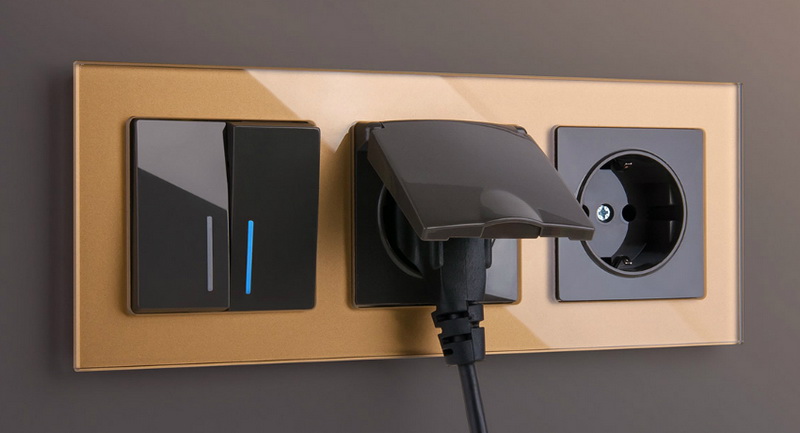
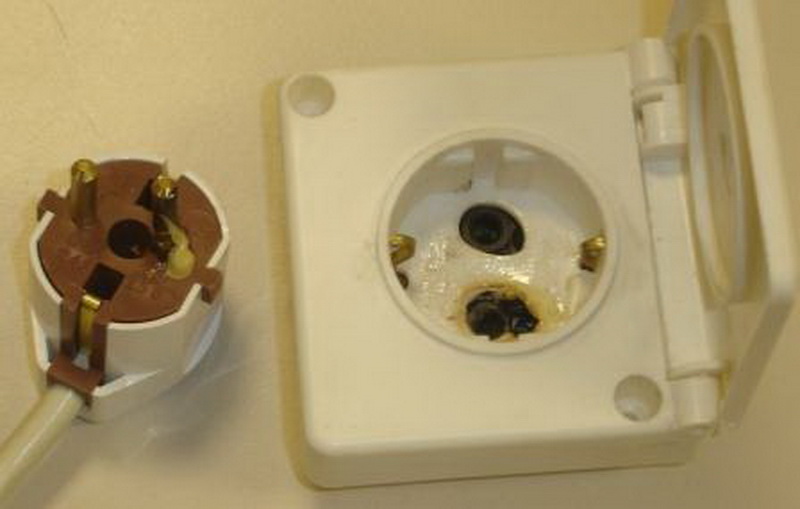
Outlets in the bathroom should be equipped with spring-loaded caps. When not in use, this element should cover the inside and prevent holes and contacts from getting wet.

How to determine the installation location

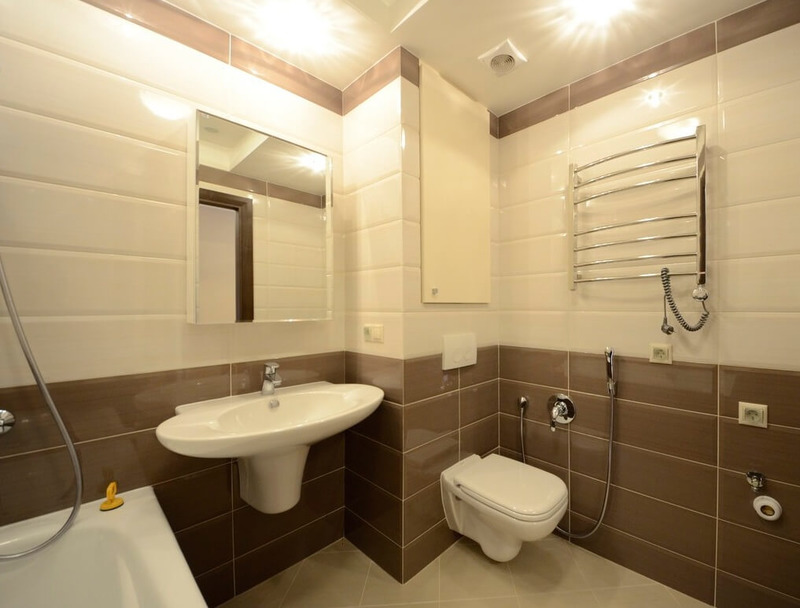
Of course, installing a power connection in high humidity conditions requires caution. It is important to zone the room. After all, it is intuitively clear that it is not worth placing the node near the shower, bath tub and washbasin, because this can lead to trouble.

The regulations regulate the division of the restroom into several foci:

  1. Class zero electrical safety includes areas inside and in the vicinity of splashes and water. Plots of the first class include zones above and below the 0 area.
  2. The second security group is located remotely, within 50 cm from the boundaries of zone 1.
  3. The third zone is all sites at a distance of 2.5 m from area 2.

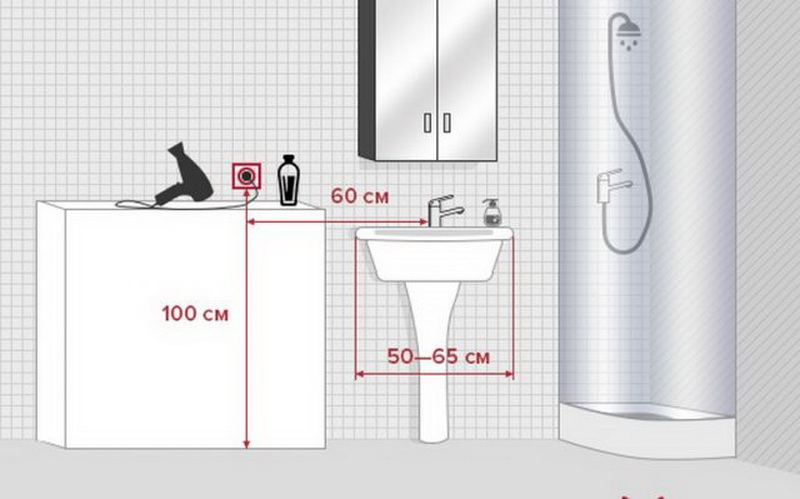
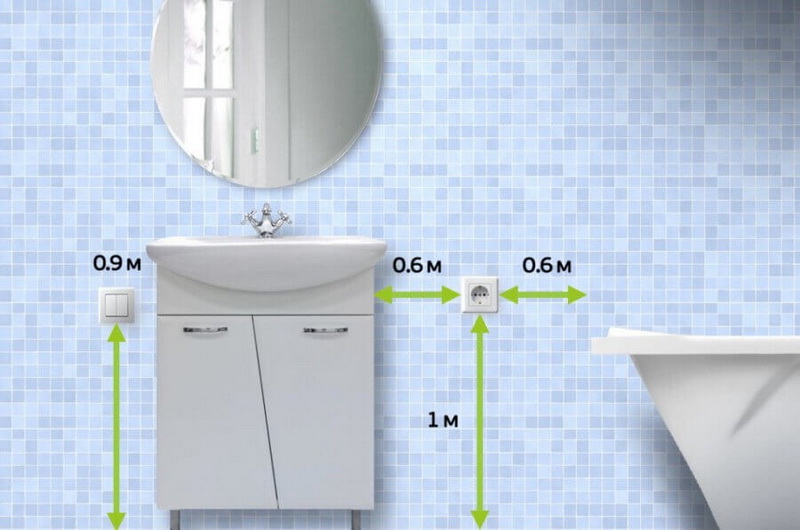
According to the requirements of the regulations, sockets are placed no closer than 2.5 m from the source of moisture, that is, in the third zone. These rules are often neglected.And this is not due to the negligence of the owners. Bathrooms in Soviet-era buildings are very small and rarely exceed 2.5 meters in length.

Attention! It is impossible to ignore fire safety rules. It is better to find a place to place in the kitchen.

When placing the wiring, keep in mind that condensation will appear intensively on the wall located near the stairwell. At the same time, closer to the floor, there will be more of it. The wall will be constantly damp. For the same reasons, it is impossible to carry out a knot under the sink.

The most dangerous thing is that moisture appears not only on the surface (near the outer part of the outlet), but also inside the concrete block. That is why the installation height is not less than 1.3 m.

It is important to observe another rule during installation - this is ease of use. How much space should be available for access is determined by the user. The main thing is to have free access. Accordingly, you should not place nodes in hard-to-reach places, otherwise, in the event of a fire or a short circuit, it will be problematic to get to the source.
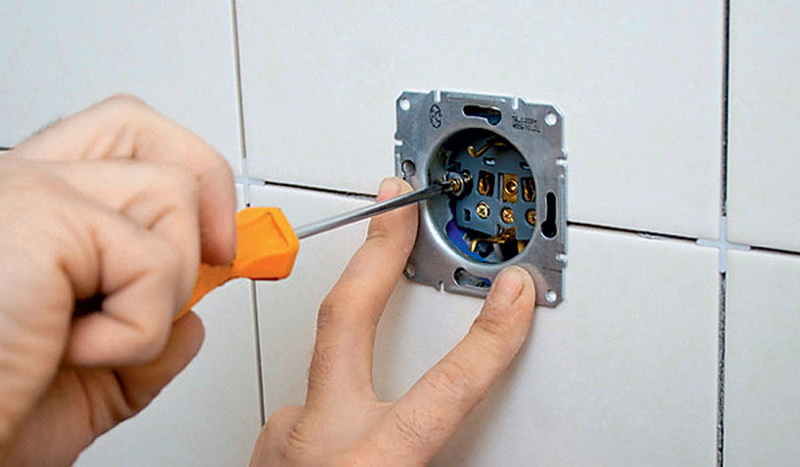
Device nuances

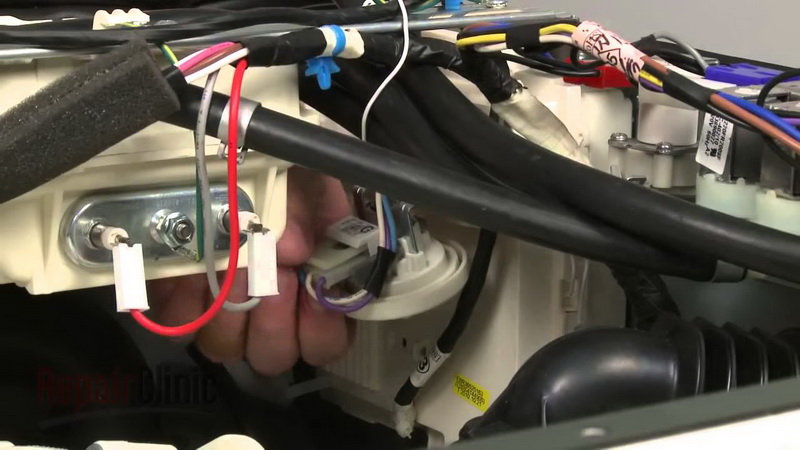
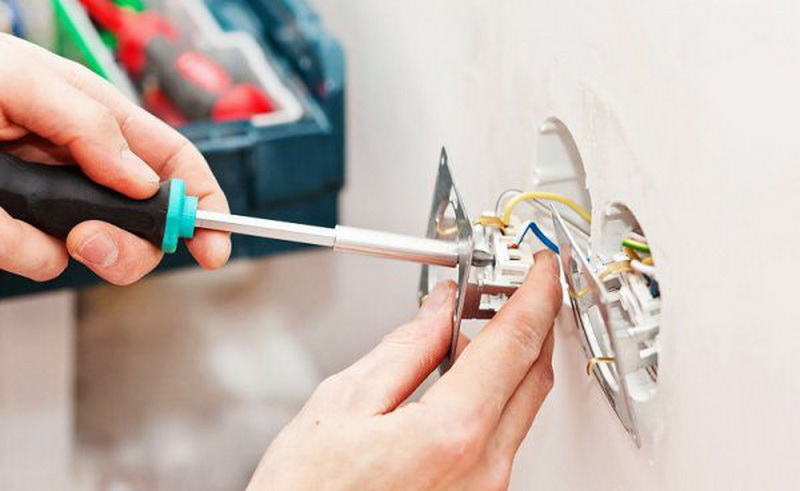
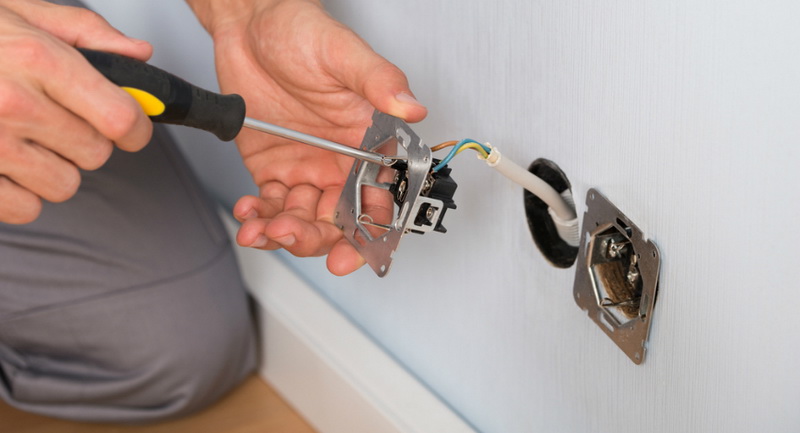
Waterproof socket, installed according to the same algorithm as a conventional product. If the socket in the room was not previously installed, you need to lay new wiring from the electrical panel and install an additional machine. Next, the cable is determined in accordance with the calculation of the current strength. The rating of the machine must be higher than the rating of the RCD.

The wire is defined as three-core, including one of the cores is connected to ground. It is dyed yellow or green. The place for installation is determined by the fire safety regulations. The socket itself is placed in a special box (to avoid contact with wall materials).

A non-combustible dielectric gasket is laid between the assembly and the box. If an additional outlet is needed if there are nodes in the room, a different scheme is applied.If the bathroom is old, the wiring is worn out, you need to make a strobe and lay a separate wire to the location of the new node.

At the same time, an RCD is installed, as in the first case. The socket must not be connected to the old one, due to the lack of cross-section data.You can install two new sockets and connect them to a common box, but you must follow the rules of tightness and isolation devices between them.

Primary requirements

In the houses of old buildings, there are no sockets in the bathrooms for objective reasons. There are no grounding systems in such buildings, and at the time of construction of these structures, there were no household appliances that consume a lot of electricity and were designed to be placed in bathrooms.

Modern automatic machines can work in conditions of high humidity, but subject to the norms and standards for the installation of power supply units. The list of rules includes:

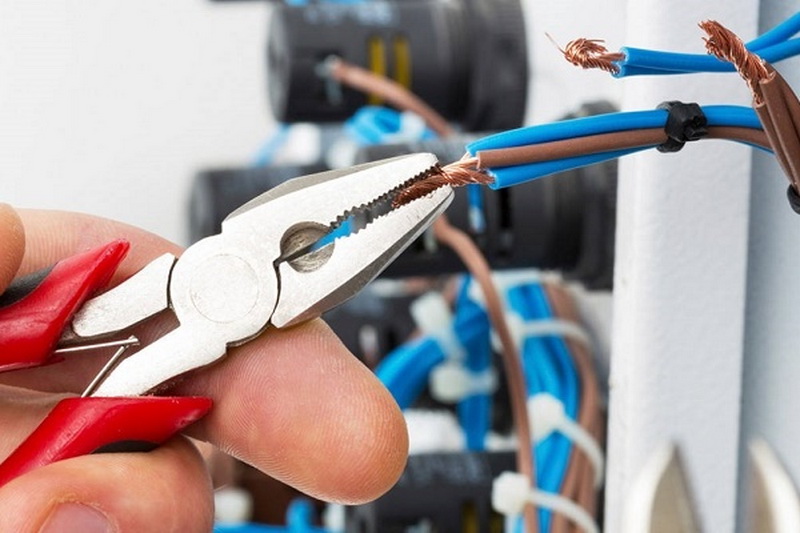
  1. Connection of household appliances can be carried out only when using wiring from a 3-core copper cable. To do this, you need to completely reconnect the system in the boxes.
  2. During installation, sockets are used, the body of which is not susceptible to moisture.
  3. Electrical equipment must be equipped with a toggle switch that provides disconnection with a response limit of 10 mA. The power line must be grounded.
  4. Powerful equipment may only be connected via a protected contact.
  5. When installing a socket in the bathroom, it must be remembered that grounding is the main condition when installing a power point in bathtubs and a combined hygienic unit.
  6. If grounding is not provided for in the building, the damping of excess currents is provided by a protective transformer. The level of protection for devices is lower.

Many owners are negligent when connecting massive household appliances, using carriers and tees for this purpose. It is strictly forbidden to perform such manipulation with the machine.This is at least inconvenient and at the maximum dangerous.If the connection is not made correctly, the risk of an accident and a short circuit increases. Because of this, even expensive equipment protected by the manufacturer breaks down.

The following video will tell you how to properly connect the outlet in the bathroom.

What to do in case of breakdown

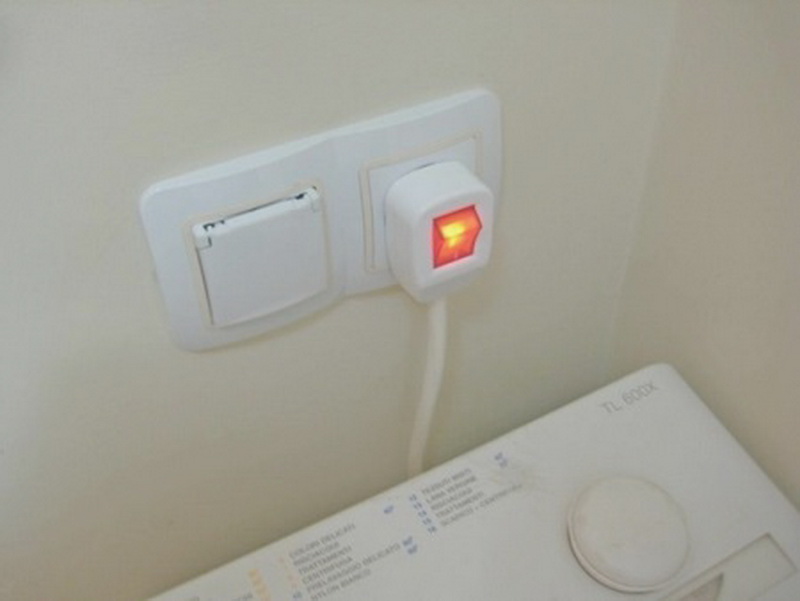
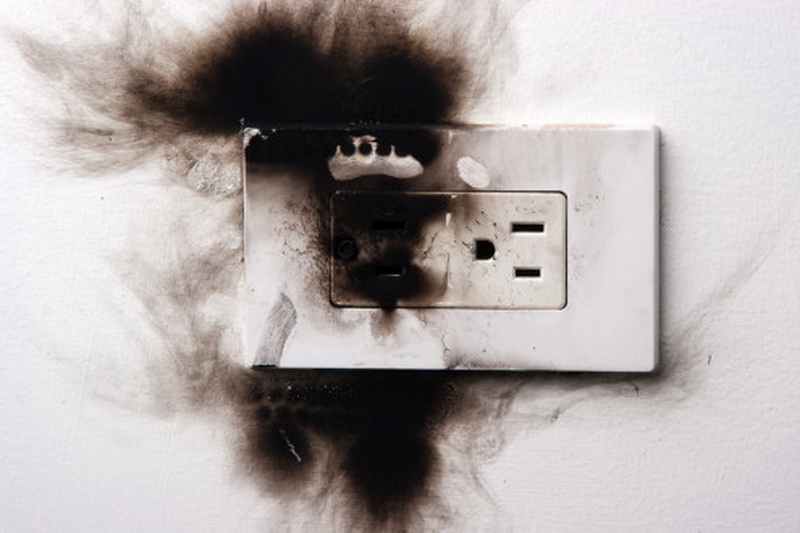
Disturbances in the operation of the outlet appear immediately visually. They are noticeable and are accompanied by a characteristic smell of plastic and sparks inside the case. That is, when the appliance plug is inserted into the socket, a spark is noticeable. This is manifested due to poor contacts in the connection of structural elements. If the problem is not eliminated in a timely manner, sparking will lead to the melting of the insulation of the conductors, then the case itself and the plug included in it will melt.

Attention! If access to the outlet is difficult, it is very difficult to control and timely identify a malfunction. If the unit is not additionally equipped with a circuit breaker, the risk of fire is very high.

The outlet in the bathroom melted: what to do

If signs of melting are visually detected, you must immediately turn off the power going to the node. To do this, use a circuit breaker.

After the socket is de-energized, the included plug is removed from it. If it has melted to the outlet housing, the cord must be cut off. It is perfectly safe if there is no current flowing to the cable. This situation is quite rare, most often the problem is noticed earlier.

The socket is disconnected from the wall and the power wires are disconnected, a new one is installed, all connections are checked. If the wires are in good condition and their length allows you to connect a new outlet, this is very easy to do. But, if the situation is different, it is necessary to replace the entire supply phase.

How to prevent problems

The socket in the bathroom is a danger to residents, but its use is most often a necessity in today's realities. A lot of household appliances are placed in the bathrooms: from simple heated towel rails that consume almost no electricity to water-heating tanks.

You can insure against troubles due to pyrostickers. So, electricians call fire extinguishing plates. They are presented in the form of stickers having a small size. Each plate contains a powder that, when heated, releases an odorless gas that stops the combustion process. The only drawback is the high cost. But, sometimes it is better to pay for convenience, comfort and safety. The use of pyrostickers will help to avoid the troubles associated with the malfunction of sockets and even household appliances.

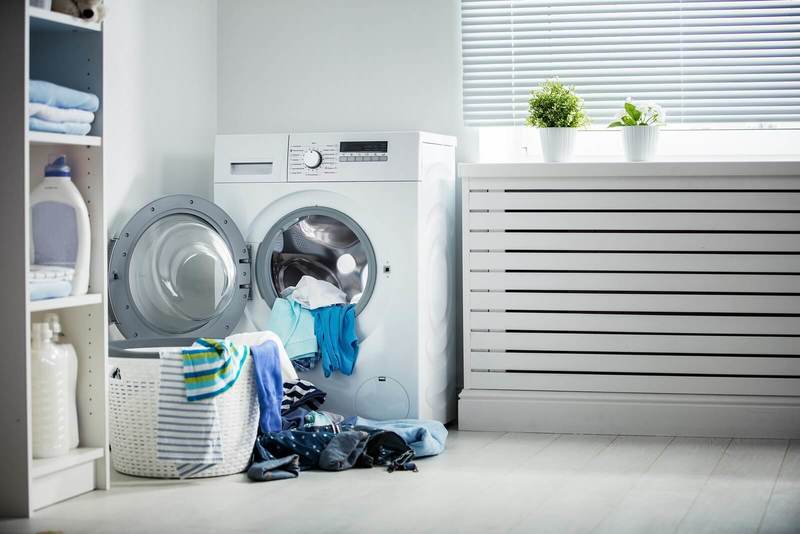
Installing an outlet for a washing machine in a bathroom is complicated by the specifics of the room. This room is quite humid, so all safety standards must be taken into account. In addition, the device - an automatic machine, consumes a lot of electricity, respectively, the old wiring may not withstand such a load. The correct location of the node is not closer than 2.5 m from the source of moisture, and not less than 1.3 m from the floor. If you can’t withstand these conditions, you need to look for another place to connect the machine, outside the bathroom.

Useful video tutorials:

Taking care of cleanliness in nature is a difficult task. You can use the washboard or your hands - but it's long, uncomfortable and difficult. Therefore, it is necessary to develop a connection for a washing machine without plumbing.

You can see that a washing machine for a summer residence without running water is profitable and convenient.

What is needed for this

All you need is water and electricity.Even in the old dacha cooperatives there are no problems with electricity. Unstable, intermittent, with low voltage, but it exists. And plumbing has not yet been carried out in most private sites in the CIS.

It is not difficult to organize the connection of a washing machine without running water; it is enough to take the pipe to the toilet or prepare the tank in advance. The main thing is the availability of electricity. As for water supply - you can choose from:

  1. Well;
  2. well;
  3. Rain.

Even in the absence of a permanent source of water, you can take advantage of the rain that often falls during the summer season.

Required materials and tools

To install the machine without connecting to the water supply, expensive tools and components are not needed. In the country you can find almost all the necessary materials for installation.

  1. Water tank;
  2. Surface pumping station;
  3. Tube for collecting water (you can take a hose);
  4. Inch fitting;
  5. Valve from 1 to ¾;
  6. Pipes for sewerage at 32;
  7. Collar.

Connection methods

There are many options for connecting a washing machine without plumbing. For the average summer resident, 4 installation methods are immediately available without connecting to the water supply.

Detergent container

The easiest and most budgetary way that does not require investments. In machines with horizontal loading, it is possible to add water during the washing process. This is done through the powder intake compartment. From the pros:

  1. Price. No need to spend money on a pump, additional equipment. Even hoses and tubes are not needed. A bucket or any other container is enough to pour the liquid inside.
  2. Simplicity. You don't even need a tool to assemble.If you do not understand anything about the device of the washing machine and do not want to understand, this is your option.

Minuses:

  1. Inconvenience. It turns out the usual machine with a manual bay. The usual semi-automatic Soviet devices, which can hardly be called convenient, work exactly on the same principle. You need a constant presence to monitor the water level and add it as needed.
  2. Limitation. Some programs will not be able to be used because the thermal electric heater is not activated.

If you are ready to put up with the inconvenience - you can use this method.

Water tank

Semi-automatic installation method. It involves connecting the capacity of the washing machine for water at a certain height, which enters the unit by gravity in the traditional way. The hose from the tank goes to the water intake.

If you have a suitable container, this method will be simple and not expensive for you. The tank can be anything: metal, wood, plastic.

Pros:

  1. Automatism. Human presence is not required. While washing is in progress, you can go about your business. You can not worry about the design - it is time-tested. With a tight connection, there is no need to watch for smudges and a sudden cessation of flow.
  2. Ease of installation. No pump installation or configuration required. Just connect the hose to the inlet and you're done.

Minuses:

  1. Lack of pressure. Without forced feed, the pressure will be mediocre. For normal operation, you need to raise the container to a height of ten meters. Then the powder will be washed off without residue. Not every house has such a height. And building a water tower is expensive.
  2. Preparatory work.For the machine to work, you need to fill the tank with water. The container must be at least 100 liters and they must be raised to a height of ten meters.

well drilling

If you have a well, the problem is almost solved, and connecting a washing machine is possible. During their drilling and installation, a pumping station is immediately installed, which can move water in the future. You just need to connect to the output.

Pros:

  1. Possibility to wash at any time. If the previous methods required preparatory work and observation, then this one is fully automated. You don’t have to carry water to fill the tank or make sure that its level does not fall in the machine. Just connect to the outlet of the well and the process has begun.
  2. The supply of water is unlimited. Can be washed every day several times.The only cost is electricity to power the pump. But you don't have to pay for water.

Minuses:

  1. impurities. Not always the well is installed correctly. Although artesian water should be clean and drinkable, it can contain many impurities of salts and minerals. Incorrect location and low height leads to the ingress of groundwater and silt. This makes it unsuitable not only for drinking, but also for washing.
  2. Price. If you do not have a well, drilling it will be extremely expensive. Despite the high performance, the cost of conducting water is high.

Pump use

Compromise between previous options. The pump is inexpensive and can be found at the hardware market or plumbing store. It is installed between the washer and the water source. If you have a well or reservoir, the problem is solved. The pumping station independently creates the pressure that is needed for the operation of the machine.

Pros:

  1. The pressure is self-created. It is possible to use stations together with tanks. No need to build a water tower or install it on a hill. The pump will automatically suck out the right amount of water.
  2. Any source. Collect the required volume of fluid and run a hose into it. An ordinary tank or a well can act as a source.
  3. Price. Surface pumps are available, sold at plumbing stores.

Mounting the compact blower

The easiest connection is with a small pumping device. Consider the simplest scheme: a tank - a pumping station - a washing machine. Of the purchases, you only need to buy a pump (cost about $ 20). You will need an extension cord for it (you can assemble it yourself from a network cable and an external outlet). Silicone sealant is required to secure the adapter.

Further according to the scheme:

  1. We need to prepare the tank. A hole is drilled in the wall with a drill or screwdriver. It is advisable to take a plastic one, since it is easier to install an adapter into it (if you use a well, lower the hose into the water).
  2. The resulting hole must be sealed.Sealant is better to buy in automotive stores. It should be tight, securely stick. Sanitary sealants are not suitable.
  3. The pump hose must be sanded. Plastic tubes have a smooth surface that is not suitable for bonding. Go over it with coarse sandpaper, seal it with sealant and pull it onto the adapter.
  4. Pumps often come without a power cord. At the point of contact there are only bare contact pads. They need to be soldered or connected with terminals. Lay the joints with heat shrink tubing or electrical tape.
  5. Connect the pump to the machine.

Remember that sealants harden for a day. If you need water, plug the pump into an outlet and the process will begin. More details in the video.

We automate the operation of the pump

Don't want to turn on the pump manually and control the process? Automate the process like this:

  1. Tilt the washing machine forward.
  2. Below is the inlet valve with wiring. Finding the cables is easy, as they are located next to the valve through which the water is drawn (as in the photo).
  3. Wires must be stripped of insulation.
  4. Pass the wiring from the pump through the technical window. Clean them up and connect. It is better to solder them, such a mount will be eternal. Twisting is not welcome, but suitable for testing. Insulate with heat shrink tubing.

Now the process has been automated. The mini washing machine will turn on the pump when starting.

How to equip a drainage line

For a vending machine without a connection to a water supply, a sewage line must be installed. Dig a septic tank one and a half meters deep. Put the cover inside. It will act as a reinforcing layer for the pit. It should be located away from the garden and the foundation of the house.

A pipe with a diameter of 50 millimeters must be laid through the basement of the house. It is important that there are no knees and strong distortions on the way. It is best to install a direct pipeline. It is better to fasten the hose to the pipe through the fitting.A hole is drilled in the plug and sealed. Now your mini washing machine has a drain.

Alternative tank machine

The alternative is special machines for houses without a regular water supply.

They are equipped with a built-in tank and pump. That is, the entire structure is completed in one device. This saves time, but the cost of equipment is high.

Washing machine brushes rotate, driving an electric motor. These are the parts that are sold in service centers or in stores. Is it possible to replace the brushes on your own? After reading our tips, you will know how to repair the machine.

Often people buy a new washing machine instead of upgrading the unit. Masters recommend ordering original accessories for Bosch, Indesit, Ariston, Zanussi or Samsung appliances.

During operation, the shape of the brush for the electric motor becomes rounded, which gives maximum contact and optimal glide.

When did you replace

To inspect the components, the craftsmen disassemble the automatic machine. Otherwise, it is impossible to check the condition of the motor.

However, replacing brushes in Bosch or other branded equipment is possible if you pay attention to other signs:

  • the engine suddenly stops working;
  • during the start of the machine, a crack is heard (this happens when graphite brushes are destroyed);
  • clothes and linen are poorly wrung out after washing (the electric motor does not spin well enough);
  • there is a smell of burning;
  • warning appears on the display.

Masters say that such problems do not always indicate that the brushes have broken, but it is worth starting the check with these details. To purchase new ones, call the store that sells spare parts or contact the service center where the masters solve these problems. Everything you need for repairs can always be ordered online.The service life of equipment and graphite products will depend on how correctly you choose the additions.Their size should be the same, because if the springs have different stiffness or they are made of different materials, then your equipment can quickly fail.

Order only at trusted points of sale, ask for advice from the masters, indicate the brand of the automatic machine. Branded add-ons can cost 800-3000 rubles, but on sale you can find universal components worth 300-500 rubles. By selecting accessories for specific models, you will significantly reduce the risk of poor quality repairs, which often happens if they are mechanically adjusted to the correct size.

Replacement

Carbon brushes wear out after a while, so they should be replaced in a timely manner. As a rule, to change the components, the craftsmen open the panel located on the back of the washing machine. This panel is on household appliances of almost all brands, but some models need to be completely disassembled. There are also devices that are so arranged that it is impossible to get to the engine even after you disassemble them. In these cases, the machine is taken for repair, where the master will unscrew it and replace the carbon brushes. Cars of different brands are different from each other, so read the instructions before repairing. Before you begin to disassemble the equipment, disconnect it from the mains.

Tools

Prepare a set of tools with which you will disassemble the unit, remove and change the brushes for the washing machine. To unscrew the housing and remove the motor, use:

  • screwdrivers;
  • pliers;
  • wrench;
  • sandpaper.

Disassembly

Before you start work, prepare everything you need: disconnect the device from the water supply, turn it around so that it is convenient for you to repair.Then remove the cover at the back, fixed with screws. Remove the belt that connects the electric motor to the drum where the laundry is loaded.To do this, pull the belt towards you, gently rotate the pulley. Then open the connector and disconnect the motor from the power supply. Then unscrew the screws that fix the motor and remove it.

It should be understood that the disassembly process may be somewhat different, and depend on the model of the machine and its manufacturer.

Replacement

Replacement of brushes is shown following the example of the Gorenje technique, however, this method is also suitable for working with washing machines from other manufacturers:

  • lay the unit on its side, remove the fasteners that fix the carbon brushes, then dismantle them;
  • repeat the manipulations on the reverse side of the motor;
  • the length of the shaft of worn carbon brushes is approximately 1.5 cm;
  • clean the collector;
  • change the parts and fix them.

Replace them in pairs. Then put the motor back and fix all the parts again. Installation is done in reverse order:

  • put the electric motor on the frame, fix it;
  • connect cables;
  • tighten the belt, turn the shafts;
  • reinstall the cover;
  • restore connections to the water supply, connect the device to the mains.

Once the motor brushes are installed and the washing machine is connected, check how well it works. If the device spins louder and does not emit a cod, you did everything right. When you hear uncharacteristic sounds, contact the master, he will inspect the device and assess its condition.

Do not overload the drum with clothes and linen for the first ten times, as the new parts will fit properly into place.

Final work

Additionally, test the washing machine brushes to see how they work. For example, put the machine on the spin cycle, then run a quick wash. Recheck from time to time and replace brushes for electric motors when they become unusable. Treat parts with protective compounds and inspect household appliances.

If you follow the advice of the masters and use the automatic machine according to the instructions, it will serve you for a long time.

Otherwise, more serious breakdowns are possible, which will not be so easy to fix even in a service center. Simple tips will allow you to quickly change failed components and install new ones on time. In this case, you do not have to spend money on services. Even if we consider that this repair is simple and does not take much time, we advise you to consult with the master to avoid negative consequences. The main thing is to choose the right elements and take into account all the recommendations.

Useful video tutorials on replacing washing machine motor brushes