How to wash vertical blinds in the washing machine

Blinds are a modern and practical replacement for traditional curtains and curtains. This element of decor is loved for unpretentiousness and ease of cleaning. We will understand the nuances of hand washing, is it also possible to wash vertical blinds in a washing machine, how to do this without harm to the slats. And if you prefer Roman or other types of curtains, then find out how to wash curtains in a machine, you can from our other article.

What blinds can be washed?

Aluminum and plastic products, bamboo lamellas, wooden parts, elements containing fiberglass are not machine washable. Such blinds are simply wiped with a damp cloth and vacuumed. Such products are not dismantled and cleaned on site. Jacquard slats are processed only by hand. Wash in washing machine only synthetic vertical fabric blinds.

Manufacturers usually provide a user manual for each product. The document indicates the material of manufacture and cleaning tips. Check the instructions first.

General rules

Cleaning blinds with a vacuum cleaner
In theory, blinds need to be vacuumed once a season, wet cleaning should be done every six months. In practice, it all depends on the conditions of your region. Regular ventilation, leaky joints of the frame and glass (relevant for wooden structures) and other factors help to accumulate dust faster. Anyway wet cleaning should be carried out regularly, and clean the appeared stains immediately.

The main catch is that for fabric and similar materials, wet cleaning is a temporary measure. After a certain number of wet procedures, dirt will appear at the attachment point of the control thread and at the lower attachment seam. Bottom line: total cleaning or machine wash is inevitable.

It is rather problematic to wash the slats in a suspended state and there is a great chance to acquire soap stains, so it is worth dismantling them.To remove the lamellas, you need to "open" the system. Most models require a separate detachment of the top mounting bar to access the elements. After disassemble the slats in batches for easy cleaning. If necessary, remove visible dust with a damp cloth or vacuum cleaner.

Machine wash
Machine washable vertical blinds
Absolutely any synthetic fabrics are machine washable, and the ease and ease of the procedure captivates. But it should be taken into account that only synthetic products, not plastic, machine washable. In order not to spoil the lamellas, follow the sequence:

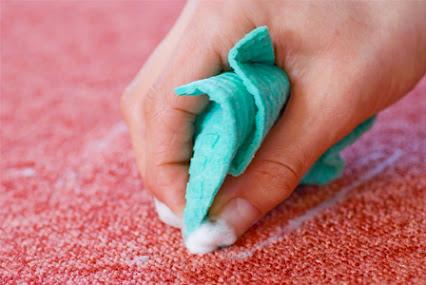
  • Remove the elements, inspect for heavy dirt and stains. If necessary, wash dirty or greasy traces by hand - the machine will not cope with this. If heavily soiled, soak the slats in warm soapy water for half an hour.
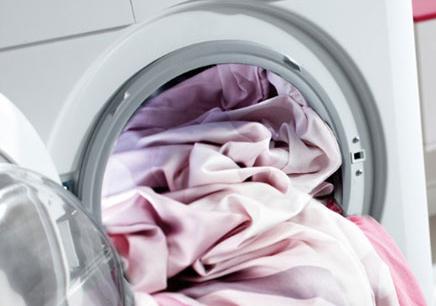
  • Narrow vertical lamellas of 6-7 pieces are rolled up and placed directly into the drum. Wide ones are twisted in 5-6 elements - it depends on the volume of the machine, the width and density of the "bands". To make the process as safe as possible, the product can be placed in a spacious laundry bag or pillowcase.
  • For washing, use a soft liquid powder without chlorine and aggressive ingredients. The concentrates are preliminarily diluted with a small amount of water and poured into a tray. Bleaches and stain removers are an absolute taboo.
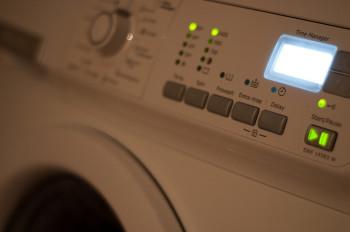
  • Select delicate or hand wash. The water temperature should not exceed 30-40ºC, otherwise the material will deform. It is advisable to turn off the spin or set at your own peril and risk a minimum value of 400 rpm.
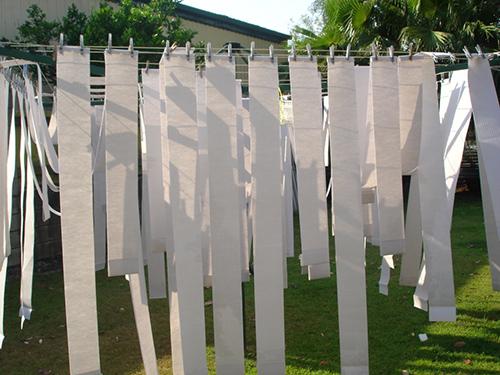
  • To dry the slats is already hung or on a horizontal flat surface. A clothes dryer would be the best option. It is not worth hanging the product in the bright sun.
  • If the lamellas begin to curl in the dryer, smooth them out by hand. Pressing down with foreign objects and making efforts is not worth it. After drying, iron at the lowest temperature using a light-colored cotton cloth or gauze.
Colored products of low quality often shed and lose color after the first wash. It is advisable to test the durability of the paint on a separate area. Moisten a white cloth and rub. If the fabric is not stained, feel free to try further procedures. The same should be done without fail with blinds with patterns that can noticeably “float” from a collision with water.

Manual cleaning

Manual cleaning of vertical blinds
A more gentle and reasonable option is hand washing. There are two options here: perform the wonders of acrobatics and clean the canvas on the spot, or remove the elements and send them to the bath.It is more convenient to carry out water procedures in the bathroom.

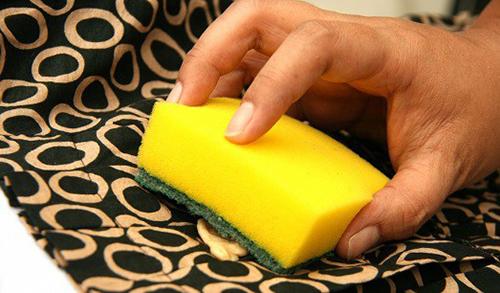
What to arm yourself with to wash fabric blinds at home? A specialized product or composition for cleaning furniture and carpets is the best choice in this situation. Even a neutral detergent or gel / shampoo for washing baby clothes will do. The main guidelines are the absence of bleaching particles or chlorine in the composition, a liquid consistency, since powder formulations are more problematic to dissolve in water. An elastic cloth or a soft brush will do as a working tool. Keep brushes that are hard and scratchy away..

So, the procedure is:

  • dismantle "piece by piece" elements;
  • put them in the bath and rinse abundantly from the shower with warm water (30-40ºC);
  • separately dilute a small amount of the product in warm water, dip into the “aggregate” solution;
  • walk with soft movements along the canvas, leave for 10-20 minutes to soak the dirt;
  • periodically wash off the foam and start again;
  • rinse thoroughly, let the water drain.
Please note that vertical blinds only clean lengthwise. Circular and transverse movements should be avoided, as this is fraught with scratches and scuffs.

After the procedure, lay out the elements on a horizontal surface or clothes dryer. If the number of free hands allows, fix the canvas in its usual place while still wet.

Dry cleaning: is it worth it?

In what cases it is worth contacting a dry cleaner:

  • with severe pollution, with which they cannot cope on their own;
  • if you are not familiar with the material and you cannot accurately determine its type;
  • if necessary, reduce the stain on the product for which washing is contraindicated;
  • with a high price of the product, the presence of additional decorative elements or a complex coating.

If you doubt your abilities, take the lamellas to the dry cleaners. Modern equipment and cleaning products will do the trick. The same advice can be given if you are not sure whether how to wash a jacket at home.

If such a “tomato” opus happened to you, then be prepared for a battle with corrosive consequences. The fact is that tomato juice is a natural dye. In severe cases, only strong remedies will help. Be patient, brush and start cleaning until the juice has done its insidious work.

General rules for deriving consequences

General rules for deriving consequences
Of all vegetable juices, tomato juice is considered the most difficult to excrete. If you bought a package of reconstituted juice, then it will be easier to deal with stains, but you will have to try harder with freshly squeezed juice. The success of the wash also depends on the naturalness of the juice and the fruit/water ratio (for reconstituted juice).

If the affected area is large and the juice is sufficiently concentrated, then you should not rub the stain with ordinary soap. Most often, this approach will only fix the dye on the surface.

Remember the first rule: don't let the juice dry out, because old stains are harder to remove and there is a great chance of failure. If you just spilled the juice, quickly blot up the excess until it has soaked deep into the structure. For these purposes, a napkin or paper towel is suitable. Blot marks gently, do not rub or smudge. It is worth cleaning off the excess from the edge to the middle, so as not to increase the harm inadvertently caused.

Be sure to check the label before cleaning. Follow the manufacturer's instructions and do not exceed the recommended temperature.Be sure to check the compatibility with cleaning products, as many items cannot be cleaned with chlorine or bleach products.

It is worth exposing a thing to cleaning agents only locally. There is no need to soak the entire garment in the product if you planted a small stain. The only exception is that the packaging of the cleaning composition indicates that things must be soaked completely, which is extremely rare.

Please note that it is not worth specifically prolonging the chemical effect on the fabric. Thin and delicate materials from prolonged use of strong chemicals can deteriorate or acquire bald spots - the chemistry will corrode the material. From the inside, it is advisable to lay a paper napkin or a soft white cloth. As it impregnates, replace it with a new one in order to quickly eliminate the coloring pigment.

Folk ways

Folk ways
If the condition is not critical and a fresh spot of small size, then improvised means and folk methods will help you.

Boiling water

This method is suitable for cotton items and non-fading dense fabrics. Remove with boiling water only fresh stains, for the old will have to pick up more effective measures. Before treatment, do not use soap or powder for cleaning, otherwise the effect will be weak. You will need 3-4 liters of boiling water. Pour boiling water in a thin stream directly onto the stain, avoiding clean areas. The tomato trail will fade quickly. After that, you can proceed with the usual washing.

Ammonia

Soak a cotton swab or sponge in ammonia (ammonia) and treat the contaminated surface from the edge to the center. If the stain is large, lay down a paper towel. After a minute, the tomato marks fade and disappear.After the procedure, it is advisable to send clothes to the machine, observing a gentle temperature regime.

Use ammonia with caution.Test on an inconspicuous area or inseam before use. If this place has not changed color, feel free to proceed to eliminate the stain.

Domestos

Domestos
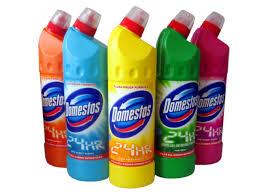
Applying a chlorine-containing composition is the lot of desperate and risky housewives. The composition is suitable for cotton, synthetics, jersey, silk is contraindicated. The main danger is that you can get a white spot instead of a tomato one. Therefore, stability testing is required. Dilute the composition with water in a ratio of 1 to 2. If the fabric is white, you can increase the concentration of the product, if dark, it should be reduced. Soak a cotton wool or sponge in the resulting mixture and treat the dirt. The tool will instantly lighten the natural dye. Prolonged exposure to the material threatens the appearance of holes and bald spots, act as quickly as possible. After cleaning, send the item to the washing machine.

Hydrogen peroxide

Another multifunctional tool in the fight for cleanliness is peroxide. It is this solvent that does an excellent job with vegetable and fruit juices on white things. Soak a cotton swab in peroxide and apply to the stain, periodically checking the condition. In severe cases, you will have to gently rub. Rinse in cool water.

Please note that hydrogen peroxide is only suitable for white and light-colored items. For snow-white, you can use a concentrate, but on a light one, the liquid will leave white spots. Therefore, first dilute the solvent with water in a ratio of 1 to 1.

Glycerin and egg yolk

Pharmaceutical glycerin and fresh yolk will help eliminate traces of tomato juice on colored clothes. Move the components in equal proportions.Apply the composition to the fabric and leave for 10 minutes. It is important that the mixture remains liquid and does not dry out.. If the effect is weak, repeat the procedure again. Rinse off the residue with warm water, then rinse in cold water and proceed to washing with a delicate detergent at a gentle temperature.

Lemon juice and ethyl alcohol

An unusual blow will help to remove tomato juice from clothes. Mix lemon juice / citric acid with ethyl alcohol in a ratio of 1 to 5. Heat the mixture in a water bath to 40 ° C and apply to the stain. Leave on for 5 minutes, rinse with plenty of cool water, machine wash. Lemon juice is quite caustic, so it is also suitable if necessary. clean grass from jeans Soak them in a solution of citric acid before washing. Rubbing alcohol is an effective method if necessary remove chocolate stain.

Use the “alcohol” method with caution if the product has iron fittings, embroidery or delicate decor.

table vinegar

This method is suitable for weak and relatively fresh stains. Mix white vinegar with cool water in a ratio of 1 to 2. Apply the product to the contaminated area, leave for a couple of minutes. Rinse thoroughly under running water, repeat if necessary. This is followed by a regular machine wash with a mild detergent and at a low temperature. A thick paste of ordinary vinegar and salt will help remove rust stains from clothes.

Specialized Chemistry

Specialized Chemistry
From professional means you will be helped by:

  • liquid or powder stain remover;
  • soap for removing stains (preferably after pre-treatment with another solvent composition);
  • bleaching laundry detergent (only for white).
To choose the best tool, pay attention to the marks like “for color”, “for white”, “for delicate fabrics”. If you are removing a stain from silk or wool, you should play it safe and reread the label. On aggressive products there is a marker like “do not use for delicate”.

Before using funds, check the label on the clothes. Delicate and delicate fabrics will not withstand exposure to chlorine-containing products. It is also important to observe the temperature regime recommended by the manufacturer. Do not expose the whole product to the composition, for most cases local cleaning will do.When using strong compounds, do not forget to wear rubber gloves and ventilate the room. After cleaning, rinse the fabric thoroughly and proceed to a standard machine wash.

Verdict

If an expensive item or a product marked “dry cleaning only” or “washing is prohibited” (an icon with a crossed-out container of water) has been damaged by tomato juice, go to a dry cleaner. It is worth resorting to home methods only with confidence in the result or the realization that the thing can be irrevocably spoiled.

Important: dry cleaners do not accept items after home cleaning with stain removers.

If strong specialized chemistry is powerless, then it is unlikely that something will have a positive effect on the stain.

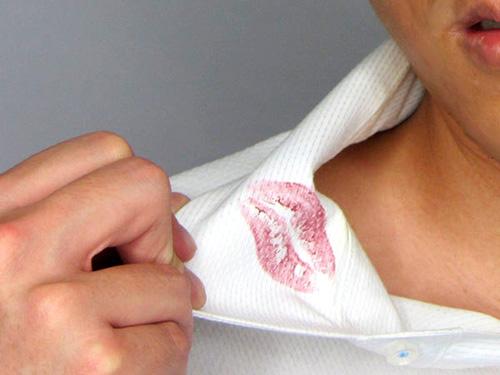
Lipstick marks are an insidious retribution for female beauty. If such a nuisance befell you, then do not despair. Lipstick stains are easy to remove from almost any type of fabric. The main thing here is efficiency, because old pollution comes off quite problematic and often with unpleasant consequences. So, before moving on to practice, let's find out the rules of response and the basics of "first aid".

General rules for saving clothes

General rules for saving clothes from lipstick
In order to completely dissolve lipstick marks, it is important to understand what kind of enemy you are dealing with. The main danger is that lipsticks are made on a fat (wax) base, adding a certain coloring pigment. The final result of stain removal depends on the quality of the composition and the durability of the dye. First of all, the fat base is reduced from the surface, then dyes. Thus, the first starting point is degreasing, the final is bleaching agents. The nuances of cleaning depend on the type of fabric.

To prevent the stain from permanently eating in or spreading, use the following tips:

  1. Treat the surface with a tool, while making gentle movements from the edge to the middle. This way you avoid streaks and smearing.
  2. For convenience, use a sponge, cotton swab or soft cloth dipped in the selected composition. The alternative is a soft brush.
  3. For extensive contamination, it is necessary to process only from the wrong side. So you prevent the penetration of the fat base into the depth of the fibers.
  4. Place a tissue or paper towel underneath to soak up excess oil and liquid. Periodically replace the napkin with a new one.
  5. Take a look at the label. If the manufacturer writes only about dry cleaning, then it is better to take such a thing to dry cleaning and not experiment with the effect.
If trouble caught you on the road, ordinary wet wipes will come in handy. This method is applicable for light pollution. Wipe the stain with a damp cloth, use swiping motions, do not rub. Since wipes contain alcohol (check the composition), the lipstick will quickly “leave”.Don't forget to wash your clothes in the washing machine at home.
Folk methods

Folk methods
Useful improvised means and materials will come to the rescue. When cleaning, remember that you should not exceed the temperature regime recommended by the manufacturer. So be sure to check the label and washing instructions.

Medical alcohol

Rubbing alcohol will help gently remove lipstick from clothes. This method is effective for woolen items and even silk fabrics. Soak a cotton swab in the composition and work until the stain dissolves. Followed by a standard machine wash.

Ammonia

Ammonia, also known as ammonia, is sold in any pharmacy for a penny, but there are a lot of benefits in reducing various kinds of stains. So, soak a cotton swab or sponge in the product and treat the surface. This technique quickly eliminates small traces of lipstick., and with large volumes you have to tinker. After the procedure, be sure to thoroughly rinse the fabric. Ammonia is a good option if needed remove felt-tip pen or marker from clothing.

When working with strong-smelling solvents, it is advisable to ventilate the room.Before use, test on an inconspicuous area such as the inseam or the wrong side.

Denatured alcohol

Another unexpected and useful assistant is denatured alcohol. You will need a soft, light-colored, lint-free cloth. Dip a cloth in alcohol and blot the stain with it. Under the action of the solvent, the trace will quickly turn pale and disappear after a while. After cleaning, it is advisable to send the laundry to the drum of the washing machine. For washing, use a mild detergent without bleaching ingredients. The water temperature should not exceed 30-40 ºC.

Hydrogen peroxide

Another pharmacy assistant is ordinary peroxide.This method will only work for cotton and natural white fabrics. For light matter, it is worth using a solution of peroxide with water in a ratio of 1 to 1. For pure white, a concentrate is suitable. Soak a cotton wool or sponge in the solvent and apply it to the dirt, which will literally melt before your eyes. Then wash as usual. Hydrogen peroxide also quickly and effectively removes nail polish stains with light clothes.

Hydrogen peroxide should be used with care. Prolonged exposure will not only discolor the fabric, but can also damage the fibers. As a result of careless handling, holes or bald spots are easily formed.

Refined gasoline

This method is suitable for mixed fabrics like jersey. You can buy refined gasoline in the economic department. Soak a cloth or cotton wool in the liquid and blot the stain. If stains remain after the procedure, prepare the following solution. Dilute table vinegar or glycerin with water in a ratio of 2 to 1, apply to the surface. The job is done - send it to the car. Petrol can be quickly and efficiently remove oil from clothes.

lemon and soda

This gentle method is useful even for delicate fabrics. Take a saucer and mix a couple of tablespoons of baking soda with the juice of half a lemon. As a result, you should get gruel.Move the porridge to the stain, rub in a little and leave for 15 minutes. Scrub with a soft brush or sponge, rinse. An unusual duo of lemon juice and ethyl alcohol will help remove stains from tomato juice.

Specialized funds

Specialized funds
Special means are created specifically for severe cases and help even when others were powerless. In the department of household chemicals, you can even ask about special fat solvents.

Bleach

To remove lipstick from a white cloth, use a suitable type of bleach. Be sure to check the instructions and do not violate the application technology. Do not overexpose the product on the surface for too long. Prolonged exposure will not improve the effect of the application, but it can aggravate the situation. Be careful when cleaning delicate fabrics, as chemicals can corrode their structure, and instead of a stain, you will get a hole. It is advisable to choose a composition with an appropriate mark like “silk” or “for delicate”.

When using aggressive compounds, do not forget to wear gloves. Ordinary household gloves for washing dishes or gloves for working in the garden will do.

Stain remover

The stain remover is considered the most universal remedy, as it is suitable for both colored fabrics and white, it even copes with wool and cotton. Read the instructions and apply the product strictly for a certain time. It is not necessary to soak the whole thing to remove the stain., a local effect is sufficient. Leave the stain in the solution for a while, then rub a little and send it to the wash at a gentle temperature.

Unexpected helpers

Unexpected helpers
If you don’t have a stain remover in your arsenal, and you don’t keep ammonia at home, then hairspray or shaving foam will certainly be found. We understand extreme and non-standard solutions.

Hair spray

Surprisingly, regular hairspray will help you get rid of lipstick marks. It is necessary to apply the spray on the stain, wetting it abundantly.Leave the garment on for 5-10 minutes and rinse thoroughly in warm running water. If the effect is weak, repeat the procedure. Then send the laundry to the wash with a mild liquid powder and at a gentle temperature.

Do not allow liquid to dry out.Apply a sufficient amount.

Shaving gel

Suitable for both male and female versions the main condition is a colorless consistency. Spread the fabric on a flat surface and stretch it. Arm yourself with a toothbrush, apply a little cream on the dirt and rub gently. After the procedure, fill the area with baking soda so that it takes away the remaining foam. Rinse thoroughly in cool water.

If the structure of the product is pigmented, then it is better to dilute the gel separately, after dropping a couple of drops of water.

Dishwashing liquid

Dishwashing gels are excellent at dissolving grease and similar stains. Moisten the stain, dilute the gel in a ratio of 1 to 1 and use a brush to treat the surface. You can replace the brush with a soft, light-colored cloth or sponge. Leave on for 10-15 minutes, then lather and rinse again. If the stain still remains, dip the garment in soapy water and launder. Followed by a gentle machine wash. Dishwashing detergent can also be used to remove foundation from clothes.

Toothpaste

You will need gel toothpaste. Natural formulations or herbal remedies will not work. Wet the stain, apply a pea-sized amount of toothpaste to a soft toothbrush and scrub. Periodically rinse the place and look at the result. Then send it to the washing machine.

Please note that toothpaste is not a good option for delicate fabrics, but it can easily clean jeans or thick materials.

Verdict

If home methods do not "take" the stain, then dry cleaning is the only way out.But keep in mind that laundries and chemical salons do not accept for cleaning clothes that have been previously treated with special bleaches or stain removers, and sometimes even aggressive chemicals.Therefore, if the affected area is extensive, and the thing is expensive, you should not risk it again.

Compact washing machines easily solve the problem of lack of free space. Such the technique is almost ideal for one-room apartments, summer kitchens or cottages, where the main guidelines for choosing are simplicity and small size. For those who live in a rented apartment or spend a lot of time in the country, a good choice would be washing machine "Baby", which also belongs to the class of small-sized. Only 33 cm narrow devices are smaller. The standard compact fits freely in a small bathroom, small toilet, even in washing machine cabinet in the living room or under the sink in the kitchen. So, let's figure out what the modern market offers us in a certain narrow niche.

Nuances of perception

Compact washing machine dimensions
Often, manufacturers sin with incorrectly formulated, so to speak, names. Even devices with a depth of 48 cm are called narrow copies. So you should navigate in terms using the following scheme:

  • a depth of 40-46 cm is considered a compact (that's what we're talking about);
  • sizes in 32-38 cm are in the "narrow" section (or ultra-narrow);
  • models in 50-60 cm - full-size.
Please note that the gradation is conditional. Some consultants and online stores do not use the term "compact", and call machines with a depth of 48 cm "narrow". Therefore, in order not to completely get confused in the wilds of terminology, take a centimeter with you and first measure your output data at home.
Features of compact washing machines

Features of compact washing machines
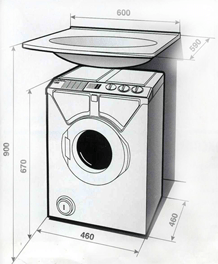
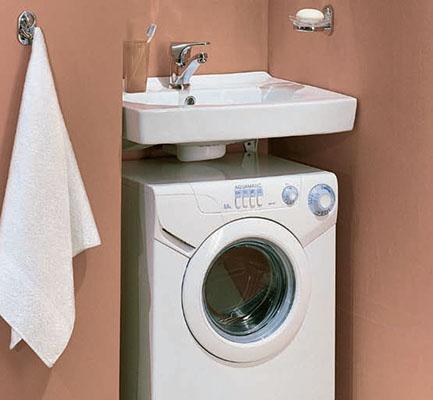
In order to finally decide on the advantages and disadvantages of compact washers, we will deal with the features of their use. To install such equipment, you need to find a suitable place. Usually the width varies within 60 cm, and a small and medium depth allows the device not to protrude beyond the adjacent furniture. For installation in a small bathroom, you may need a special sink for washing machine.

Shallow depth and often a small drum will play into your hands when arranging a compact room. With modern technology, you can even wash large amounts of laundry. So, washing machines with a capacity of 6-7 kg can easily cope with washing heavy bedspreads, voluminous curtains and other bulky items. But most ordinary models can hold 5 kg of dry laundry. Therefore, such devices are designed for use by families of 3-4 households.

In order not to miscalculate with the size, specify in advance the features of installing communications and connecting the device. If you buy a machine "under the furniture", voice this fact.

Despite the relatively compact dimensions, standard, rarely truncated functionality, such equipment often costs more than conventional models. It is impossible to call compacts much more economical in terms of electricity and water consumption, everything here is within the normal range. The only significant plus is that they still require a little less water, since the drum displacement is reduced compared to full-size counterparts.

Compact front loading washing machines

Vertical compacts are a more common type than their vertical counterparts.This category allows you to choose a small-sized washing machine for any environment and dimensions, such as a place under the sink or in the hallway.

Indesit WISL 103

Indesit WISL 103

Indesit WISL 103 is a budget compact option. Only 85 cm in height, width does not exceed 60 cm, and depth - 40 cm. The maximum amount of linen for loading is standard 5 kg. The spin speed remains within 1000 revolutions - a decent indicator for a baby. Despite the low cost, the washing and energy efficiency classes are among the highest - A and A, respectively. Spin class - C. Indesit requires a minimum water consumption of 44 liters per cycle. Among the auxiliary modes you will find "sport", "light fabrics", a 30-minute mini-program, extra rinse and reload options.Useful additions will be leakage protection and an indicator of washing stages. Such a self-erasing pleasure will cost 13-15 thousand rubles.

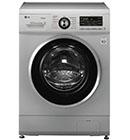
LG F1096WDS5

LG F1096WDS5

The model from LG is a decent compact, the dimensions of which are a little short of the full size. The height remains 85 cm, the width is 60 cm, and the depth does not exceed 44 cm. With such indicators, it can hardly be called small, but the output of 6.5 kg of linen more than compensates for this. The maximum spin speed is standard 1000 rpm, class -B. Among the "utilities" there is a steam mode, wrinkle prevention, child protection and a long delay start. A total of 13 programs and an intelligent display will help you quickly and efficiently cope with any type of laundry. LG is considered the best choice for a family of 4. Water consumption of 56 liters is the optimal indicator for a device designed for 6.5 kg. The device will cost about 25 thousand.

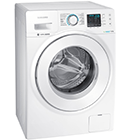
Samsung WW60H2210EW

Samsung WW60H2210EW

Another big compact is the Samsung WW60H2210EW. With a width of 60 cm, a height of 85 cm and a depth of 45 cm, Samsung remains in the "compact" framework. The loadable dry maximum is 6 kg of laundry, and the spin speed reaches 1200 rpm. Among the useful there is a delayed start, protection from children. The energy consumption and washing classes are A and A. The B spin class is one of the highest among compact competitors. The machine will be an economical option in terms of water consumption, since only 36 liters are required per cycle. The digital display and indicators of stages and completion of washing will be useful for busy housewives. Among the modes there are universal ones like “stain removal”, “children's things”, “outerwear” and “bubble generator”. The device has built-in protection against children and a voltage stabilizer, which is important for Russian networks. The cost of the machine ranges from 25 thousand rubles.

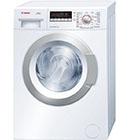
Bosch Maxx 5 VarioPerfect

Bosch Maxx 5 VarioPerfect

The Bosch Maxx 5 VarioPerfect machine belongs to the premium segment. With dimensions of 85 cm in height, 60 cm in width and depth of 44.5 cm, the device holds 5 kg. The maximum spin speed is 1200 rpm, and the class is C. The washing and energy efficiency classes are A and A, respectively. Water consumption for one wash remains within the normal range - 40 liters. Among the non-standard modes, you can find the “jeans”, “shirts”, “outerwear”, “anti-allergy”, “night” programs. The delay start is maintained up to 24 hours. Useful options are represented by leakage protection, child protection and a voltage stabilizer. The cost of the machine ranges from 32 thousand rubles.

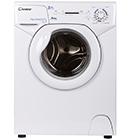
Candy Aquamatic AQ 1D 835

Candy Aquamatic AQ 1D 835

Candy Aquamatic is a non-standard solution for limited space in a modern apartment.So, a compact washing machine under the sink or cabinet will freely fit any size of furniture and plumbing. The height of the device is only 70 cm, the width is limited to 51 cm, and the depth remains within the compact - 46.4 cm. Such non-standard dimensions, of course, affect the functionality. The machine is able to take only 3.5 kg of dry laundry, and the spin speed does not exceed 800 per minute. Nevertheless, Candy retains all the basic functions such as quick mode, hand wash, "woolen" and delicate program. Important indicators - the washing class and electricity consumption correspond to the indicator A and A, respectively, which is not inferior to the advanced standard compacts. The machine can be placed under water lily type sinks. The price of the unit ranges from 16-18 thousand.

Compact top-loading washing machines

It must be understood that a device with such requirements is a rarity. Typically, vertical machines are made in standard sizes, and narrow and compact counterparts are rarely produced. Hence the slightly overpriced and problematic purchase. Let's deal with the favorites of this segment.

Whirlpool AWE 7515/1

Whirlpool AWE 7515/1

The Whirlpool AWE 7515/1 is top loaded and belongs to the compact segment. With a height of 90 cm, the device has a width and depth of 40 and 60 cm - excellent performance for a vertical washer. The capacity of linen corresponds to an indicator of 5 kg, and the revolutions reach 1000 per minute. The device is also in the middle price category and justifiably gives odds to frontal competitors. Energy consumption and washing class correspond to - A +, A. Among the useful options are half load, foam and imbalance control, leakage protection.The price ranges from 25,000 thousand rubles and above.

Candy EVOT 10071D/1-07

Candy EVOT 10071D/1-07

The Candy automatic machine is a real washing record holder. For its compact dimensions of 88 cm high, 63 cm wide and 40 cm deep, the machine can hold a maximum of 7 kg of dry laundry. Among the useful options are imbalance control, overflow protection. The device has a reduced noise level and a maximum spin speed of 1000 rpm. The washing efficiency and energy efficiency class remains at A. If you need a reliable machine with compact dimensions for large volumes of work, then Candy EVOT is the best solution in its segment. The only “but”, the cost of the machine starts from 30,000 rubles.

Indesit ITW A 5851 W

Indesit ITW A 5851 W

A more modest version of the vertical apparatus is the model from Indesit. The height is 85 cm, the width is 60 cm, and the depth is only 40 cm. With such indicators, the machine "takes on" a maximum of 5 kg of contaminated clothing. The washing class and electricity consumption are still the same A. However, the spin cycle is slightly inferior to competitors and reaches only 800 revolutions - just the amount needed to painlessly remove moisture from delicate fabrics. Spin class D, which is justified by a small margin of revolution. Water consumption for washing does not exceed 52 liters. The device is also equipped with useful options such as protection against leaks, child protection, imbalance control and foaming.The price ranges from 20-25 thousand rubles.

You can entrust the connection of an automatic washing machine to a specialist, or do it yourself. By choosing the latter option, we will save money and get the opportunity to spend it on something else, more useful. Previously, we considered connecting the washing machine to the water supply. Now, let's look at how to connect the washing machine to the sewer, ensuring that dirty water drains reliably and safely.

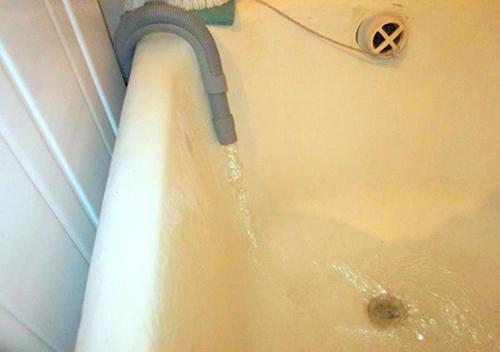
Many users find that this is not difficult - just throw the drain hose over the edge of the tub or sink. But this approach cannot be called optimal, since it is unsafe. That's why it is best to connect the washing machine directly to the sewer, using special equipment for this. This is what we will talk about in this review.

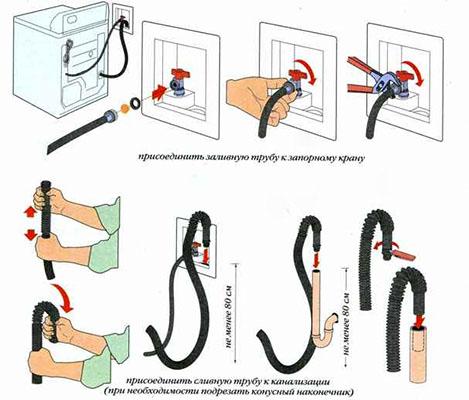
When making any connection of the washing machine to the sewer, do not forget to pay attention to the position of the drain hose. It must be laid in such a way that it is not accidentally twisted. You also need to monitor the position of the drain hose - nothing should squeeze it, interfering with the normal passage of water.

The main features of connecting the machine to the sewer

Scheme of connecting the machine to the sewer
There are two main ways to connect a washing machine to a sewer:

  • Through a special siphon;
  • Directly by securing the drain hose with a plastic hook.

Draining into the bathtub and sink - disadvantages

The latter method is practiced quite often, since plastic hooks always come with a washing machine. Throwing a hook with a hose over the edge of the bathtub or sink, we will ensure the unhindered discharge of dirty water into the sewer. In this case, we do not need to install siphons, fiddle with pipes and connections. But not everything here is as simple as we would like.

The whole point is that direct discharge of dirty water into the sewer contaminates bathtubs and sinks. After cleaning our bathtub to a shine, we immediately pour dirty water into it with washing powder and the remnants of pollutants.And it’s good if this dirty water immediately goes into the drain - in many cases, the drain hose only reaches the other end of the tub. Therefore, dirty water will gently flow along the bottom, polluting the snow-white enamel or acrylic (depending on what kind of bath).

Another disadvantage

Consider the second drawback of such a connection - the drain hose is easily knocked off the edges of bathtubs and sinks. Therefore, the threat of flooding will constantly hang over our neighbors. Your floors will also suffer if the machine starts to drain dirty water at this time. The hoses fly off not only due to the carelessness of users, but also on their own, for example, during the spin cycle - vibrations affect. It is also not uncommon for hoses to fall as a result of turning on the drain pump - water running under high pressure through a ribbed hose makes it twitch.

If the water is drained into the bath, then this is not so bad. And if it’s in the sink, it’s a real nightmare - after all, it’s customary to wash over the sink. Seeing the streams of dirty water, sometimes with a strong aroma of dirt, is not so pleasant. Therefore, it is best to connect the drain of the washing machine to the sewer through a siphon.
Connection through a siphon is devoid of the above disadvantages - the connection is tight, there are no unpleasant odors, the probability of water leakage is extremely small. Another thing is that with such a connection you will have to tinker a little. Let's look at both connection methods in more detail.

Connecting the washing machine to the sewer through the siphon

Connecting the washing machine to the sewer through the siphon
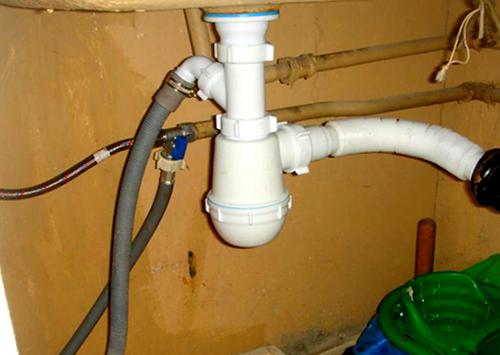
In order to connect the drain of the washing machine to the sewer, we need a special siphon, which can be purchased at any plumbing store.The siphon is installed under the sink, as high as possible to prevent the backflow of water.During the connection process, we may find that the length of the drain hose is too short. Therefore, in many cases it has to be extended. You can specify the maximum hose length in the instructions for the selected washing machine.

Plastic siphons for washing machines are endowed with pipes to which the drain hoses themselves are connected. We fix the junction of the branch pipe and the hose with a special coupling. This will help seal the connection and prevent unpleasant odors from entering the sewer.

Advantages of the connection method

Such a connection scheme is quite common, as it provides an excellent connection between the drain hose and the sewer. In this case, we can not be afraid of leaks - the siphon is equipped with a rubber cuff, which makes the junction more airtight. As for dirty water, it will be able to freely pour into the sewer.

This scheme is also good because we can safely use the sink or bathroom. Agree, when the machine is washing, you won’t take a bath - it will flood with dirty water. It is also unpleasant to wash oneself, seeing in front of oneself seething streams of foam and the same dirty water with an unpleasant odor. The maximum that can disturb us in the presence of a siphon is a soft gurgling coming from the neck of the sink.

Siphon installation

Installed siphon
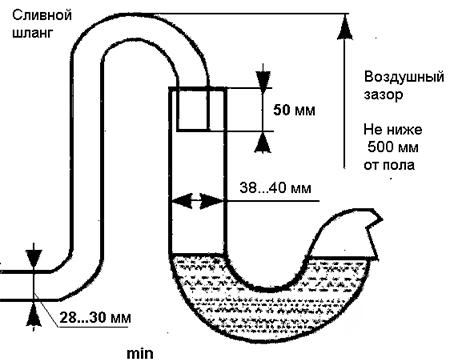
The siphon for the washing machine is always installed in a vertical position, but not in a horizontal position - such a scheme is erroneous, since leaks are possible. You also need to remember about the correct position of the drain hose. It must first rise to a height of at least 60 cm, and then descend to the drain. Usually it is hooked to the upper part of the body, where appropriate fasteners are provided.

In order to connect the washing machine to the siphon under the sink, the old siphon must be removed and a new siphon installed in its place, with a pipe for connecting the drain hose. All connections are carefully tightened to ensure proper drain tightness.. After that, open the tap with water and check our assembly.
The next step is to connect the drain hose. If there is a special cuff, then it's good. If it is not there, we use a special adapter to connect the hose, tightening it with a metal clamp to ensure tightness.

Some installers advise not to get carried away with tightness - according to them, the presence of a small gap will avoid the effect when dirty water from the sewer is partially sucked back into the tank (due to excessive tightness).

Of considerable interest are special siphons for hidden installation in the wall. On one side they are connected to the sewer pipes, and the other side looks out - here we connect the drain hoses, tightening the connection with a clamp. Usually, a cold water outlet is installed nearby so that connecting the washing machine is convenient and quick - even if you buy a new machine, it will take 5-10 minutes to install it.

We connect the machine to the sewer without a siphon

Scheme of connecting the machine to the sewer without a siphon
You can connect the washing machine to the sewer without a siphon. In this case, the drain hose is connected directly to the sewer pipe. To do this, a tee is placed in it, with which the hose itself is connected. In some cases, a separate plastic pipe is laid to the machine, connected to the sewer.

Connecting

The process of such a connection is quite simple - just lower the drain hose into the sewer pipe, fix it and seal the junction. If you do not seal, you will have to enjoy all the smells penetrating from the sewer. By the way, during the connection process, you need to organize an S-shaped bend in the drain hose - thereby we isolate the machine from the sewer system at those moments when the drain pump is turned off.

By the way, if the drain hose is made straight, without rises, all the sewer stink can get into the tank, where the clean and washed clothes are located. Therefore, special attention must be paid to the bending of the hose. And it is best to try to install a siphon that will cut off all unpleasant odors. To prevent sewer water from entering through the drain hose back into the drum during washing, an anti-siphon is used - check valve for washing machine.

To connect drain hoses and sewer pipes, special adapters are used to help seal the connection and prevent unpleasant odors from entering the bathroom atmosphere.

Draining the sink and tub

Draining water into the bath
Another way to dump dirty water is to attach a drain hose to the edge of a tub, toilet, or sink. But in this case, we may face the danger of flooding our own bathroom. In order to protect your bathroom from flooding, you need to fix the drain hose well in such a position that it cannot be accidentally dropped.

Do not rest the drain hose on unstable surfaces as it may accidentally fall. It is also not recommended to fix it tightly - then it will be subject to falls from vibrations.Remember, if it is not possible to fix the drain hose in a free and safe position, then it is best to connect the washing machine to the sewer through a siphon - it is not very expensive, but it will help protect the bathroom from accidental flooding.

In addition, a siphon with a pipe is a reliable protection against unpleasant odors. But if you still decide to connect directly to the sewer, do not forget to give the drain hose an S-shape to isolate the washing machine from sewer odors.

Conclusion

In conclusion, we can conclude that the safest way to connect a washing machine to a sewer is to connect through a siphon.

Automatic washing machines are connected to the mains, sewerage and water supply. Moreover, they only need cold water - they prepare hot water themselves, using the built-in heating element.This element heats water to the temperature prescribed in the current program. Failure of the heating element leads to the impossibility of further operation of the washing machine - it interrupts the execution of the program and displays an error.

In this article, we decided to tell you about what a heating element is and how it works. We will also tell you about the choice and purchase of a heating element, about its verification and installation in a regular place. Installation instructions are the same for almost all machines, since their internal structure is very similar.

The principle of operation of the heating element in the washing machine

The principle of operation of the heating element in the washing machine
The heating element in an automatic washing machine is a tubular structure responsible for heating water. Inside this structure is a thin conductor made of a special alloy that has high resistance and the ability to heat up to high temperatures without breaking.The heating coil is separated from the outer steel shell by a dielectric material with high thermal conductivity.

The ends of the spiral are soldered to the contacts to which the supply voltage is applied. Here, most often, there is a thermoelement responsible for measuring the temperature of the water in the tank of the washing machine. When we start any program, the control unit supplies the heating element with a supply voltage - it warms up and starts to heat the water. As soon as the temperature sensor detects that the set temperature has been reached, the control unit will turn off the heating element and further heating will stop.

The power of the heating elements reaches up to 2.2 kW - the more powerful the heating element, the faster the machine will heat the water, and the faster the washing will reach the peak of efficiency.By the way, due to the high resistance and inertia, the heating elements practically do not react to power surges - a short-term increase in the voltage of the mains does not have a harmful effect on the nichrome (or fechral) thread. Due to this, the heating elements have a long service life.

Why the heating element breaks and how to check it

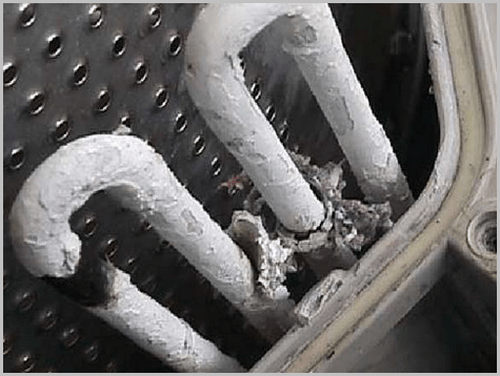
Broken heater
As we have already said, heating elements are distinguished by increased reliability. Therefore, most often they fail for the following reasons:

  • Manufacturing defects;
  • Settling of scale.

It is impossible to insure against factory defects, but if the machine is under warranty, then you just need to hand it over to a service center, where it will be quickly put in order. But scale is the most terrible enemy of heating elements. It settles on the outer part of the metal case, preventing the normal transfer of heat to the water.Due to the low thermal conductivity, scale provokes overheating of the heating element, as a result of which it burns out, and in order to prevent this from happening, you need use Antinakipin.

Also, the formation of scale contributes to the formation of corrosion on the metal shell of the heating element. As a result, its tightness is broken, there is a danger of a short circuit to the machine body (with all the ensuing consequences). Therefore, scale must be actively fought.

Before changing the heating element, it is necessary to check it. To do this, you should arm yourself with an ohmmeter or a multimeter operating in ohmmeter mode. We need to check the resistance of the heating filament and make sure there is no leakage to the body of the washing machine. The resistance of the heating element of the washing machine varies between 20-40 ohms (depending on the power of the heating element used).

As for leaks, in the normal state of the heating element, the ohmmeter should show the absence of any resistance.The check is carried out by measuring the resistance between the contacts of the device and its case. The ohmmeter itself is transferred to the maximum available work limit (measurement of tens and hundreds of megaohms).

You should also check the presence of a supply voltage from the control module - for this you need to switch the multimeter to the AC voltmeter mode and fix the probes on the contacts of the heating element. After that, we turn on any program and wait for the voltage supply. If not, then you need to check the control module itself.

The presence of low resistance between the contacts of the heating element and its body requires the complete cessation of operation of the washing machine in order to avoid electric shock.

Where is the heating element at the washing machine

Where is the heating element at the washing machine
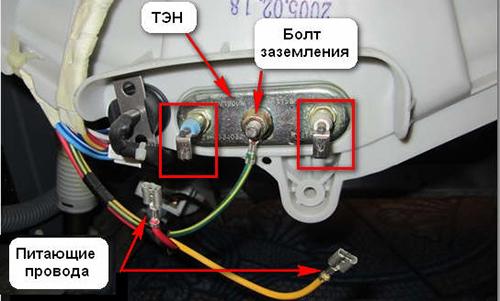
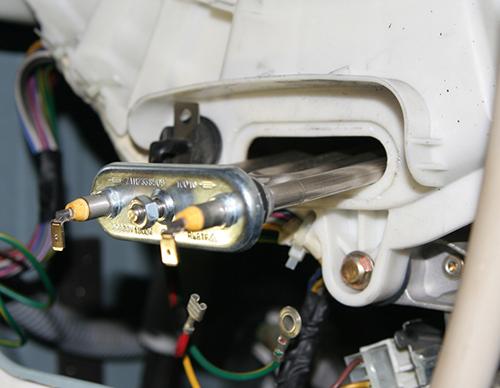
In order to find the heating element in the washing machine, you need to remove the back cover from it. Here we will see a plastic tank, in the lower part of which there are contacts of a heating element and a temperature sensor. Sometimes the contacts of the heater are not located at the bottom, but on the side - for this you have to tinker with the side walls.

If you found the contacts of the heating element in the upper part, then this is the heating element for drying - at the moment we do not need it, although it is checked in the same way as the heating element for water. It is not necessary to remove the heater to control the resistance. By the way, between the contacts of the heating element or in the immediate vicinity of it, we can find the contacts of the temperature sensor.

The heating element is very easy to change - it must be unscrewed and removed, replacing the broken sample with a new heating element. After tightening the fasteners, you need to make sure that the tank is tight.

How to choose a new heating element for a washing machine

How to choose a new heating element for a washing machine
Electric heating elements for washing machines differ in their shape.U-shaped and W-shaped heating elements are widely used, the contacts of which we will certainly see in the back of the tanks. There are also more exotic options, for example, in the form of a deformed "heart". In some models, we can see spiral heating elements, like those used in old electric kettles or samovars.

In addition to the form Heating elements differ in the way of fastening and the way of connection – terminals and fasteners can have a different shape. Fasteners are most often fittings with flanges of various diameters. The same applies to contact groups with connecting washers and wires.

Also in the design of heating elements there may be temperature sensors and fuses that protect the heating elements from excessive overheating, often resulting from the formation of scale. Their contact groups are located between the supply contacts of the heating element.
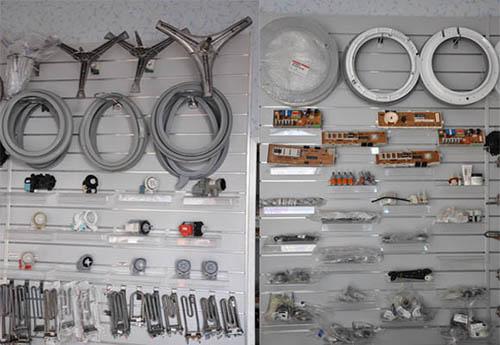
Washing machine parts store
Due to this, it is quite difficult to choose a suitable heating element for a washing machine. If possible, it is advisable to purchase an identical model, with similar fasteners and connections. Otherwise, you will have to be creative in order to connect the heating element to the supply wires and seal the place of its installation.

Also, when choosing a new heating element, the electric power of the heating element is taken into account. The parameters of the old and new heaters must match - so we will ensure the correct execution of washing programs, quick heating of the water and the absence of errors from the self-diagnosis system.

If the washing machine model is very old and you cannot find the original heating element, pay attention to partially compatible heater models. Installing and connecting them is more difficult, but it will solve the problem of repairing an old washing machine.

Where to buy a heating element for a washing machine

Do-it-yourself washing machine repair allows you to save money in your wallet.Another thing is that the search for spare parts and components is a certain difficulty - parts for washing machines are practically not sold in stores. The problem is solved by ordering spare parts through service centers, but the extra charge here can be fantastically large.

The easiest way to buy a heating element for a washing machine is easier in a specialized online store selling spare parts for modern household appliances.Such stores can be found in any search engine by setting the appropriate search query. The search for the desired model of heating element is carried out according to the model of the washing machine.

Paraffin and wax candles have long been transformed from the main sources of lighting into original accessories for decorating cakes, rooms and festive tables. They delight with real living light, but are a source of rather difficult spots. How to remove wax from clothes and get rid of stains from paraffin candles? For this reason, we have compiled our review.

In it, we will look at the following ways to remove stains:

  • With the help of heat and cold;
  • Through various means.

Worst of all will be those who managed to put wax from colored candles on their clothes - rather resistant dyes are used hereleaving visible stains on clothing.

Exposure to heat and cold

Exposure to heat and cold
If your clothes show stains from paraffin and wax candles, do not rush to panic - there are many means to get rid of traces of these contaminants. For example, we can act on tissues with heat or cold. But first, we will need to properly prepare our clothes for cleaning - for this we clean off excess wax or paraffin with a sharp knife to make our work easier.

hot iron

Next, let's try to work on the spots with an iron. To do this, we lay white napkins on both sides of the stain and begin to iron them with an iron. The temperature is low or slightly higher so as not to damage the stains. Paraffin and wax evaporate well, so after 10-15 minutes the stains will disappear. After that, we send the clothes to the wash with ordinary washing powder. Hot iron also cleans well chewing gum marks on clothes.

Instead of napkins, you can take powdered chalk - with its help, the ironing time is reduced to 5 minutes. Chalk, being a good absorbent, will quickly absorb the remnants of the candle.

The ironing technique is quite effective, but it is not suitable for delicate fabrics - in this case, it is best to resort to a thorough wash using a good washing powder.

Freezer

We have already talked about removing traces of chewing gum from clothes using a refrigerator. But how to remove paraffin from clothes? To do this, we can again resort to the help of a freezer. We take clothes, put them in the freezer for 2-3 hours, wait until the wax or paraffin hardens to the state of a stone. After that, the place with pollution needs to be wrinkled a little and clean off the remnants with a fingernail - the paraffin will immediately crumble. Don't know how wash soft toys in the washing machine, if she is already many years old and she has acquired a horde of ticks, give her a “cold” cleaning.

Hot water

Let's return to the effect of heat and try another technique - using hot water. To do this, we need to arm ourselves with a heated kettle or adjust the geyser to the maximum heating temperature. Our task is to provide a jet of hot water through the fabric. Due to this, the paraffin will be gradually removed, and without harm to the tissue.

With the help of chemicals

With the help of chemicals
Now let's look at ways to remove wax and paraffin stains using various chemicals purchased at hardware stores.

Ammonia

To remove wax from a candle from clothes, the most common ammonia will help.To do this, dissolve a spoonful of alcohol in a liter of water and pour the resulting solution on a paraffin or wax stain.In the next step, send the clothes to the wash with a good laundry detergent. Ammonia is effective in removing stains from some delicate fabrics.

Alcohol and turpentine

The next helpers in the fight against stains from candles are ethyl alcohol and turpentine. We take a cotton pad, moisten it in one of the indicated means, carefully wipe the place of contamination until wax and paraffin stains are completely removed. After that, we send the clothes to the laundry. If the stains do not go away, leave a moistened cotton pad on top of the stains for 20-30 minutes.

Dishwashing liquids

Dishwashing detergents show no less effectiveness. Apply a few drops to paraffin stains, leave overnight. In the morning we send clothes to the washing machine - the stains should completely disappear. This method is good because it is suitable for washing wool and silk. The high effectiveness of dishwashing detergent is demonstrated if necessary. remove grease stains from clothes.

Before using one of the above products, be sure to test the selected product on an inconspicuous area of ​​\u200b\u200bthe fabric, for example, on the lining. If after 30-40 minutes nothing happens to the fabric and dyeing, you can safely start removing stains. As for clothes made of delicate fabrics, it is best to subject them to a normal wash with an effective washing powder - always with an overnight soak.

Be careful when removing stains from colored candles, as permanent candle dyes can leave additional stains. In particular, you should not use the hot iron technique - it is best to use a stain remover.

Silk things can warm you in a cool season, cool you in the heat.Thin material instantly removes moisture from the surface of the skin. Depending on the structure and type silk feels different to the touch, can easily wrinkle or be not prone to wrinkling. So, natural material rarely requires ironing, and taffeta, silk chiffon and organza are given only to dry cleaning, avoiding home experiments. Nevertheless, most products can be brought into proper form at home.
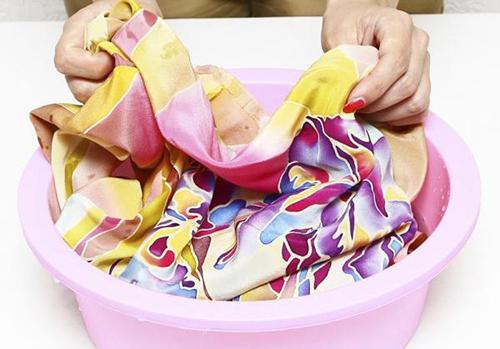
Rules for the care of silk things

  1. Delicate or transparent silk fabric is washed only by hand. Aggressive detergents and strong friction are unacceptable. More dense and resistant things are washed in a typewriter.
  2. Before washing, be sure to check the label and manufacturer's recommendations. Do not exceed the permissible washing temperature, as silk is most afraid of high temperatures. The maximum for the material is 40°C.
  3. To preserve color, table vinegar is used to rinse colored fabrics. Add half a cup of vinegar to the conditioner compartment.

Total wash

Total wash
We figure out how to properly put silk things in order. Which is better to choose: spend time on hand washing or send the item to the machine.

Choosing a cleaning agent

The best solution is to buy a specialized silk detergent. They sell both powders and liquid shampoos, as well as conditioners and softeners specifically for silk. These products are usually labeled "Silk" or similar. If you are unable to find the appropriate powder, a mild cleaner like liquid powder for baby clothes will do.

Please note that bleaches or oxygen (bleaching) compounds are not used for silk. White silk clothes are washed in a solution of borax in the proportion of 1 tbsp. for 1 liter of water.

The nuances of machine washing and program selection

Wash silk clothes on a delicate or hand wash, which is in every washing machine. More expensive models are equipped with special programs for delicate fabrics: “Silk”, “for washing silk and curtains”, “for silk and wool”. If the modes are presented solo in the machine, then the program “for curtains” is suitable for washing silk bed linen (read about the features of washing bed sets from various fabrics in our review on the correct mode and temperature of washing bed linen). "Woolen" mode is useful for washing blouses, dresses and scarves.

If you use the delicate mode, check the settings additionally. Water temperature - 30-40 ° C, spin - no or minimum 400-500 revolutions.

Sort items by color and type of fabric before loading into the drum. If there is even slight dirt on the surface, be sure to remove the stains before machine washing. Delicate items should be placed in a laundry bag.

How to wash silk by hand

Products made of 100% silk are washed only by hand and a mild detergent or specialized gel is chosen. The liquid composition is preferable, as it dissolves faster in water and begins to act on pollution. A delicate fabric should not be squeezed out at all, but a more resistant one should be shaken off and excess water slightly squeezed out.. It is impossible to twist the linen at the same time, since creases and bruises are quite difficult to remove. After a delicate and proper wash, the thing remains "obedient" and easy to iron.

Natural silk is obtained by unwinding silkworm cocoons. Thin threads are an organic polymer that is easily damaged by high temperatures and careless attitude.

How to dry and iron silk?

How to dry and iron silk?
If you are washing the product by hand or in a machine without spinning, allow excess water to drain. Silk clothes are dried in a well-ventilated area and not hung out in the open sun. Under the influence of bright sunlight, the fabric will lose its luster and color, it will quickly dry out. Drying near a heater or radiator is also unacceptable. Jackets and dresses are left to dry on hangers. Silk, like linen (how to wash linen clothes we already wrote earlier), do not dry to the end, but remove it a little wet.

Overdried silk can only be revived by steaming ("silk" program) during ironing. Wetting the fabric with a spray gun or a spray gun in an iron will result in streaks.

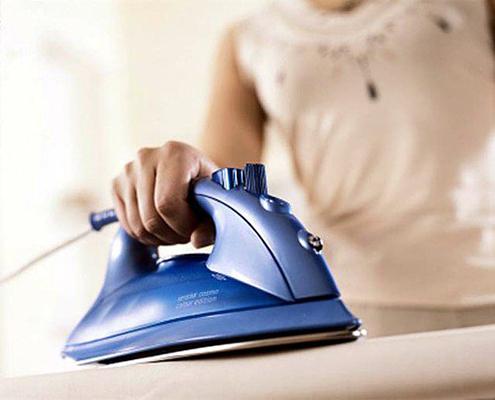
Iron linen on a horizontal surface, preferably an ironing board lined with cotton or linen. Air blouses and scarves are steamed through cotton material. All silk items are ironed only from the inside, using the minimum temperature (one or 1 asterisk on the regulator). Most modern irons are equipped with a special program for silk - a sure-fire option. If there is no such program, set the regulator to 150°C. To smooth out large wrinkles in the fabric, use moistened gauze and a hot iron.

For designer, asymmetric and embroidered clothes, vertical ironing is used. Turn on warm steam and run the iron near the surface at a distance of 5-8 cm. Some manufacturers offer special soleplate attachments for such a sophisticated procedure.

How to wash artificial silk?

How to wash artificial silk?
More affordable rayon is made from synthetics or cotton and viscose after pre-treatment. The artificial analogue took over from silk not only the appearance, but also problematic cleaning.This material is washed in the washing machine on a delicate program or gently by hand. A mild liquid laundry detergent is a must. Stains and dirt are reduced only with special compounds, they do not wash or rub with a brush. It is not recommended to squeeze the fabric with force so that persistent wrinkles do not form.. How to wash viscose so that it does not shrink, we considered in the previous review.

In ironing, artificial material differs from its natural counterpart. Some specimens do not tolerate even low heat, some clean only “dry”, others do not wrinkle at all. To painlessly iron artificial silk, be sure to look under the collar on the label.

Folk tricks. Capricious fabric will help to smooth out warm steam. Place the clothes on hangers and hang them over the tub. Turn on a hot shower and warm air vapors will smooth out large wrinkles and creases.

Follow the elementary rules for the care of linen and the manufacturer's recommendations, and silk items will last you a long time.If you are worried, play it safe and give an expensive thing to dry cleaning.

A dangling drum is a clear reason to take any measures to eliminate the malfunction, since the breakdowns associated with this can subsequently ruin other components of the apparatus. But do not rush to contact the service center, first try to find faults. You may be able to fix them yourself. We recommend that you study our reviews, in which we examined the error codes of the self-diagnosis system of washing machines in order to quickly identify and eliminate some malfunctions in time, for example, "Hans Washing Machine Codes" or Whirlpool Washing Machine Codes.

If you are not at all versed in technology, then it is better not to try to disassemble the washer.Such actions can only exacerbate the problem, and repairs will cost much more.

Causes and their detection

Causes and their detection
When the drum at the washer dangles, then most often washing machine hums when spinning and vibrates a lot. You can feel the "chatter" by moving the drum to the sides.

There are two reasons for this error:

  • worn or broken bearing.
  • shock absorbers are dead.

How to determine what is out of order? Very simple.

Bearing problem

To determine this malfunction, it is enough to move the drum in different directions with your hands. Play (strong or weak) indicates bearing wear. Usually such a problem is accompanied by a strong hum and slight vibration.

The bearing is a durable part, but the service life is still limited. This element fails due to two reasons: wear or water ingress into it. The latter causes corrosion of metal parts, which in the shortest possible time turns the metal into non-working. Often the service life of the bearing is 7-10 years.

If you find such a problem, then do not pull, but replace all bearings as soon as possible or take the unit to a workshop. It is not recommended to use faulty equipment.

Shock absorbers broke

To identify this problem, you will also need to dig with your hands in the machine, but do not move the drum, but slightly pull it towards you and release it. If it does not fall into place, but starts to swing / hang out, then this is a clear sign of the failure of the dampers / shock absorbers.

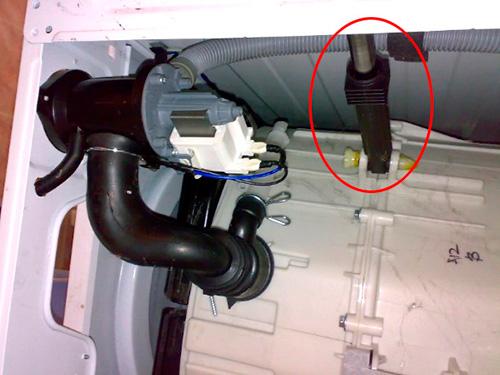
Shock absorbers serve to soften vibrations during the spin cycle. If even one element breaks, strong vibrations occur and noise may occur. The washing machine has two dampers and two springs. You need to change them in pairs.

Breakage of shock absorbers leads to increased wear of all mating components in the apparatus, including the bearing. Therefore, it is recommended to immediately fix the problem at home or contact a service center.

How to change the bearing yourself?

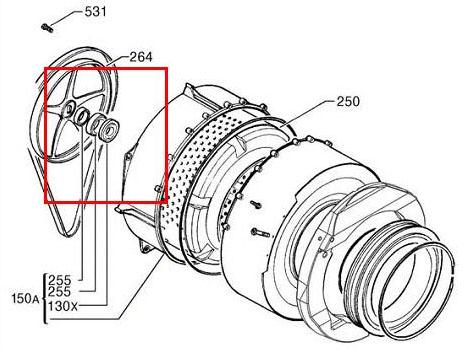
The layout of the bearing in the washing machine
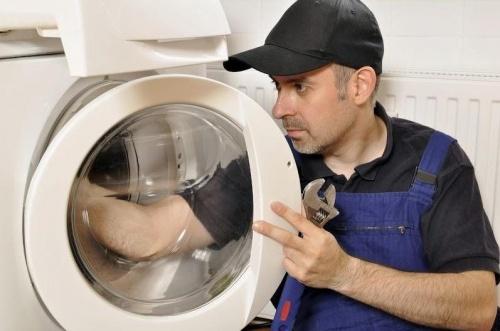
First of all, evaluate your strengths. If you are not sure of yourself, then it is better to call the master. Also note that Repair requires specialized tools..

Important! Different models of washing machines may differ in their internal structure.

Training

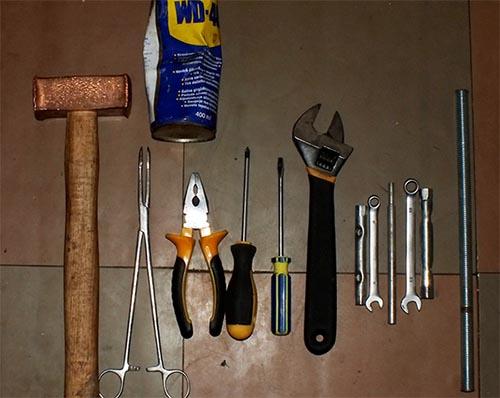
Required tool:

  • sets of keys (end, open-end and hex);
  • hammer ordinary and rubber;
  • various screwdrivers;
  • a pair of wrenches;
  • grease for the bearing (as a rule, LITOL-24 is used);
  • spare bearings and seals;
  • chisel.

Prepare your workspace first. Disconnect the washer from the network and communications. Move it aside so that you can easily reach the back of the machine.
Bearing replacement tools

Disassembly process

This stage includes the following items:

  1. First of all, unscrew all the bolts on the back panel and remove it.
Here much depends on the model of the device and its design features. Act carefully, remember the sequence and location of the elements.
  1. Remove the dispenser.
  2. Remove the control unit by unscrewing the screws that fix it.
  3. Remove blocking.
  4. Remove all remaining fasteners and remove the front panel.
  5. Now you need to loosen the clamp, but first remove everything that interferes with this.
  6. Dismantle the counterweight, and then the heating element.
The work of dismantling the heating element, although not too complicated, is very responsible. Be sure to remember or write down the order in which all wires are connected.
  1. Disconnect all wires, pipes and belt from the tank.
  2. Unscrew the engine and remove it from the mount.
  3. Now you can freely remove the tank with the drum.
It is better to move the tank to another place, for example, a table, where it will be convenient to work with it.

The stage of disassembling the tank and replacing bearings

This stage is easier, so it should not cause you any difficulties. Sequencing:

  1. Remove the rubber seal (cuff) to avoid damage during disassembly.
  2. Install the tank so that the pulley is on top, and unscrew all the bolts holding the pulley. Remove the last one.
  3. Now the crucial moment - knocking out the shaft. This must be done with a rubber mallet by gently hitting the shaft.
You can use an ordinary hammer, but put a wooden block on the shaft, otherwise you can damage it.
  1. When the shaft is free, unscrew all the bolts connecting the two halves of the tank. After that, separate them (halves).
  2. Now the bearing is visible. But before taking it out, remove all excess grease and dirt that has stuck on top.
Do not be lazy, inspect all parts of the washing machine for damage. In order not to disassemble it again later, it is better to identify all the malfunctions at once.
  1. Knock out the bearing with a chisel, then remove the seals.
  2. Wipe thoroughly and lubricate the area with grease.
  3. Install new seals and bearings and press them in with a hammer and chisel.

The work is over. Now you need to assemble everything in the reverse order, connect and test in action.

Before starting repairs, read on the Internet about your washing machine. If the tank is non-separable in it, then it is much more difficult to repair the bearing. It is better to take the device to a service center.

Replacing shock absorbers

Location of the shock absorber of the washing machine
In modern washing machines, classic shock absorbers have been replaced with dampers, so disassembly will be described in accordance with the design of new devices. The tank in the device is hung on springs, and shock absorbers are placed from below.

Most often, it is not the damper itself that breaks in washing machines, but the gasket and liners wear out, which are responsible for the “elasticity” of the shock absorber. Less wear on the cylinder.

Replacing shock absorbers (the method does not work on all models)

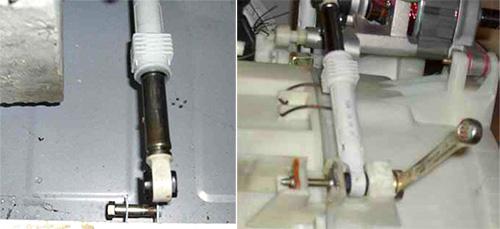
In order not to disassemble the machine in vain, it is better to be 100% sure that the dampers are out of order. To do this, lay the equipment on one side, gaining access to the shock absorbers. In some models, damaged elements can be replaced in this way.. Unscrew the fixing bolts with which the dampers are attached to the body (plastic pins can be used instead of bolts). Disconnect the element from the tank in the same way. Install new ones.

Even if the problem is in the gasket or liners, finding a repair kit is now almost impossible. Therefore, it is easier to replace the entire shock absorber.

Change the shock absorber of the washing machine

If you can't get to the dampers from below

In some models, the shock absorbers can only be reached by removing the front panel. For this you need:

  • remove the top cover from the washing machine: unscrew the fixing bolts at the back of the device and slide the top panel;
  • remove the powder tray and remove the bottom plastic panel covering the drain filter;
  • dismantle the control panel - unscrew all fixing bolts, disconnect the wires;
  • remove the rubber cuff, after removing the clamp from it;
  • unscrew all the bolts that hold the front wall, and remove it.
Before removing the front wall, you need to disconnect the wires coming from the door lock.

Having gained access to the dampers, dismantle them, then replace them with new ones and assemble the constructor in the reverse order.

Verdict

If you are not sure or if you have difficulties in the process of replacing parts, it is better to leave your idea until the arrival of the master. Incorrect manipulations and incorrect connection of the device to the system can lead to breakage of parts vital for the equipment. Complex repairs are best left to the experts..

Super glue is an indispensable assistant: it glues almost everything and dries at a high speed. But it's worth the awkwardness to take over, and a persistent stain will end up on your blouse or favorite jeans. Dried glue is not at all a reason to throw away a thing; it is difficult to remove such pollution, but still possible.

Rules and recommendations

Rules and recommendations
Noticing the ill-fated drop of glue, do not delay and start cleaning immediately. The fresher the stain, the more likely it is to get rid of it without consequences. If possible, use a paper towel to remove any remaining liquid adhesive from the surface. Do not rub the glue into the fabric, do not smear, but lightly wipe off the excess from the edge to the middle.

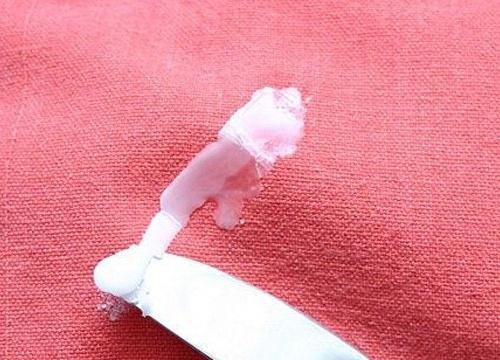
It is important to remove as much of the adhesive as possible before the cleaning and dissolution procedures.. Be patient and prepare a sharp tool to remove the remaining glue. A kitchen or pocket knife will do. Scrape off visible hard marks from the fabric. Be gentle and do not go beyond the stain, so as not to damage the structure of the material or color.

Note! Before cleaning, check the clothing label and the manufacturer's recommendations. It is important to determine the type of fabric and the allowable temperature.

We reduce any glue

We reduce any glue
To successfully reanimate clothes, you need to determine what kind of glue you got. So, the most common types and safe ways of information.

Important! Before using aggressive solvents, it is advisable to test the composition on an inconspicuous area or back seam. If after 2-4 minutes there are no unintended consequences, feel free to use the chosen means to reduce the trace.

glue moment

Removing glue from clothes is quite problematic. The main snag is that TM "Moment" produces various types of compositions, hence the dispersion of solvents.

  1. For the wallpaper composition, you should resort to the simplest method - hand washing. Since such glue is not aggressive for fabrics, it is easy to reduce it. Moisten the dirt and walk with laundry soap. Followed by a standard machine wash.
  2. Excess shoe composition from leather, suede products and leatherette is cleaned off with a nail file. You will need a soft nail file. Rub in a circular motion with the tool, then treat with a protective compound for shoes.
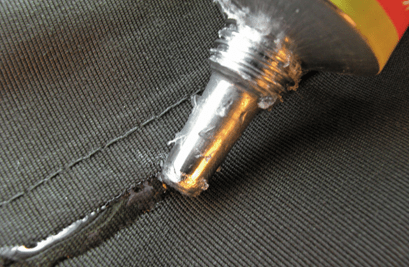
  3. Universal is removed with a colorless nail polish remover without acetone. This is a more aggressive and dangerous method, so it will not work for delicate fabrics.. Soak a sponge or cotton swab in the solvent and gently work the surface. Strong friction will only hurt. After the procedure, send to the wash at a gentle temperature.
  4. "Super Moment" dissolves only a special composition made for this purpose. "Super Moment Anticlear" will help restore the original appearance of the product without damaging the structure, most importantly, follow the manufacturer's instructions.
Please note that dry cleaners will not accept clothing that has been experimented with gasoline or specialized chemicals. If you doubt that the product will help in your case, or value your clothes too much, then the best solution is dry cleaning.

Adhesive from the label

A trace of a barcode or label often remains on small items such as decorative cosmetics or skin care products. As a rule, after removing the label, the adhesive is removed along with the paper side, but in rare cases, most often with prolonged contact with the surface, part of the adhesive coating remains. Such the area easily attracts lint and dust, and noticeably spoils the appearance. Nail polish remover will help dissolve sticky residue.But keep in mind that leather and some types of plastic react negatively to such exposure. For suede cleaning you will need a stationery eraser. Acetone-free nail polish remover is also suitable for gentle removing nail polish from clothes.

PVA

PVA glue is another easy-to-use compound. Regular laundry soap and a soft toothbrush will help to wash it off (by the way, laundry soap does its job well, if necessary remove felt-tip pen or marker from clothing). In severe cases, more effective and aggressive methods will be needed:

  1. If the contamination has eaten in or too much time has passed, then use medical alcohol. Soak a sponge or cotton wool in the solvent and work the stain from the edge to the middle. This method is ideal for natural fabrics like cotton and linen, synthetics should not be treated with alcohol. Rubbing alcohol will help you out if needed. remove chocolate stain.
  2. The "frosty" option will help remove stains from silk or wool. Roll up the thing and pack it in a plastic bag, send it to the freezer for 1-2 hours. Manually separate and clean off cured adhesive residue. Wash in washing machine. The freezer is an old and proven way to removing chewing gum from clothes.
  3. For suede material, the steam method is suitable.Let the fabric steam for 5 minutes and remove the residue with a paper towel. For greater efficiency, mix water and ammonia in a ratio of 1 to 1, treat the trace. Repeat if necessary.
When working with aggressive liquids with a pungent odor, do not forget to ventilate the room and wear protective gloves.

Super glue

Super glue
To remove super glue from clothes, you have to work hard. It is this composition that leaves the most difficult to reduce and caustic traces. If you come across a quality composition from TM "Moment", then only "Anticley" or professional dry cleaning will save. If you were among the lucky ones, and a cheap Chinese composition came to your hand, then everything is much simpler.

  1. A fresh stain is easy to remove with clean gasoline, which is sold in hardware stores and used as a thinner.
  2. If the adhesive composition got on a thick or denim fabric, nail polish remover will save.
  3. For severe cases, you will need a paint thinner.
  4. For delicate fabrics, a solution of water and table vinegar in a ratio of 2 to 1 is suitable. Soak the item in it and wash it by hand.

Stationery glue

The easiest way is to "catch" a stain from stationery glue. Applications, children's crafts and school creativity are to blame. This glue is also easy and comes off to the delight of mothers. It is enough to stock up on laundry soap and a little patience. For white clothes, you should take a bleaching soap for washing. After cleaning, send the clothes to the washer.
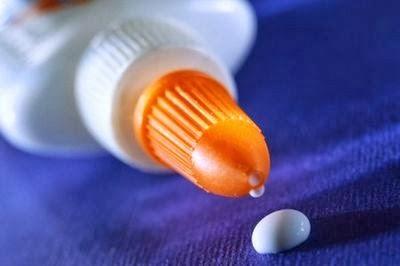
A dried stain should be soaked for 10-15 minutes before cleaning, and only then try to wash it off. If the affected area is large, use a soft brush or sponge.

Verdict

Whatever method you use, remember that the solvent is an aggressive substance. Even with careful handling and the occurrence of the "correct" chemical reaction, there is a chance to ruin the thing. Expensive clothes or delicate items that are only dry-cleaned should be taken to the dry cleaners.