The washing machine creaked - what to do

Your washing machine worked, worked, and suddenly creaked. Why could this happen? There may be several reasons, as well as the creak itself can be different and can be caused by different parts of the washer. If your washing machine creaks, then the first step is to find out what caused this sound, and starting from the cause, you can fix the problem. Therefore, we will describe for you all the possible causes, and how to solve them.

Squeaky drum in washing machine

If you notice that the drum of the washing machine creaks during rotation, then there may be a rather serious reason that will require disassembly of the washing machine.
The drum is connected to the shaft, which is installed in the tank on bearings. In order to prevent water from entering the bearings during washing, a rubber seal is placed on them, which can dry out or even be damaged over time. If this happened, then the gland, which should be lubricated with waterproof grease, begins to pass water, which in turn falls on the bearings. From moisture, the bearings begin to rust and creak.
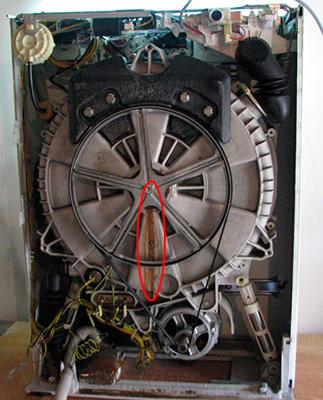
Rust on the tub of a washing machine

If the washing machine creaks during washing precisely because of the bearings, then it is necessary to immediately stop its operation, since the subsequent operation of the bearings in this mode can cause their complete breakdown. If this happens, other parts of the washing machine may be damaged and repair may no longer be possible.

Another reason for the creaking of the drum in the washing machine can be a weakening of the shaft. This is extremely rare, but still. Over time, or from poor assembly, the mounting bolts may loosen. As a result, the drum will be unbalanced and a creak will appear. It is eliminated very simply by tightening the bolts, though getting to them is not always easy.

Small items got into the washing machine

Very often, the owners forget to get out of the pockets of things that they send for washing, small items, trifles, etc. This leads to the fact that during washing these small items fall into the drum and through the slot in the cuff can get into the gap between the tank and the drum. During washing, the drum begins to rub against them and a creak or knock occurs.

To check and get these small things, you need to remove the wall of the washing machine (front or back - depending on the model) and unscrew the heater, through the hole for the heater you can get all the little things that got into the space between the tank and the drum.
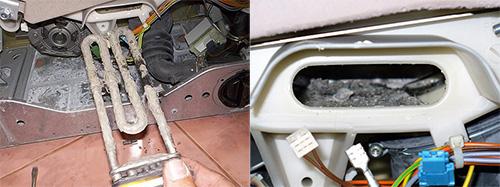
Get the change out of the washing machine through the hole from the heating element
If you hear the characteristic creak of the washing machine drum on the cuff, then the reason may be that during washing, for example bra bone caught in washing machine drum or others small things could get into the cuff itself and get stuck there. Check the entire cuff for the presence of small things, if it is there, then be sure to eliminate it.

If you do not get out small things that are stuck between the tank and the drum in time, the tank may be damaged and washing machine leaking from below.

Stretched belt

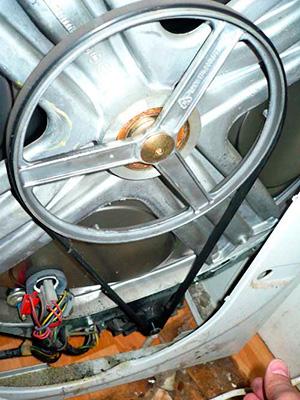
Washing machine belt and drive

If your machine is not directly driven, and has been in operation for more than a year, then it is likely that the belt that drives the drum has worn out. When the belt is stretched, it begins to slip making a characteristic creak. Please note that if your belt is stretched, then squeaking will occur under heavy loads, i.e. when a lot of laundry is loaded into the drum.

If the belt is to blame, then it must be replaced. In some cases, it is possible to simply increase its tension.

Springs and dampers

Springs and shock absorbers can cause the washing machine to creak during washing and especially spinning.
The springs themselves can squeak. The springs are fixed from above in special holes. During washing, they can rub against their mounting holes and make an unpleasant noise.Such a malfunction is not critical and is easily corrected.
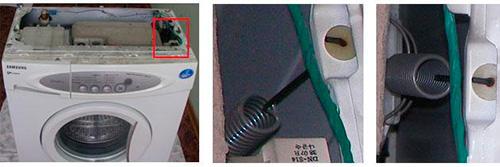
Springs in the washing machine and the place of their attachment

In order to determine that the reason for the squeak is in the springs, remove the top cover from the washing machine and run the wash without it. During washing, when the squeak starts, hold the springs where they connect to the mounting hole (just press with your hand). If the creak is gone, then this is the reason. To eliminate creaking, you can simply lubricate the springs in these places with any lubricant.

The second option is the wear of springs or shock absorbers, as a result of which the tank sways during washing and comes into contact with the walls of the washing machine, which causes a creak.
You can start washing without a top cover and see if the tank is rubbing against the walls of the washing machine and what caused such a malfunction. Inspect shock absorbers and springs, they should not be damaged.
shock absorbers should be well tightened and of course they should cushion. If they have too much travel, and they do not perform their function, then replace them.

The body of the machine creaks

If the machine was poorly assembled, then over time, some body fasteners could loosen and creak during washing. This usually happens with the walls of the machine. In order to eliminate this cause, it is necessary to stretch all the bolts that connect the case to each other. It will also not be superfluous to inspect other connections that may also have loosened, such as counterweight fasteners.

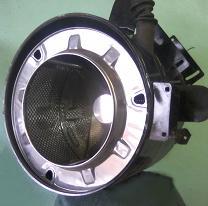
The washing machine tank is one of the most critical parts that is subject to constant loads and temperature changes. The quality of the tank can determine how long the washing machine will last you. Of course, there are many other details in the washing machine that are no less important, but it is worth talking about the tank separately, in particular, we would like to touch on the issue of materials from which the washing machine tank is made.Polyplex or plastic, stainless steel or enameled steel - which is better? We will answer this question in this article.

Immediately make a reservation that the article is discussing the tank, not the drum. Some people when asking a question about the material of the drum have in mind the tank.

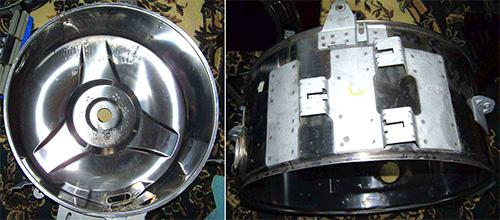
Enamelled steel tank

Enamelled steel tank for washing machine

This type of washing machine tank is made of ordinary steel, which is coated with a special enamel. Enamel well protects the metal from corrosion and prevents the tank from rusting.
But if a foreign object suddenly gets into the tank, then the enamel can be damaged and then corrosion will begin in the place where the enamel chipped. Over time, a hole forms at the site of corrosion, through which water will flow and such a tank can be safely thrown into the trash. Most likely, you will have to throw it away along with the washing machine, since it is unlikely that you will be able to find a suitable replacement.

The positive side of such a tank is that it is quite durable and will not crack on impact, as can happen with a plastic tank. Of the minuses is that a machine with an enameled steel tank will be heavier, and also that the technology is quite old and on modern washing machines you will no longer meet it.

Stainless steel tank

Washing machine stainless steel tank

Such tanks are considered the most durable and most often they are in perfect condition, even when the entire body of the machine has already rotted, and it is no longer suitable for washing. The tank is made of stainless steel, with which we are all so familiar.

But it is worth paying attention to the fact that a stainless steel tank will last a long time only if, if it is made of high quality steel, as well as using the “right” technologies for its welding and assembly. Of course, you need to understand that all these technologies and good stainless steel require a lot of money, so a machine with such a tank will not be cheap. The “correct” stainless steel tank can last up to 100 years.

But if you see a washing machine with a stainless steel tank, the price of which is no different from other models with plastic tanks, then you should not flatter yourself. Most likely the material of the washing machine tank is of poor quality. Such a tank will serve no longer than a plastic one.

If you are wondering which plastic or stainless steel washing machine tank to choose, then first of all measure yourself with the fact that with a stainless steel tank, you only need to buy a premium segment washing machine.

Of the minuses of metal tanks, it is worth noting that the machine works quite loudly with them, because the metal cannot dampen either vibration or noise. Also, the energy consumption of machines with metal tanks is higher than washing machines with tanks from the same polyplex, because metal does not have good thermal insulation.

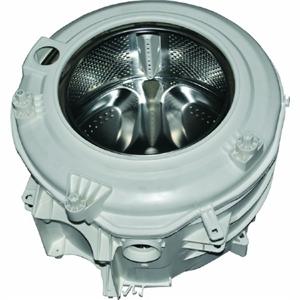
Plastic tanks in washing machines

Plastic tank for washing machine

Washing machines with metal tanks are becoming less and less available on the market and are already harder to find than machines with plastic tanks. That's why It is plastic tanks that are most common today.

On the market you can find cars with tanks made of different polymaterials: Silitek, Carboran, Polinox, Poliplex. All these materials are nothing more than ordinary plastic, which is slightly modified by different manufacturers to suit their needs. Let's say polyplex in a washing machine, like any of the above materials, is designed to dampen vibration and provide good thermal insulation.

There are of course small differences between different types of plastic. Let's say polyplex is more brittle than carborane, which is more ductile and more durable. Carborane is often compared to a stainless steel tank for its properties and durability.

In general, each manufacturer tries to come up with a name for the material from which he makes the tank, but in fact it is all the same.And if the tank is plastic, then it does not matter how the manufacturer called the material.When properly manufactured, the tank should last until the moment when it is time to change the machine entirely.

The advantages of washing machines with a plastic tank are as follows:

  • Lightweight design - due to the fact that it is plastic, and not metal, that is used, the tank itself is lighter, respectively, and washing machine weight too. True, to make it heavier, special counterweights have to be hung on it. But when repairing such a tank, it is easier to remove it than a metal one.
  • Quieter washing machine - the plastic from which the washing machine tank is made has excellent noise attenuation, as well as vibration absorption, therefore, washing machines with such a tank work much quieter than with a metal one.
  • energy efficiency - washing machines with plastic tanks consume less energy, because the tank has good thermal insulation. Accordingly, less energy is required to heat water.
  • Chemical resistance - the tank is made of such material that it does not experience the effects of chemicals: powders, bleaches, etc.
  • Durability - no matter how strange it may sound, but it is the durability of plastic tanks that is also a plus. These tanks can last up to 30 years. Of course, this period is much lower than that of stainless steel tanks. But you yourself imagine what will happen to your machine in 30 years, we think that washing machine life will come to an end and it will need to be changed already.

There is only one minus for plastic tanks of washing machines:

  • fragility - a tank made of polymeric materials is quite fragile, it can break if the washing machine is not transported correctly.Also, a plastic tank can crack during operation of the washing machine if a foreign object gets into it. Also, the plastic tank may crack if you do not unscrew the transport bolts before starting operation.

There are also plastic tanks that are not collapsible, if suddenly, your bearing breaks, then remove drum from washing machine with a non-separable tank will not be easy.

Every day, some new technologies appear in advertising that we have not seen before, this applies not only to the world of electronics, which is developing very quickly. Household appliances, in particular, washing machines also do not stand still and every year their manufacturers improve their products.

One of these “novelties” is a honeycomb drum in a washing machine, what is it, what are its advantages, and are there any at all? We will answer these questions in this article.

What is a typical washing machine drum

conventional washing machine drum

In order to understand what a honeycomb drum in a washing machine means, you must first understand what a regular drum looks like. An ordinary drum is a kind of stainless steel tank, which is pierced with small holes over its entire area. How many holes to make and at what distance from each other is calculated by the manufacturer, so different drums can have a completely different number of holes and their location.

But, of course, all standard drums are made using the same technology - the same principle of hole arrangement.

The disadvantage of any machine wash is that the laundry wears out more with it.. During washing, the linen rubs against the walls of the drum and, accordingly, the threads begin to wear out, which spoils the overall appearance of the fabric.If you conduct an experiment and wash two identical things in different conditions, but the same number of times: one in the machine and the other by hand. Then after a while you will notice that the thing that was washed in the typewriter is more worn out.

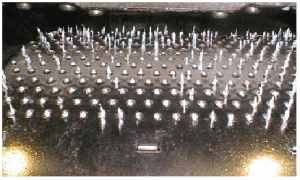
This happens for the following reason, in addition to the fact that during washing the linen rubs against the walls of the drum, the so-called “pulling” of the linen into the holes in the drum also occurs.During the time when the drum is spinning intensively, the water, along with the laundry, is pushed outward by centrifugal force. And the fabric begins to tighten into the holes.
Fabric pulled into the drum of a washing machine

Of course, manufacturers try to minimize this process by drawing up the right washing programs for different types of laundry, but fabric wear is still inevitable.

What is a honeycomb drum in a washing machine

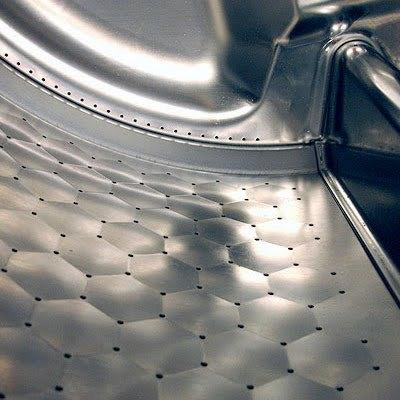
Honeycomb drum washing machine

In order to reduce the effect that we described above, one of the well-known manufacturers of Miele washing machines invented the so-called honeycomb drum (European washing machines have always been renowned for their technology. As the manufacturer himself says, the technology was not invented by them, but by nature itself, they only took the idea of ​​​​arranging honeycombs and introduced it into their technique. Of course, this is a very beautiful fairy tale and no less beautiful marketing ploy.
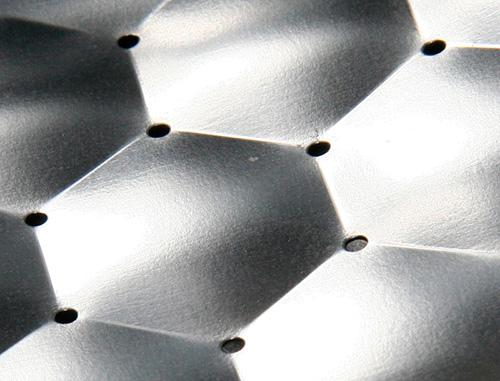
Maybe, of course, they took the honeycomb as a basis, but still, it is unlikely that the bees themselves are somehow connected with washing machines. The drum is really made in the form of honeycombs, at the corners of which there are small holes for water circulation.
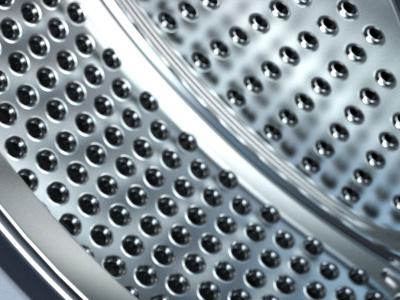
Holes in honeycomb drum

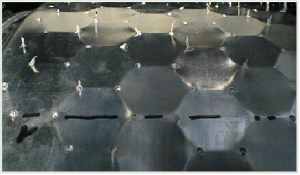
Be that as it may, but the manufacturer managed to achieve the best resultthan with a conventional drum.Washing machines with a honeycomb drum made it possible to wash clothes more gently, damage the fabric less during washing and spinning, and also not “pull” it into the holes so much.
Fabric pulled into the honeycomb drum of a washing machine

If you look at the honeycomb drum, even to the eye it seems smoother and there are noticeably fewer cavities in it, which destroy the fabric during washing. It can be said for sure that this technology is significantly superior to conventional drums in terms of gentle washing of clothes. As for the rest washing machine working principle with a honeycomb drum is completely similar to a conventional washer.

Advantages and disadvantages of honeycomb drums

Of course, like any other technology, it has its advantages and disadvantages. Let's go first Let's look at the benefits.

  • Smoother drum - as we wrote above, the drum turned out to be smoother, and accordingly this reduces the wear of the fabric during washing.
  • Small holes for water circulation - due to the fact that the holes have been reduced, the water lingers longer in the drum, forming a thin film that protects the fabric from friction. Also, due to the smaller holes, the fabric is less drawn into them.
  • Honeycomb structure - also allows you to reduce the friction of the fabric on the walls, which adds a certain plus to the treasury of benefits.

Of the shortcomings, only the price can be distinguished. Yes, you have to pay for new technologies. Many buyers question the wisdom of overpaying for a honeycomb drum washing machine, but that's up to everyone. Undoubtedly, such a drum is more efficient than a conventional one. When buying a washing machine, be sure to pay attention to the material from which it is made, and read more about this issue in our article. Choosing the material of the tank in the washing machine.

Honeycomb Drum Diamond and others

Honeycomb Drum Diamond

Miele's honeycomb drum technology has also caught the attention of other manufacturers, who have also begun to invent their own drum designs to make laundry more gentle.

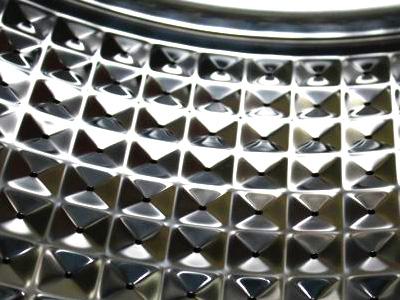
Samsung decided to call its Diamond drums also cellular, although they are not as similar to honeycombs as those of Meile, but more, probably, on the verge of diamonds. The principle of diamond drums is similar: the manufacturer has reduced the hole itself and their number. As he himself claims: the total area of ​​the holes was reduced by 79%. Also, recesses were made in the drum, in which holes are located.

All these innovations are designed to achieve the same goal - to improve the quality of washing and reduce wear and tear on things.

Other manufacturers began to invent their own types of drums.But they all follow the same principle - reduction in the diameter and number of holes; and such an arrangement to reduce the tightening of the fabric during washing and spinning.

Some home appliance manufacturing countries have long established themselves as reliable suppliers of equipment that does not break down and works like clockwork. One of these types of equipment are Italian washing machines, which are not inferior to many German and are very popular in our country. If you decide to buy an Italian-assembled washing machine, then our advice will be of great help to you in this venture. Here we will consider the most important points when choosing such a technique.

Brands of washing machines made in Italy

In fact, not only Italian washing machines can be produced in Italy. Some famous German washing machine brands transfer their production to this country, becauseconfident in the high quality of production. For example, an Italian-made electrolux washing machine is actually a Swedish brand. Therefore, we will not consider these manufacturers, but will focus only on purebred "Italians".

Hotpoint-Ariston
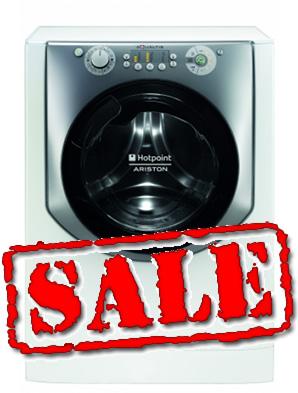
Washing machines ariston Italian assembly is nothing more than the well-known Indesit. If you did not know about it, Indesit and Hotpoint-Ariston are the same manufacturer, which is represented in our country under two brands. Ariston are distinguished by high build quality, and also do an excellent job of washing clothes. Of the minuses of this brand, its strong vibration is noted, but we tend to think that vibrations during the spin cycle are most often due to improper installation of the washing machine. Also, for this model, the tank is not collapsible, that is, if suddenly your bearing “flies”, you will have to try to change it.

Indesit
Italian brand Indesit - this is a well-known brand not only in Italy itself, but also in our country.At the moment, the production of these washing machines is organized in several countries, including Russia, so if you want a native assembly, you will have to try and look. A distinctive feature of these washing machines is the presence of the Eco Time function, which, according to the manufacturer, reduces the consumption of electricity and water by 20%.

Ardo
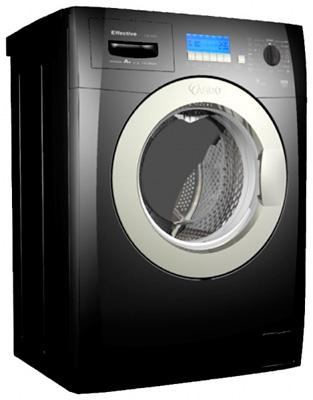
Washing machines - Another popular Italian brand, which in our country is in great demand among buyers of equipment. Excellent build quality and washing wins the hearts of many. What is also captivating in this brand is that on the shelves of our stores you can find exactly the Italian assembly, which is undoubtedly a plus, because such a machine will serve you longer.

candy
Candy - these washing machines are especially popular in our country. Their popularity is due to their affordable price. Indeed, Kandy, with its cheapness, has simply excellent functionality. They also look very decent and modern. It is worth noting that the production of these washing machines is dispersed in different countries, so it is very difficult to find an Italian-assembled Kandy washing machine.

Zanussi

Zanussi - This is a rather old Italian brand, which is popular not only for washing machines, but also for other types of household appliances. As for washing machines, it is worth saying that they are quite high-quality and reliable, they do an excellent job with their tasks. It should be noted that the repair of these washing machines is not always appropriate due to the high cost of parts and the complexity of the repair itself. The rest of the machines are not even bad.

Advantages of Italian washing machines

Washing machine

We have already talked about the advantages briefly, but it is worth paying closer attention to them. The main advantage of Italian cars is high quality at an affordable price. These machines can really serve no worse than German ones, without yielding to them in any way, but, unlike them, they are cheaper.In addition, finding an Italian-assembled washer in a store can be much easier than the same German one.

If we compare the same typewriters made in Italy and Korean washing machines, then the latter are inferior in quality, at almost the same price.

When comparing, we look at cars of the same class and a set of identical functions.

Repairing Italian washing machines today is not difficult, all parts are easily bought in specialized stores or replaced with analogues. Repair masters are also very familiar with this type of equipment.

How to buy an Italian-made washing machine

Washing machine Hotpoint-Ariston

Today it is very difficult to find a real Italian assembly, because most washing machines are produced in our country or in the nearest neighboring countries. Even if parts are not produced, they are assembled there.

To determine in which country the washing machine was produced, you need to look at its “label” on which the country of origin is indicated, most often it is located behind the washer. You can also ask the sales assistant in the store to show the documents for the washing machine. They should clearly indicate the country where the machine was assembled.
Some buyers think that you can determine the country of manufacture by the barcode. This is not entirely true, because the birthplace of the brand is indicated on the barcode, but not the place where this model was assembled.

As a result, I would like to note that manufacturers who care about maintaining a good reputation for their brand monitor their production regardless of the country. Therefore, the quality control of one manufacturer in different countries should be the same. Reviews of experts on choosing a washing machine very different and there is no consensus on this matter.

Hand washing is no longer relevant in our century, because each of us has such a miracle of technology at home as a washing machine.And it's no secret that the washing machine makes our life very easy, we don't have to waste hours of our time washing dirty laundry. But how to wash in a washing machine correctly and more efficiently in terms of savings? We will talk about this now. You will also learn from this article how to properly wash different things in the washing machine, whether it be cotton fabrics, synthetics or silk.

Preparing to wash in the washing machine

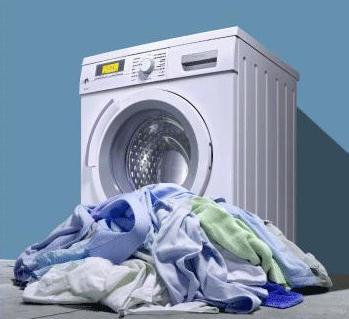
Things in front of the washing machine

Before you start washing, you need to prepare the laundry.

  • Separate colored clothes from whites, you do not need to wash them together, because colored things tend to shed, so after washing white linen will no longer be so.
  • Wash baby clothes best separate from adults, so split them into two washes.
  • Also desirable sort items by fabric type. It is impossible to wash things made of silk together with synthetics. Of course, you can wash, but these two fabrics require different washing programs.
  • If you decide to wash bedding, then read our an article about the rules for washing bed linen.
  • Remove all items from clothing pockets. Many people forget in their pockets a change, keys and other items that can deteriorate themselves or ruin the washing machine.
  • Remove the belts from your trousers, as well as all foreign objects, such as icons, they can ruin both the thing itself and the washing machine during the washing process.
  • If there are zippers on the clothes, then it is better to close them..
  • Experts also advise before washing turn all clothes inside out.
  • Small items of clothing, such as bras, are best wash in special laundry bags.
  • It is advisable to use the powder only the one that is intended for washing your things. That is, for washing colored fabrics, you need to use the appropriate powder, for white things your own.
  • Be sure to read the rules for washing your clothes. To do this, you need to find a label on the seam of clothes, which indicates the washing rules. Learn more about badges on clothes you can read on our website.

If you follow these washing rules, it will be difficult to spoil the item or damage the washing machine. Next, we will consider the moments associated with the washing itself.

Rules for washing in a washing machine

These rules are very important, because they allow you not only to properly wash your clothes in the washing machine, but also to make it as profitable as possible for you.
Temperature and modes of the washing machine

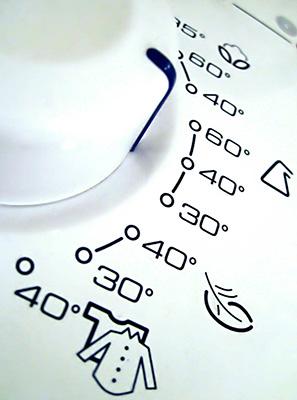
  • It is necessary to wash only on the appropriate laundry program. For example, you wash cotton in the washing machine, so you need to select the program “Cotton” in order to get the best result. Speaking of things made of white cotton - such linen can be washed at high temperatures and even boiled.
  • For delicate fabrics, you need to use advising programs. Do not wash woolen items on programs for regular linen, because they can be damaged, the same applies to items from other delicate fabrics. Also for such things it is best to turn off the spin cycle at the end of the wash.
  • If things are not too dirty, then use the quick wash programs. This will save you both electricity and water, as well as washing time. Things that do not have strong pollution are perfectly washed in cold water.
  • Use special membrane laundry detergents. Various modern materials require special preparation for washing, and the washing itself must take place under the necessary conditions.
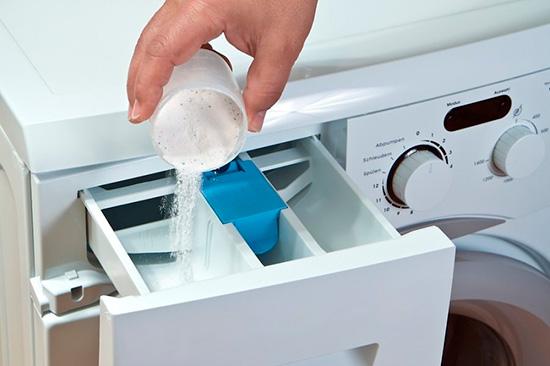
  • You don't need to add a lot of powder. Many housewives think that more powder will wash the thing better, this is not at all the case. If there is too much powder, then they will either not dissolve in water, or there will be too much foam and will stop the wash. The powder should be put exactly as much as its manufacturer advises. This information can be seen on the packaging.
  • It is better to wash less often. It is better to save up laundry and wash everything at once in one wash, rather than wash several times one T-shirt.This will save you a lot of money and also increase the life of your machine.

Pour washing powder into the machine

If you use the washing machine correctly and follow all the necessary rules, then you will extend the life of your equipment and things.

Washing dirty linen

Separately, it is worth mentioning the washing of heavily soiled linen in the washing machine. Such laundry may not be washed if you use a regular washing program, so if the laundry is really very dirty and has stubborn stains, then there are several options:
Manual washing

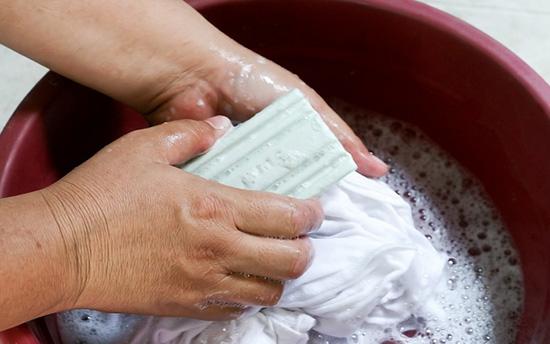
  • Before washing in the washing machine linen must be washed by hand. No matter how crazy it may seem to you, this is the best way to get rid of stubborn dirt. In order to do this properly, soak the laundry in a basin of soapy water for a while. After that, rub the stains with laundry soap and rub them well. For the lazy, you can simply rub the stains with soap and after that send the clothes to be washed in the washing machine on a regular wash program.
  • The second option is more convenient, but depends directly on your washing machine. Many machine models have prewash program. This program runs two washings in a row, which should cope with difficult soiling. You can use this program. To do this, the powder is poured into two compartments and the necessary washing program with the prewash function is started.
  • If you do not have such a program, then you can do two washes independently, simply by running the wash twice in turn.
  • If things are white, then you can use the second laundry with bleach. But in any case not with chlorine. For washing machines, special oxygen bleaches are used that do not harm equipment.

The tachometer of a washing machine is a small device that is installed on the engine rotor to control its speed. The tachometer is also called the tachogenerator of the washing machine. In some washing machines, such a sensor is called a Hall sensor, it is slightly different, but their principle of operation is exactly the same.

The principle of operation of the tachogenerator in the washing machine

Tachogenerator in a washing machine

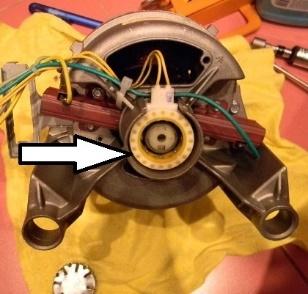
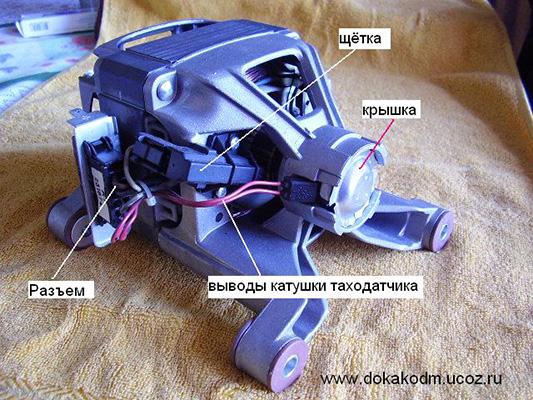
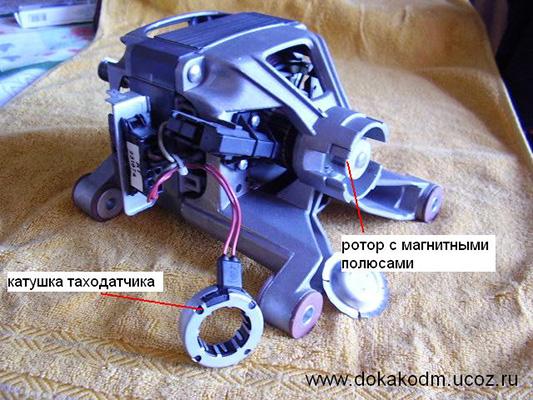
The principle of operation of the tachometer is quite simple. The tachogenerator itself is located on the motor shaft and is a small ring with wires. When the motor rotates in the ring, a voltage is generated due to the magnetic field (generator principle), the higher the speed of rotation of the motor, the higher the voltage. Accordingly, by measuring this voltage, you can get the speed of rotation of the engine.

It is for measuring the speed of rotation of the engine that the tachometer in the washing machine is used. The principle of operation is the following. Suppose the engine spins up and starts to rotate the drum, in order to activate the spin, you need to increase the number of engine revolutions to 800 rpm. The control module gives a signal, gives a command to increase the engine speed, but when do you need to stop raising the speed? For this, a tachogenerator is needed, it constantly gives the parameters of the engine speed and thereby allows the control module to make decisions about the speed of rotation of the motor.

Symptoms of a faulty tachometer

If the tachometer breaks in the washing machine, then it begins to behave as follows. Since the number of revolutions is not controlled, the machine starts to rotate the drum at the wrong speed.During washing, the speed may be too high, and during the spin cycle, on the contrary, the speed does not rise. The machine may not spin the laundry at all. Such "glitches" indicate that one of the reasons for their appearance may be a tachometer.
To check the tachogenerator of the washing machine, you must first get to it.

These symptoms may be not only due to a breakdown of the tachometer, but as a result of other washing machine malfunctions.

Where is the tachometer located in the washing machine

The location of the tachometer in the washing machine

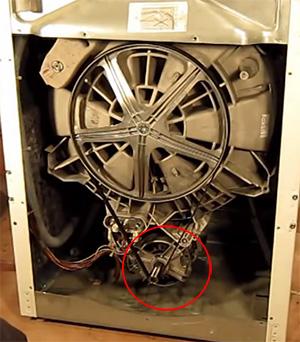
The tachogenerator of the washing machine is located on the motor shaft, which is installed at the bottom of the washer. To get to the engine, you will need to remove the rear wall of the machine. To do this, unscrew the bolts that secure this wall and remove it. The engine is at the bottom and connected with a belt to a pulley, you can see it right away.

The tachometer is located on the rear of the motor on the shaft. To check or replace it, it will be necessary to remove the engine, this procedure is described in detail in do-it-yourself article on repairing a washing machine engine.

How to check the tachometer on a washing machine

Washing machine tachometer device

To check the tachogenerator, it is optional to remove it from the engine, but the engine itself will have to be removed from the washing machine. First you need take off the belt from the motor shaft. Next, unscrew the bolts securing the motor, pull the motor out, after disconnecting the wires from it.

To check the tachometer for operability, do the following:

  • First, disconnect the tachometer wires from the connector, and then measure the resistance on them. To do this, you will need a multimeter, which must be switched to resistance measurement mode. The normal resistance of the tachogenerator should be around 60 ohms.By the way, you can do this procedure without removing the engine from the washing machine.
  • To make sure that the tachogenerator works and produces current when the engine rotates, switch the multimeter to voltage measurement mode. While measuring the voltage at the terminals of the tachometer, turn the engine by hand. The tension must rise. When the motor is rotating, it is usually around 0.2 V.
  • If everything is good, check the tachogenerator mounting bolt, very often it relaxes and the sensor starts to “fail”. If he is relaxed, pull him up.

If your tachogenerator did not pass these tests and its fastening bolt was tightened, then it's time to change it. The tachometer breaks most often due to overloading the washing machine.

The tachometer itself fails extremely rarely, because it is a fairly reliable part, so check all the contacts for its connection, as well as other malfunctions.

How to replace a tachometer in a washing machine

Washing machine tachometer parts

First we need to remove the tachometer from the washing machine. To do this, you first need to disconnect the connectors of the tachometer, if you have not already done so. The connectors can either simply be pulled out or be fixed in a common block, from where they must be carefully pulled out. Using a thin slotted screwdriver.
Next, you need to remove the tachometer cover, it usually snaps into place. Lids are either metal or plastic. Also, the cover can go together with the tachogenerator and is fastened with bolts. We unscrew the bolts that secure the tachometer and remove it.

Assembly is in reverse order. In the video below you can see how to remove the motor from the washing machine.

Many people wonder: is it possible to wash shoes in a machine? Washing shoes in a washing machine is possible if you follow a number of rules that will allow you not only to save things, but also the washing machine itself. We will talk about how to wash shoes in a washing machine and about which shoes should not be washed.

What shoes can be washed in the washing machine

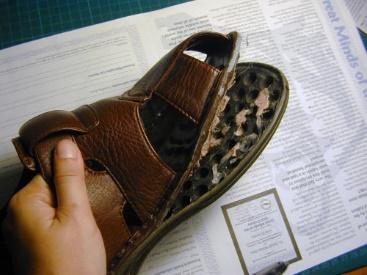
Shoes falling apart after washing

Laziness is the engine of progress. For this reason, they try to put everything that needs to be washed into the washer, not paying attention to the instructions for washing these things. As for shoes, their manufacturers prohibit machine washing. This is due to the fact that with such a wash, shoes experience strong mechanical and thermal effects that are not characteristic of them. But in fact, not everything is so bad, yet some shoes can be washed in a washing machine without fear for their condition.

You can wash sneakers in the washing machine or sneakers, i.e. sports shoes. It is not subject to damage and easily tolerates such washing.But before you make sure that you can wash sneakers in the washing machine of your manufacturer, read the following:

  • Do not wash leather shoes in the washing machine This also applies to sports shoes. The skin after washing will shrink and lose its appearance and shape, so refrain from such washing.
  • Wash suede shoes also in the washing machine Absolutely forbidden - suede is even more susceptible to moisture than leather, and after washing, shoes from it can be sent to a landfill.
  • Do not wash damaged shoes in the washing machine - if your sneakers have any defects, somewhere something is torn off, then machine wash will finish them off completely. Refrain from washing such shoes.
  • Do not wash shoes with jewelry - if your shoes have a lot of rhinestones or reflective stripes, a bunch of stripes, then all of them can fly off during washing.
  • Do not wash low quality shoes - dubious Chinese sneakers are usually kept on cheap glue, which will fall off after washing and your sneakers can be thrown away. If the quality of your shoes is questionable, then it's not worth the risk.
Especially do not worry about sneakers, because they are made of fabric that tolerates washing perfectly. If you wash sneakers, then you should pay attention to the junctions of the sole with the fabric, there should not be any damage.

How to wash shoes in a washing machine

Washing shoes in a washing machine

Wash sports shoes in the washing machine, like any other, according to the following rules:

  • Unlace your sneakers and remove the insoles before washing. - this is true for those shoes where there are laces and the insoles are not glued. It is best to wash these parts separately.
  • Sneakers must be free of mud. - remove all adhering dirt from the shoes, also pebbles, leaves and other debris that could get stuck in the sole tread. If the dirt does not lag behind, then the shoes can be soaked in soapy water for a while.
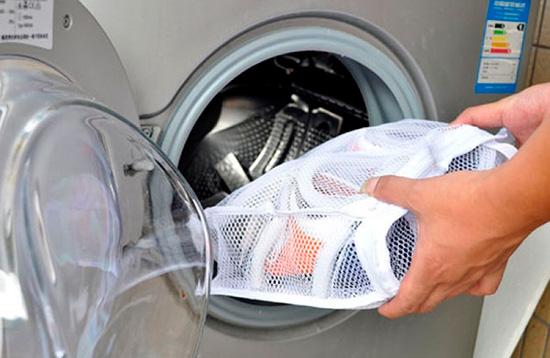
  • Washing must be done in a special bag - in order for the shoes not to literally fly on the drum of the machine, it is necessary to use laundry bag. Instead of a bag, you can put your sneakers together with other underwear (which is not very sorry), placing them inside. Or use a pillowcase for these purposes, which is also not a pity.
  • Do not wash multiple pairs of shoes at the same time - it is recommended to wash no more than one pair of shoes, in extreme cases two.

If you have prepared everything, then you can proceed directly to the wash. To do this, put the sneakers in a laundry bag and put them in the drum. Close the hatch and pour in the powder. For washing, it is best to use a liquid detergent that is well washed out. Perfect fit membrane washing agent, which is also used for all sportswear and footwear. If you're washing sneakers, find a liquid laundry detergent for sportswear at the sports store, it's great. If there is no desire or opportunity to buy such a product, it can be washed with the most common powder for automatic machines. But don't put too much of it.

Then choose a washing program. The ideal option would be a special program for shoes, but not many washing machines have it. Therefore, in its absence, you need to choose delicate wash program. Such a program will allow you to most “softly” wash your shoes without damaging them.

Be sure to check that the washing temperature on the program does not exceed 40 ° C, if this is not the case, then set this washing temperature. It is also important that there is no spin at the end of the wash, so turn it off or check that the washing program is without using it.
If you have a washer dryer, disable this feature.

Spinning at high speeds can seriously damage your sneakers or damage your washing machine. The drying mode can also severely damage the shoes themselves.

Now you just have to turn on the start of the program and wait for the machine to finish its work.

During washing, the shoes hit the walls of the drum, so you will hear a strong roar. Don't be scared, it's normal.

Proper drying of shoes after washing

Drying shoes

If you think that the most responsible process is washing shoes, and you can dry them on a battery, then you are mistaken. Drying shoes is a very important process that can harm them.

In no case do not dry shoes at high temperatures (on batteries, in steam rooms, in the sun, etc.), as high temperatures can damage them very much. In the best case, the shoes will lose their shape, in the worst case, the whole thing will fall apart.
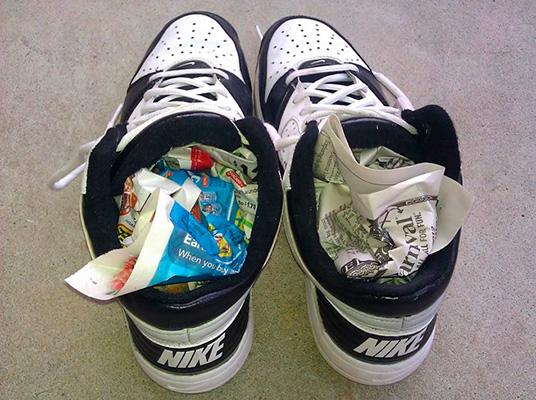
  • Before drying inside the shoes it is necessary to push lumps of white paper (colored or newspapers can dye the inside of shoes) to give them the correct shape.
  • Shoes should be dried at room temperature. in a well-ventilated area out of direct sunlight.
  • After the shoes have dried, they must be treated with a water-repellent impregnation. - such an impregnation is sold in any shoe store and is an aerosol that should be applied to dry shoes.

Wait until the shoes are completely dry and you can insert clean insoles and laces into them.

Progress does not stand still and every day more and more advanced washing machines appear that delight us with their functionality and ease of use. However, not only the functionality of washing machines is of interest to users, many people pay great attention to its dimensions when choosing a washing machine.

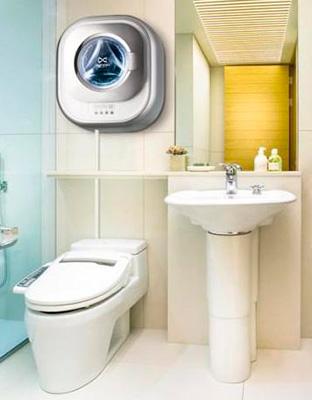
For those who save a lot on square meters of their area, manufacturers have invented a wall-mounted washing machine. Yes, you understood everything correctly, such a washing machine is hung on the wall, like, say, a heating tank or a cupboard in the kitchen.

It is about such washing machines that we will talk today, find out their advantages and disadvantages, and also try to find out about all the pitfalls of such a technique.

Overview of the wall-mounted washing machine

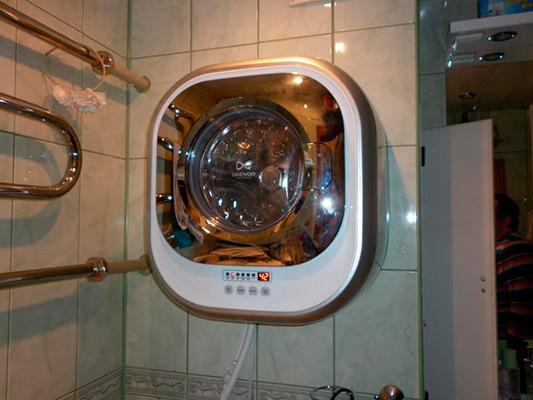
Bathroom with wall-mounted washing machine

In fact, such washing machines have not been put on stream, and so far only Daewoo has developed and presented the DWD-CV701PC machine, which is installed on the wall. Very soon this model appeared in stores and now you can find it on Yandex. Market and see its description and characteristics.

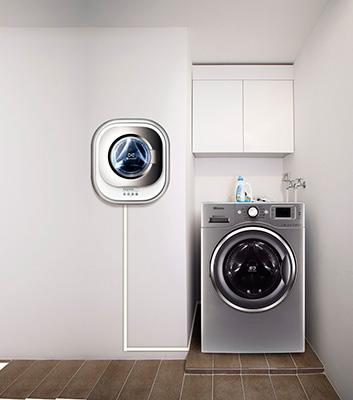
The wall-mounted washing machine is attractive in that it takes up very little space. You can literally hang it on the wall. At the same time, it will not spoil the appearance, because it has a modern high-tech design.

This washing machine was conceived as an additional washer for the home, in which you can quickly freshen up clothes, because this model is much quieter and more economical than a conventional washing machine, and if you need to wash one T-shirt, then it makes no sense to run a “big wash”.

It is important to choose the right place for installation, since not all walls are suitable for this. It is important to study the plan and determine a suitable place - do not choose thin walls or reinforced concrete columns

Characteristics of the wall-mounted washing machine

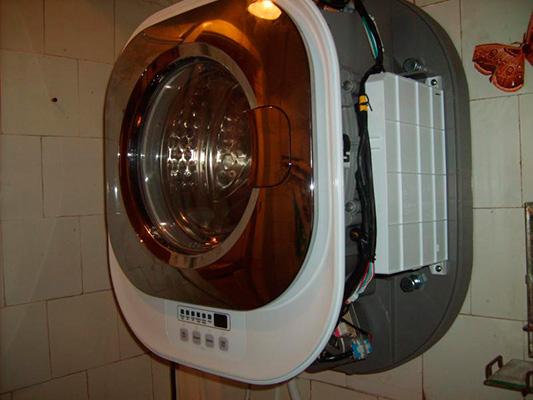
Wall-mounted washing machine without lid

  • Daewoo washing machine on the wall has the ability to wash up to 3 kg of laundry in one wash. As you understand, this is a very small volume and is not suitable for a large family, but it is perfect for one person.
  • But in the washing machine there is a spin of 700 rpm (spin class C), which is quite enough to ensure that water does not flow from the laundry after the end of the wash.
  • The DWD-CV701PC washing machine does not have a drain pump. That is, according to the manufacturer's idea, water should drain into the sewer by gravity, due to the fact that it is not on the floor.
  • Set of 6 washing programs not very large, but allows you to wash almost any thing.The maximum possible washing temperature is 60°C.
  • Wash class B allows you to wash lightly soiled things, but for a snow-white result it falls short.
  • The weight at the washing machine 17 kg, which is very small compared to a conventional unit.
  • Dimensions of the wall-mounted washing machine 55x29x60 cm, which is quite small.

As you can see, the machine cannot boast of its characteristics, they are quite modest, but it will give odds to the “big” competitors in the size race, it has no equal here.

A special requirement for the installation of this washing machine is a good solid wall without internal voids, which can withstand the necessary load and nearby sewer pipes.

Washing machine testing

Wall-mounted washing machine

In the video below, you can see how the process of washing a wall-mounted washing machine takes place and what happens in the end. We can only comment on the result, which was obtained during testing of the DWD-CV701PC model.

It is safe to say that the machine does its job well and washes even difficult stains. Of course, if you compare the quality of washing with a conventional class A washing machine, then the wall-mounted one is inferior. But compared to washing machines of a similar washing class, a wall-mounted washer is not inferior in anything, but even wins.

Separately, I would like to note that during its operation there are no vibrations, also, with the exception of spinning and draining water, the machine works almost silently. Draining and spinning itself also do not cause discomfort.

Daewoo wall-mounted washing machine reviews

Wall-mounted and simple washing machines

After analyzing user reviews about the DWD-CV701PC washing machine, we can draw the following conclusions:
Advantages:

  • small dimensions - machine is very thin and compact, does not take up space on the floor, which is the main argument in choosing it.
  • Convenient loading of linen - no need to bend over, the machine hangs within reach at arm's length.
  • Excellent appearance - the design of the washing machine pleases its owners.
  • Washes quickly - washing programs are short enough to wash soiled laundry quickly.
  • Quiet operation - really the machine is almost silent and does not disturb their owners during washing.
  • Economical - a wall-mounted washing machine saves not only water and washing powder, but also electricity.
  • Excellent quality - today these washing machines are produced and assembled in Korea.

Flaws:

  • Small amount of loadable laundry for washing - if you accumulate mountains of dirty laundry, then this machine is not for you.
  • Weak spin - if you compare the wall-mounted washer with ordinary ones, then the spin is much inferior.
  • Not the best quality of washing - again, in comparison with standard washing machines.
  • Difficult installation - not every master will undertake the installation of such a washing machine, because there is no experience.
  • High price - the price is slightly above average. But today you will not find analogues on the market.

The washing machine inlet valve is a small device that allows you to automatically supply and stop the flow of water into the washing machine. In simple terms, the inlet valve is a kind of ordinary faucet, in any case, it performs a similar principle. Only the faucet you turn manually in order to open the water, and in the case of a valve, water is supplied automatically.

The principle of operation is as follows: when you activate a washing program, the control module sends a signal to the solenoid inlet valve. Voltage is applied to the valve coil and an electromagnetic field is formed in it, this field opens the valve itself and the water supply begins. After the water in the machine has reached the desired level, the voltage supply to the valve coil is stopped and it closes.

Types of filling valves for a washing machine

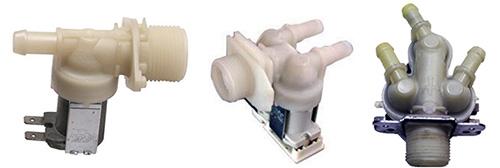
Various filling valves

Filling valves for washing machines may be different. Above, we simply described the principle of operation of a solenoid valve, but in reality everything can be more complicated. After all, water must be supplied not through one hose, but through several at different times.

The most primitive valves for washing machines have one coil, usually these are installed on old washing machines. In them, the coil opens the water supply, and through which tube and into which compartment of the powder dispenser it will flow, it mechanically regulates the command device. But you will not see such machines in stores now.

Other solenoid valves for washing machines include two or three sections with valves. Depending on which compartment you want to send water to, a certain coil is activated and the necessary valve opens. So, by actuating the desired coil, the direction of the water changes. If the valve has only two coils, then the third direction is activated by opening both sections. Otherwise, a third additional section is required.
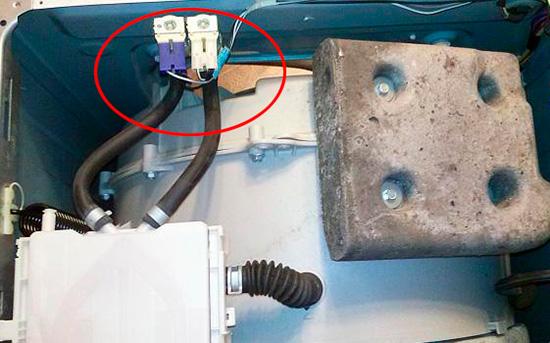
The location of the water inlet valve in the washing machine

As you can see, the principle of operation is very simple and does not raise questions.

How to check the water supply valve in the washing machine

Checking the water supply valve

But, like any other part in a washing machine, the valve can fail. If this happened, then your washing machine stops drawing water. In order to check the valve, do the following:

  • First of all, you need to check is the valve clogged?, to do this, unscrew the water supply hose, and pull out the mesh filter. Clean it up.
  • Remove the valve from the washing machine and connect the water supply hose to it, open the water tap. The valve must not let water through. Next you need apply 220V voltage to each section in turn. Depending on which section you apply current to, the valve should work and water should flow from the corresponding tube. If any valve coil of the washing machine does not work, then it is out of order.
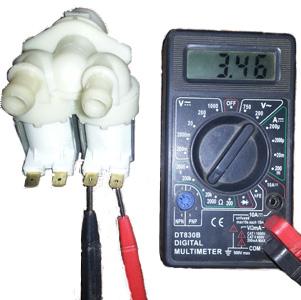
  • You can also check the performance of the valve coil with a multimeter, to do this, measure its resistance, if it is in the region of 2-4 kOhm, then the coil is in order, otherwise it is not working.
Be very careful, because if water gets on the bare wires, it can cause a short circuit, and you will also be susceptible to electric shock. So think about safety.

Washing machine valve repair

If we talk about repairing the inlet valve in a washing machine, then theoretically it not repairable. In practice, you can try to replace the burnt coil with a similar one that can be removed from another valve. But we would not recommend doing this, because the effort may not be justified.

It's best to buy a whole new valve and replace it, it won't cost you a lot of money, but it will save you a lot of nerves and time.

How to replace the water inlet valve in a washing machine

If you have a new valve and you are ready to change it yourself, then follow the instructions below.
Before starting repairs, you need to find the place where the inlet valve is located in the washing machine. Typically, manufacturers place it at the top of the washer, and in top-loading machines at the bottom.
Unscrew the water supply hose

  • First of all, turn off the power to the washing machine. Shut off the water supply and unscrew the inlet hose from the valve.
  • To get to the valveif it is on top, remove the top cover washing machine, to do this, unscrew the two screws located at the back, slide the cover back and remove. For top-loading machines, the side wall must be removed.
  • Now you all wires and hoses must be disconnected from the valve. The hoses are attached with clamps that can be reused. In some cases, the clamps are disposable, then take care of new ones in advance.
  • Now you need detach the valve itself from the body of the machine. It can be screwed in or secured with latches. You need to either unscrew the fixing bolts or bend the latches.
  • Once the valve is unscrewed, it must be turned to pull it out.

Removing the water supply valve in the washing machine

Be sure to remember the position of the wires and hoses that connect to the valve, or rather take a picture.When connecting, you must adhere to the same scheme for connecting them.

Installation of the washing filling valve of the washing machine is carried out in the reverse order. After you put everything in place, check the performance by running the washing program.

When do you need to replace the pump in the washing machine? Most often, the drain pump fails after a long time of operation of the unit. In this case, all modern machines give an error code, by which you can determine that it is time to change the pump.If the drain pump fails during washing, the water will not be drained from the tank.

If you have such a breakdown, then here you can find out how to change the pump on the washing machine to a new one. You can buy a drain pump for your washing machine online. To do this, find a seller of spare parts for washing machines and leave a request, indicating the brand of your machine. We will assume that you have already bought the drain pump and now it remains to change it.

Depending on the model of the washing machine, the drain pump can be replaced both without removing the walls, or with removing the back or front wall. We will consider all options. Also if you want lengthen the drain hose, then this instruction will help you understand how it is attached to the pump.

The article presents standard situations for the listed brands. If you did not find your washing machine model here, then this will indicate that it is being repaired differently. One of the methods listed here will probably work for you.
First of all, see if your washing machine has access to the drain pump through the bottom, this is the easiest way to change the pump. Also mark the location of the pump on the snail to put the new one in the same way.

How to change the drain pump on Samsung, Indesit, Beko, Ardo, Whirpool, Candy, LG, Ariston washing machines

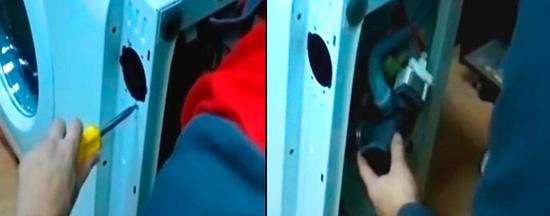
In these models of washing machines, the pump is very easy to change; to replace it, you do not have to disassemble the machine or remove its walls, because all the work happens through the bottom.
Washing machine disassembly

  • The first thing to do is unplug washing machine and turn off the water supply.
  • First, lay the washing machine on its side. The drain pump should be at the top of yours.We recommend laying some kind of fabric under the washing machine so as not to spoil the coatings.
  • After that, remove the lower plastic panel by snapping it off. If there is a plastic panel on the bottom of the washer that covers it, unscrew it and set it aside.
  • Now unscrew the pump from the body. The screws that hold it are on the outside, you can see them next to the drain valve.
  • Press down on the drain pump from the outside (from the side of the drain valve), and bring it out.
  • Disconnect the wiresgoing to the pump, to do this, simply pull the chip off the pump.
  • Now you need to prepare some kind of container to drain the remaining water. If she's ready then loosen the clampsthat hold the drain pipe coming from the tank and the drain hose. Usually, the clamps are easily unclenched with pliers or unscrewed with a screwdriver.
  • Now remove the pipe and drain hose over the container that you prepared in advance, because the remaining water may leak.

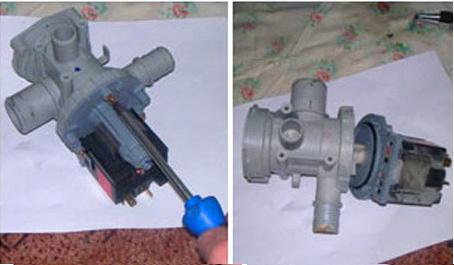
If you change the pump along with the snail, then you just need to put it in place in the same sequence. If your snail is in good condition, then leave it. To do this, unscrew the pump itself. Usually it is mounted on three bolts, there are also snap-on mounts. Either way, you won't get confused. Simply unscrew the screws that connect the volute to the pump and separate them.
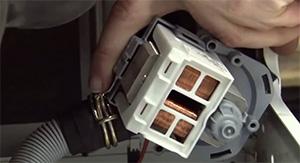
washing machine pump

Before screwing on a new pump, clean the snail well from dirt. Pay special attention to the seat on which the pump sits, it should not be in the dirt.

Then collect everything in reverse order.First, screw the pump to the snail, and then connect it to the nozzles. Don't forget to put the wire back in place.
In the video below you can see the detailed pump replacement process:

Replacing the pump on washing machines Bosch, Siemens, AEG

AT German washing machines, unfortunately, it is more difficult to change the drain pump, because their bottom is closed and we won’t be able to get to the pump from below. The best option is to remove the front wall.

The front wall is removed quite standardly, and we have written about it more than once on our website:
Removing the front cover of the washing machine

  • Remove the top cover of the washing machine, to do this, unscrew the two screws that are located at the back of the washing machine. Then push the cover back and remove it.
  • After that, remove the lower plastic panel, behind which is the drain valve. It can be unscrewed and drained of the remaining water, so that subsequently all work takes place in a dry environment.
  • Now we need to remove the top panel with control buttons. To do this, pull out the container (where to put the powder in the washing machine) and unscrew the bolts securing the panel. The panel is wired to the rest of the washing machine. You just need to carefully place it on top so that it does not interfere.
  • Next, we need to remove the cuff from the front wall. To do this, find the junction of the cuff clamp and remove the clamp with a screwdriver. The cuff must be removed from the wall and filled inside the drum.
  • Remove the bolts that secure the drain pump. You can find them next to the drain valve.
  • Now it remains to unscrew the bolts securing the front wall. They are located on the top and bottom of the washing machine. Unscrew them.
  • The front wall can be removed, but carefully, because the hatch closing lock is connected by wires. You can also unscrew it or put your hand under the panel and pull out the wires.

If you removed the front wall of the washing machine, then now you can proceed to replace the pump. Everything is done by analogy with other models of washing machines.

  • Disconnect the wires that are connected to the pump
  • Next, loosen the clamps that hold the water supply pipe and drain hose. Remove both hoses from the pump.
  • Now take out the pump and unscrew the snail. It is fastened with bolts or latches (depending on the model of the washer).
In some models of washing machines, the pump does not need to be unscrewed and the nozzles removed from it. To detach it from the snail, turn it counterclockwise and it will detach.

washing machine pump

Now you need to clean the snail well and only after that attach a new pump to it. Everything is assembled in the reverse order. After everything is assembled, you can start a test wash.

To make everything clear to you, watch the video on replacing the drain pump on the Bosch washing machine through the front wall:

We change the pump on Electrolux, Zanussi washing machines and top-loading washing machines

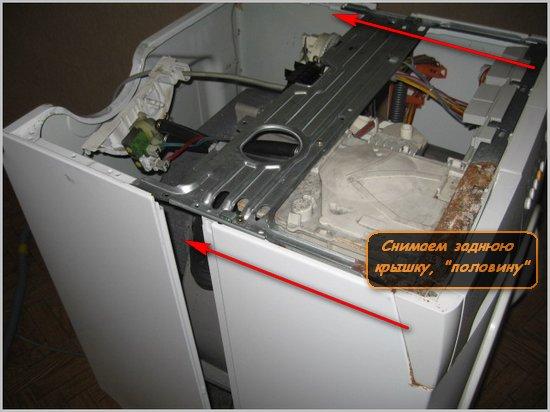
In these models of washing machines you can get to the pump through the back wall. And this is not just a wall, but the back half of the entire body of the machine. To get to the pump we need to remove it.

On the top loading washing machines repairs are exactly the same. Only the back wall is removed, not the side. The rest of the pump replacement process is similar.
  • The first step is to drain the remaining water from the washing machine through the drain valve or hose.
  • Then unscrew the top cover, which is mounted on two bolts and remove it.
  • Now we need to unscrew all the bolts that secure the back half of the machine. Bolts are located at the top of the machine, on the sides and back.
  • After you unscrew them, you need to disconnect the inlet valve, which is attached to the wall
  • Now the wall can be carefully removed.

Removing the back cover of the washing machine

Change the drain pump:

  • The drain pump is very easy to change, first disconnect the wires from it.
  • After that, you need to disconnect the snail from the body, fasten it with latches or bolts.
  • It is not necessary to disconnect the drain hose and pipe. Then just unscrew the pump itself from the snail and remove it.
  • We clean the snail itself well from dirt and put a new pump, connect the wires to it.
  • The washer is assembled in the reverse order.

Replacing the pump on Hansa machines

With Hans washing machines, things are much simpler. In order to unscrew the pump, you do not need to remove the entire front panel. Unscrew only the lower metal plinth on which the drain pump is mounted. Then we unscrew the pump itself and do everything similarly to other models.