How to wash a down jacket in a washing machine

A down jacket is one of the most common types of outerwear in our time. It has very good thermal insulation, is comfortable and practical to wear, and is also affordable. But, like any other thing, in order to stay in good condition, it requires timely care and washing.

But how to wash a down jacket in a washing machine so that the fluff does not stray, and in general is it possible to wash a down jacket in a washing machine and how to wash it? We will answer these and other questions in this article and analyze all the details of washing downy things.

Is it possible to wash a down jacket in a washing machine

If you conduct a survey among the population, asking people this question, then there will be a large percentage of those who will answer that the down jacket is not intended for washing in a washing machine. In fact, each of you can find the answer to this question, and it will be 100% correct. To do this, you just need to look at label with icons your down jacket, where all the requirements for washing it are indicated. And, if you do not see the icon that allows only hand washing, then this means that the item can be washed in the washing machine.
Label on the down jacket
In most cases, a down jacket, of course, can be washed in the washer, but observing all the necessary rules that will prevent unpleasant consequences after washing, such as: knocked down fluff, an unpleasant smell and stains all over the surface of the jacket.

Preparing a down jacket for washing

Before proceeding directly to washing the down jacket, you need to prepare it, because its condition after washing will depend on it.

First, check all pockets for the presence of things in them. If there are any, then you need to remove them.

After that, inspect the down jacket for stains on it.Very often down jackets, especially light ones, get dirty in the area of ​​the collar, pockets and cuffs. If stains are present, they must be further processed before washing.. To do this, rub these places with laundry soap or a special tool.
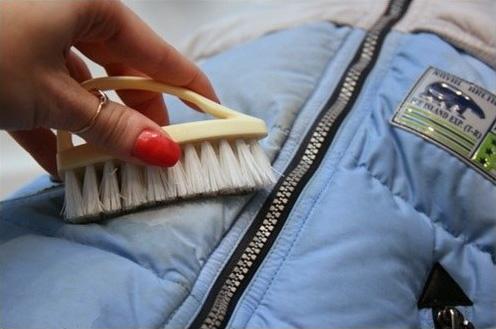
Treatment of stains on a down jacket before washing in a washing machine
Next you need turn the jacket inside out and leave it like this for the duration of the wash. Wherein fasten all buttons and zippers: nothing should hang out.

You can only wash down jackets in a washing machine one at a time, do not try to push two or more down jackets in one wash - this, at best, will not wash both things normally, and at worst will ruin them.

Check the seams of the down jacket, if a large amount of fluff climbs out of them, then the likelihood that washing will ruin the thing is very high.

Washing a down jacket in a washing machine

After the thing is prepared, you can go directly to the washing process itself. For this you will need special detergent for washing down jackets, which you can buy in retail chains or in a specialized store.

Do not try to wash the down jacket with ordinary powder, you can ruin the thing forever.

It is also very desirable to use when washing such a thing. special balls for washing down jackets or tennis balls, which will not allow fluff to go astray, however, you can read more about this on our website. The same balls are used for washing the sleeping bag in the washing machine, the filling of which is fluff.

Next, we need to decide on which program to wash the down jacket in the machine. If your washer has a special program for washing down jackets, then you will not have to think about these issues for a long time. If you didn’t have such a program, then don’t be discouraged, because almost every washing machine has a number of suitable programs in its arsenal, which will also suit us.

For washing a down jacket, the most delicate program is suitable, for example: washing wool, silk or other delicate fabrics. Please note that washing takes place at a temperature not exceeding 30 ° C. If such a temperature is provided by the program, then everything is fine, but if not, then you will need to reduce the washing temperature to the required one, using a special function (if any).
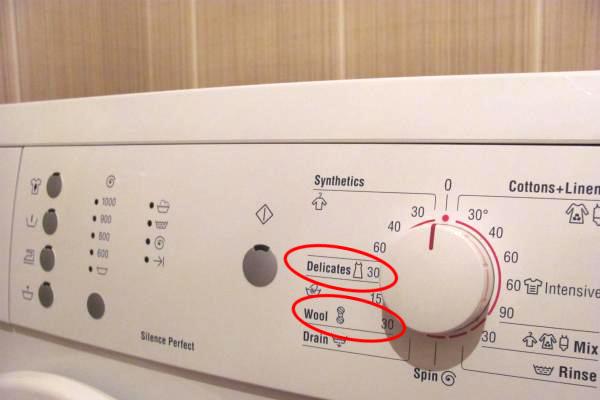
Programs for washing down jackets
In addition to the washing program, you will need turn on the extra rinse function, if possible, or after the end of the washing process, start another rinse to better wash out the detergent from the down jacket, because, as you know, the down absorbs detergents very well and gives them very poorly.

It is also best to refuse the spin function, because at high speeds the fluff can go astray and even crawl out of the seams, which leads to damage to the thing.

After that, you can safely put the jacket in the washing machine and start washing.Then we just have to properly dry the down jacket.

How to dry a down jacket after washing

Now the washing of the down jacket has come to an end and we just have to dry it thoroughly, which we will now proceed to. To do this, first you need to remove the jacket from the washing machine and unbutton all buttons, zippers and other fasteners. It is also advisable to turn the pockets inside out so that they also dry well. Himself the down jacket does not need to be turned out until the very end of drying.

After washing, the fluff in a down jacket usually bunches up in its cells, so try to stir it up a little with your hands and distribute it evenly over the entire surface. Now you need to take the usual hangers and hang a jacket on them. In such upright and you need to dry the down jacket after washing in a washing machine, because it is in this position that water drains best and, accordingly, the down jacket will dry much faster than in a horizontal position.
Drying down jacket
During drying, regularly spread the fluff inside the jacket evenly so that it is properly located in the cells and dries faster.

Dry the down jacket until the down is completely dry, because if the feather is not completely dry, it can rot and begin to emit an unpleasant odor, which will lead to the fact that the thing will be completely damaged.

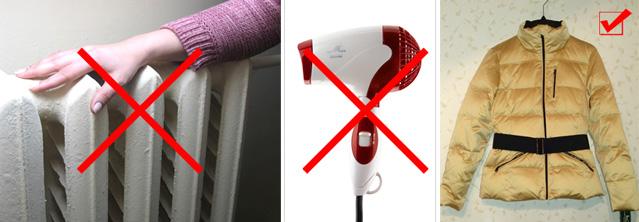
Some fans of "quick results" very often dry a down jacket on batteries, with a hair dryer or other heating devices, not realizing that this procedure destroys the fluff inside the jacket.

Never dry your down jacket with hot air. For better drying ensure room ventilationin which the down jacket dries, and good air circulation.

Drying a down jacket in a washing machine

Again, to speed up the process, the hostesses use such a modern method as a tumble dryer or dry the down jacket in a washing machine with a drying function. We strongly discourage the use of this method as the process is completely destroys all thermal insulation properties of the pen and after such procedures, the down jacket will not be suitable for wearing in cold weather.

What to do if after washing the fluff in the down jacket is lost

If such a failure happened to you, then of course, for a start, it is best to identify the reasons why this happened. And this could happen if the rules for washing a down jacket were violated, or you chose the wrong washing program in the washing machine. But don't worry, there is a way out. If the fluff is very stray after washing, then the first thing to do is to try manually distribute it over the entire surface of the jacket. If this does not work, then you will need balls for washing down jackets, with which you will wash the down jacket again, following all the above tips.

If you follow all these recommendations, then you will not have to worry about the integrity of your down jacket after washing, because all our tips have been tested in practice and are confirmed by experts.

Have you recently bought a washing machine, plugged it in, and are now getting ready for your first wash in your new washing machine? If so, then you have come to the right place, because the first start-up of the washing machine must be done correctly in order to extend its durability and not damage the parts of the unit that have not yet been run in.

Checking the washing machine for readiness for the first start

If you have already completed correct connection of the washing machine to the sewerage and water supply on your own, or entrusted this matter to a specialist, then we will skip the question of the correct connection of the washing machine and go straight to the checklist that you need to check to make sure that the device is ready for use.

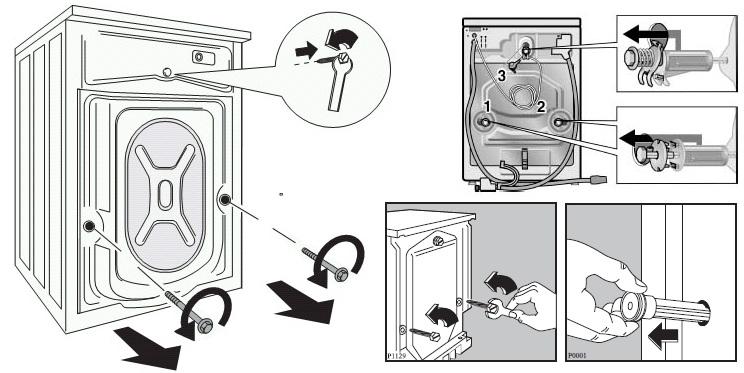
  • The first thing to check is the absence of a machine behind shipping bolts. The fact is that these same bolts are installed in the machines for transportation, which must be removed before the washing machine is turned on for the first time, otherwise they will cause very strong vibrations, which will lead to breakage of many parts of the unit.
  • Read the instructions - most users of household appliances neglect this important rule, thereby incapacitating the device with their ignorance of elementary things. So that you do not have to take a new machine for repair after the first start, be sure to read the instructions for it.
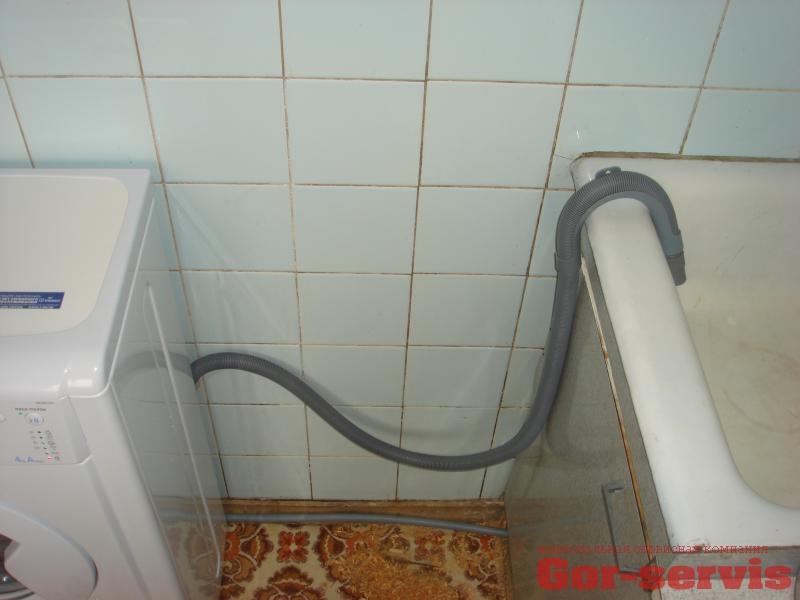
  • Check the connections of the washing machine to the water supply and to the sewer - the rubber hose from the washing machine must be connected to the water supply, and the corrugated drain hose must be connected to the sewer pipe or siphon. Also, the drain hose can be hung on the edge of a sink or tub to drain water into it.
  • Open the water supply tap to the inlet hose - it is located at the junction of the water supply and this very rubber hose.
  • Make sure that all shipping and packaging materials are removed from the machine - remove adhesive tapes from the outside of the machine that hold the door, powder tray and other parts. After that, look into the tank and make sure that there are no foreign objects in it.

If you have done all the points and you have no problems, then your washing machine is ready for its first wash and you can start it.

This preparation for the first start-up is suitable for a washing machine of any manufacturer, be it Bosh, LG, Ariston or another brand.

First wash in the washing machine without clothes

Experts recommend carry out the first wash in the washing machine without linen. This is done in order to eliminate the unpleasant smell of laundry after the first wash, because lubricants and technical odors may remain in the machine. However, this is a controversial point, because the machines are tested at enterprises and are suitable for use the first time. But we will not tempt fate, but simply perform the following steps in order:

  • If you have done all the above steps to prepare the washer for the first start, then close the loading hatch.
  • Next, add a small amount of detergent to the powder compartment and close it.
  • Plug the device into a 220 V power supply.
  • Select a short wash program and start it according to the instructions by pressing the start button.
  • Wait for the wash to finish. The machine will not immediately let you open the loading door, this is done for safety. After a minute you will be able to open it. If the door does not open even after a few minutes, read how to unlock the door yourself.

You can carry out the next wash with the laundry already and not worry about troubles - they should not happen.

Useful tips for operating washing machines

If you follow the tips below for using your washing machine from the moment you buy it, it will serve you for a long time and you will not have to repair it yourself.

  • If the machine makes strange sounds or behaves “not adequately” at the first start, do not try to fix it yourself.You have it under warranty, and therefore you should repair it for free. Just call the number of the service center that is listed in the purchase documents and explain the situation. You will be required to send a master to fix the problem or pick up the broken unit.
  • Use only special powder for automatic machines, do not even try to fill it with hand washing powder.
  • Do not overload the machine with dirty laundry - this increases the wear of the washing machine parts, and if there is an overload control, the wash will stop.
  • Regularly clean the drain valve of the washing machine, which is located at the bottom, this will prevent you from clogging the drain hose.
  • Before washing, check all pockets for various small parts, because they can get between the tank and the drum of the washing machine, which will jam the latter.
  • After finishing washing, leave the loading door open so that the tank and drum of the washer are ventilated, and then you will not form mold inside and will not appear bad smell from the machine.
  • Do not use questionable descaling products with every wash, they slowly destroy the seals, leading to serious bearing failure.

If you take care of your equipment and carry out inspections and troubleshooting on time, then it will serve you for a very long time.

If you have a bearing buzzing in the washing machine or completely “crumbled”, then replacing it is simply necessary so that the machine can continue to function, because as a result it will start dangle drum and subsequently deteriorate other components of the machine.If you do not change the bearing in time, then the operation of such a machine can cause such consequences that will force you to change the entire washing machine.

If you decide to replace, then you have two options:

  • Calling a repairman and entrusting the matter to a professional is the most convenient option that guarantees you that all the work will be done correctly (subject to the professionalism of the master) and in the shortest possible time. But how much does it cost to change a bearing in a washing machine today? The numbers can actually scare off many, because the cost of repair can be from 30 to 50% of the cost of a new washing machine.
  • If the price of the repair turned out to be high for you, or if you think that this work can be done on your own, then this information will be useful to you.

Here we will step by step analyze all the stages of repair.

Preparation for repair

From the tool we need:
Necessary repair tool

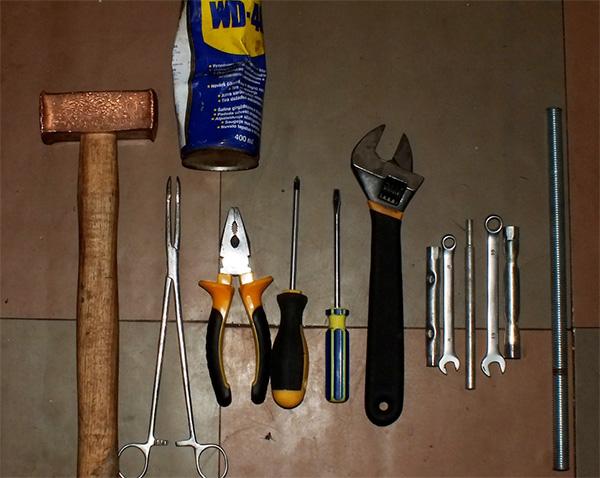
  • Ordinary metal hammer
  • Set of open end wrenches in different sizes
  • pliers
  • metal rod
  • Screwdrivers (Phillips and slotted)
  • Silicone sealant.
  • Special waterproof grease for bearings of washing machines (in extreme cases, lithol)
  • Camera or camera phone - when disassembling the washing machine, we recommend taking pictures of all the parts that you are going to disassemble, so that the assembly process is as simple as possible.

Required spare parts for repairs
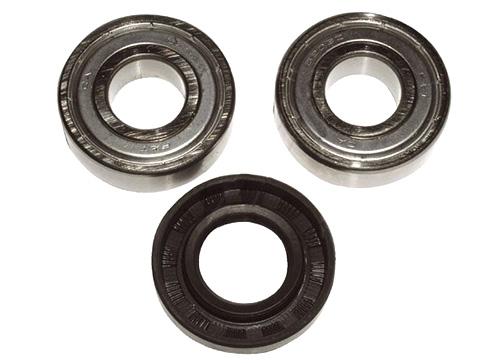
Of the spare parts for repair, we need two bearings and an oil seal, which must be purchased. For more confidence in the correct purchase of spare parts, you can first disassemble washing machine, pull out the old bearings and oil seal, and then find the originals or analogues on the Internet by the numbers on them.Or find stores selling spare parts for washing machines, and by the brand of your machine, they will select the necessary parts for you.
Spare parts for repair
Try to buy original spare parts, they guarantee you a long service life. Also buy only bearings that are designed for washing machines (they are usually closed).

Do not want to bother with such a complicated repair of your washing machine? Read the rating of washing machines and choose the best new washing machine for yourself.

Washing machine disassembly

If everything is ready, then you can start disassembling the washing machine.

Removing the top cover
In order to remove it, you need to open two self-tapping screws located on the rear wall of the unit, then slide the cover back and lift it. Set the cover off to the side. As you can see, it is removed very simply.

Removing the top and bottom panels
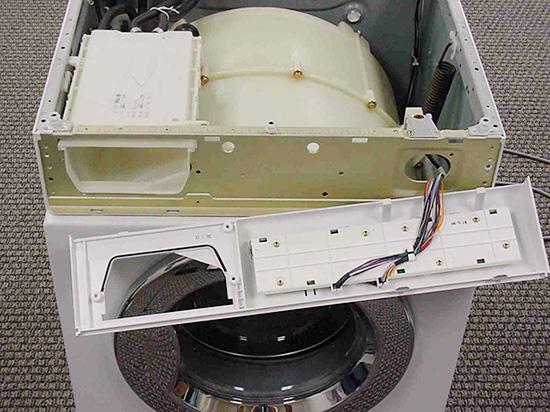
After the top cover is removed, we proceed to remove the top dashboard. But, before you start unscrewing it, remove the powder tray: to do this, pull it out and press the special plastic button while pulling it towards you. Set it aside.

To remove the dashboard, you need to unscrew a few screws: in different machines there are a different number of them and they are in different places, but for sure some of the screws are in the place where you pulled out the powder receiver, and another one is on the right side of the washing machine. Unscrew them all, after which you can remove the top panel.
Removing the top panel
As you will see, a control board is installed on it, connected by wires that will not let you remove it completely.To detach the entire panel, you will need to remove all the chips with wires from the sockets, and then set the top panel aside.

Mark the chips and their corresponding sockets with a marker or something else so that you do not mix them up during assembly.

Alternatively, you can not disconnect the wires, but leave the panel hanging, but this is not very convenient and you can accidentally break the wiring.

Now let's start removing the bottom panel: if you regularly clean the drain valve, then you probably know how to do it, if not, then we will tell you how to do it. To remove the bottom panel, you need to use a screwdriver or other flat object to press on the latches holding it and pull it out.

Remove the cuff
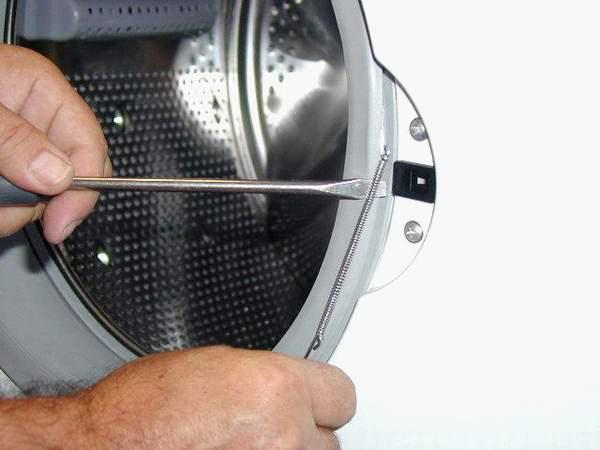
Next, we need to remove the cuff, which prevents us from removing the entire front panel of the washing machine.The cuff is an elastic band that is dressed at one end on the tank, and at the other on the front panel, and it's all fastened with a clamp, which we need to remove. Run your hand around the perimeter of the elastic band and feel for the small spring that connects the ends of the clamp, or find it visually. Next, pry it with a flat screwdriver and pull it out along with the clamp.
Remove the cuff
After that, remove the front edge of the cuff and fill it inside the tank.

Removing the front panel
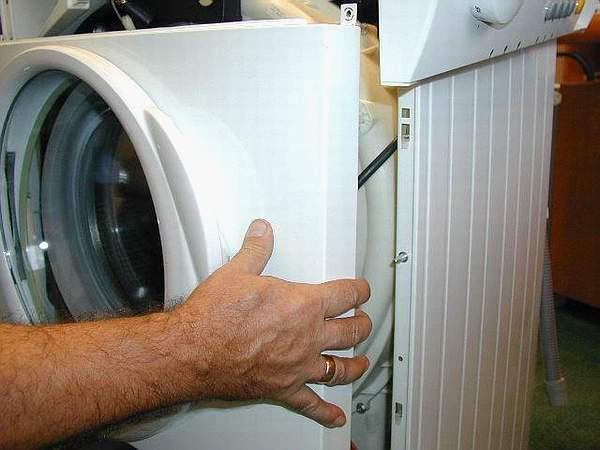
Close the hatch of the washing machine. Locate the top and bottom of the front panel with a few self-tapping screws holding it. Unscrew them, after which the front panel will only be held on a small special hook. Now remove the front panel, but be very careful, because it is connected by a wire to the rest of the washing machine.

As soon as you remove the front panel, disconnect the wire going to the lock of the loading hatch by removing the chip.Then move the panel aside.

Disconnect all parts from the tank of the washing machine
Now we need to remove the top panel along with the powder box, which is located under the control panel that we removed earlier. To do this, you need to unscrew the bolts at the back of the washing machine that hold the inlet valve, since it will be removed along with the panel.

Next, unscrew all the screws holding this panel. Now it can be removed, but pipes and wires interfere with us. Disconnect them and remove this part to the side.

Now we need to disconnect the drain pipe from the tank of the washing machine, for this we unscrew the clamp and remove it.

Water may remain in the nozzle, which will flow after removing it, so have a rag ready.

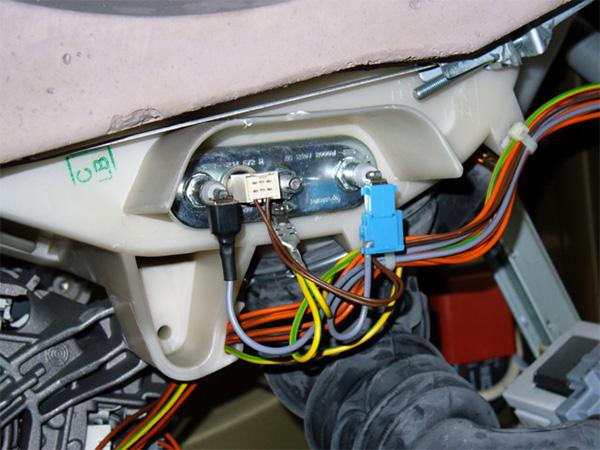
Next, we disconnect all the wires suitable for the heating element, it can be located both in front and behind the washing machine, so unscrew the back cover if necessary.
Disconnect the wires suitable for the heating element
Also, the wiring can be attached to the tank with ties or wire.You need to disconnect it at all points of attachment to the tank. Also disconnect the wires from the engine, since we will be removing it from the outside of the washing machine. If desired, you can disconnect the remnants of the wiring from the pump and pull it out so that it does not interfere while removing the tank.

Now we unscrew the lower and upper counterweights so that they do not add weight to the tank and it is easier for us to remove it. Counterweights can be located both in front and behind the machine.

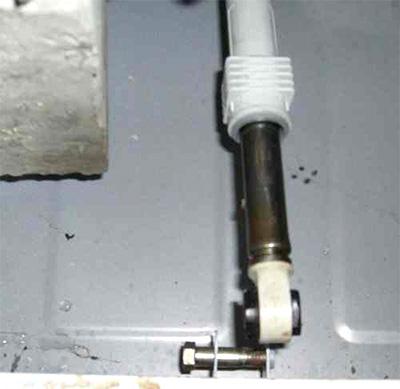
We disconnect the pipe going to the water level sensor and you can start unscrewing the shock absorbers of the washing machine. To do this, we find the lower bolts that hold the shock absorbers and unscrew them with a wrench.

To unscrew the shock absorber bolts, it is more convenient to use a head with an extension.

Unscrew the shock absorber
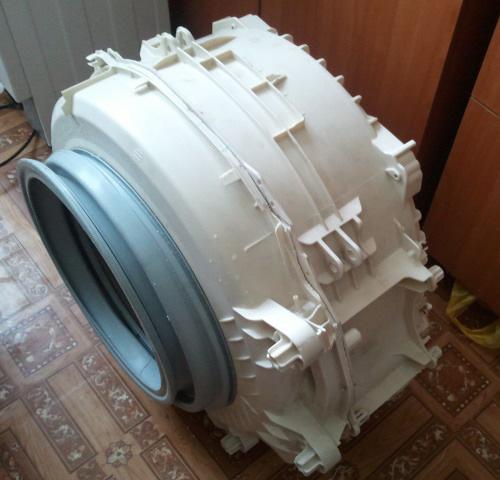
Now the tank hangs with us only on springs, and we can remove it, but do it very carefully so as not to drop it. The tank without counterweights is light enough, lift it from the inside with one hand, and with the other, unhook the springs on which it weighs and pull the tank out.

You will remove the tank along with the engine, which must also be unscrewed, but before that, remove the belt. Next, we unscrew the engine itself, as well as the shock absorbers that we left hanging on the tank.
Removed washing machine tank
Now we can start disassembling the tank and replacing the bearings in it.

Dismantling the washing machine tank

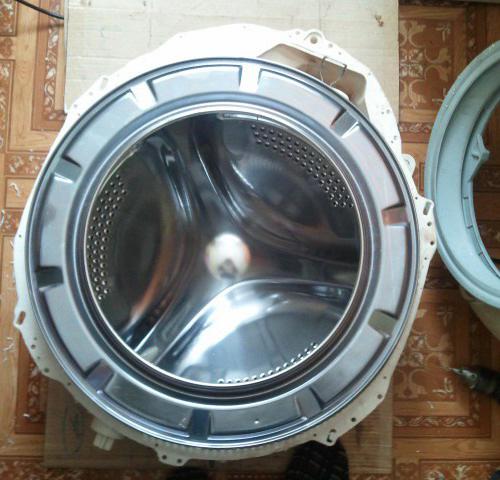
To get to the bearing, we need to divide the tank into two halves and pull out the drum. Both halves of the tank are fastened either with special latches or bolts that are located around the entire perimeter of the tank. Therefore, either disconnect the latches if the washing machine makes noise, or unscrew the bolts and disconnect the front half of the tank. You can clean it of debris if desired before putting it back together.
Back half of a tank with a drum
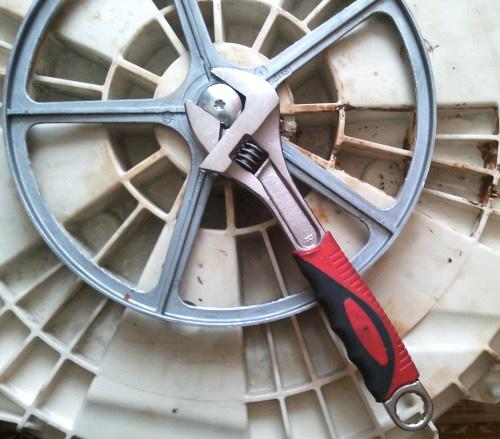
We proceed to disconnect the drum from the back of the tank, for this we need to remove the pulley. We unscrew one bolt with a wrench that holds the pulley on the axis of the drum, after which we remove it from the axis and put it aside. And the bolt that we unscrewed is screwed all the way back into the shaft so that when the drum is knocked out, the shaft itself is not damaged.
Unscrew the pulley
Next, with an ordinary hammer, with a little effort, we knock on the shaft, trying to knock it out. If the shaft is gradually going, then we continue in the same spirit. If the force is already large, but the shaft does not lend itself, then it is better to unscrew the standard bolt and replace it with any other that you would not mind throwing away, because.too much force can cause the bolt to deform. As soon as the shaft is drowned to the bolt head, we unscrew the bolt and pull out the drum from the back wall of the washing machine tank.

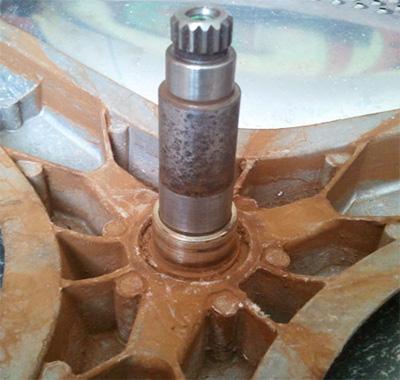
Inspect the sleeve and the shaft itself, located on the drum. If you delayed the repair, then they could wear out and then you will also have to change the cross, which significantly affects the price of the repair. In order to check the integrity of the shaft, wipe it well with a rag and see if there is any wear on it. For more confidence, take new bearings and put them on the shaft. After that, check that there is not even the slightest play in the bearing. If there is play, then you need to replace the cross with the shaft.
Washing machine drum shaft
Also check the sleeve, which is located on the shaft and on which the stuffing box is put on, it should also not have strong wear and transverse grooves. Under the condition of high output, the oil seal will pass water and the new bearing will quickly fail.

Washing machine bearing replacement

Having finished with the shaft, we proceed directly to replacing the bearings in the washing machine.They are, as you might have guessed, in the back wall of the drum and they need to be pulled out from there, but before that, let's remove the stuffing box.

In order to pull the oil seal out of the back of the washing machine, take a flathead screwdriver and pry it off.

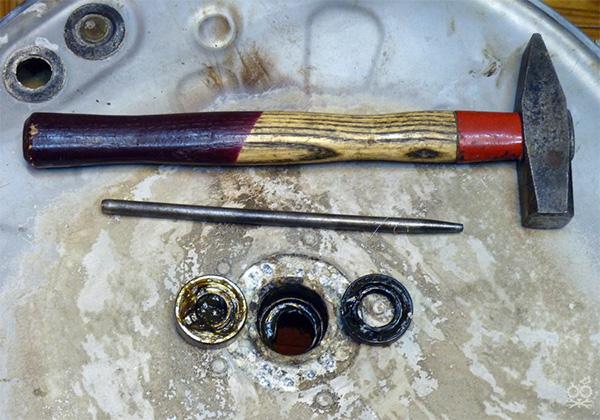
Now we need to knock out both bearings, for this we set a metal rod as thick as a pencil and with sharp confident movements with a hammer we hit it moving it to different sides of the bearing, cross to cross. Thus, we knock out both bearings.
Knocked out seal and bearing
A small bearing is knocked out from the inside of the tank, a large one, on the contrary, from the outside.

The washing machine tank is quite fragile, so it is best to knock out the bearing by resting it on your knee to prevent damage to the tank.

After you knocked out the bearings, you need to clean the back cover itself and the seats for the bearings. Not the slightest dirt should remain in them, and they should simply sparkle with cleanliness.
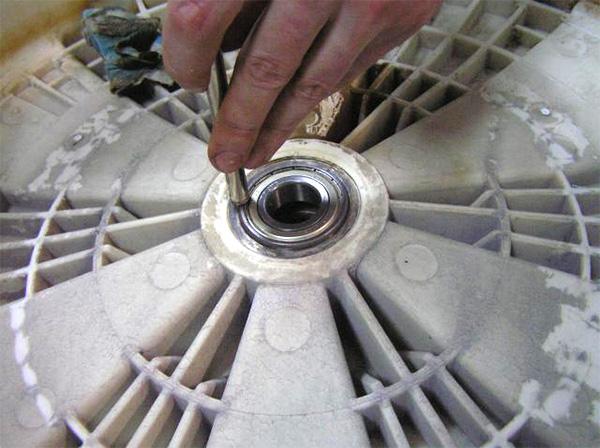
Now let's take the new bearings out of the package. First, we insert a small bearing and also, pointing the rod, hammer it, rearranging the rod on different sides of the bearing cross to cross. Clog the bearing until it stops, when the bearing "sits" in place, the sound from the impact becomes more sonorous.
Driving a new bearing
Further similarly, but on the other side of the tank, hammer in a large bearing.

After that, we “stuff” the stuffing box special waterproof lubricant and put it in place. You can lightly hammer the seal with a hammer in the same way as a bearing, but be extremely careful not to damage it.

It is best to use a specialized waterproof lubricant, but if you couldn’t get it, then you can use Litol-24, which can be found at any automotive store.

Reassembly of the washing machine

After the bearings and the oil seal are in place, lubricate the sleeve on the tank shaft with grease and install it in place, i.e., stick it into the back cover.
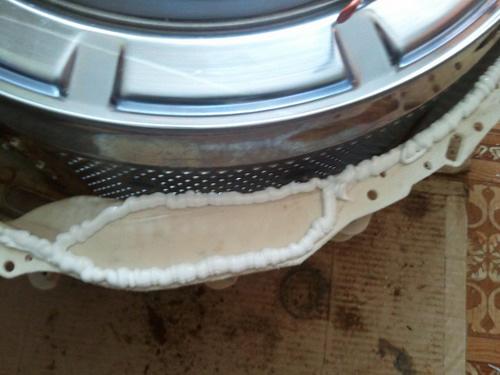
Now we need to connect the halves of the tank, but before that it is desirable to change the sealing gum. If this is not possible, then you can simply fill the groove along with the gasket with a small layer of sealant in a circle, and then connect the halves of the tank.


Fill the groove with sealant
Now it remains for us to assemble the washing machine in reverse order, the photos that you took during the disassembly process will help you with this. You did them, didn't you?
We also recommend that you watch the video instructions for replacing bearings on a Samsung washing machine, which will help you understand the entire repair process more clearly.

All of us, when buying a brand new washing machine, rely on the fact that it will serve us for more than one year and will not cause us problems with breakdowns, but we completely forget that for this we, the owners, require proper care for the equipment. One of the problems that housewives face is that the washing machine is covered with a layer of scale, which in turn leads to a breakdown of the heating element or more important components of the unit.

Here we will talk about how to clean the washing machine from scale using citric acid and other improvised means, as well as other procedures for cleaning the washing machine from mold and unpleasant odors.

Why does scale appear in the washing machine

Before proceeding with the analysis of ways to remove scale from a washing machine, it would not hurt to understand the causes of its occurrence, and perhaps in the future this information will help us in solving the problem.

As everyone knows, the water in our taps is far from spring water and contains a large number of various chemical elements. In some areas, the water can contain a lot of iron and be "hard", which means it contains a lot of salts and other components.All these substances contained in water, when heated, form deposits (or so-called carbonates) on the heating elements, which, as is known from chemistry lessons, can be removed with acid. How higher washing temperature you use in your washing machine, the more scale builds up on the heating element.

If crystal clear water flowed in our taps, then no scale would appear in the washing machine. But we live in the real world where poor quality waterand so we have to deal with this problem. The only solution to get rid of scale is install a polyphosphate filter for a washing machine, which will soften the water and reduce the appearance of scale on the heating element.

What is the danger of scale in the washing machine

Scale itself does not pose a danger to you, but it has a very detrimental effect on the processes taking place in the washing machine. Let's take a look all the disadvantages of scale:

  • Electricity consumption increases: scale covers the heating element and, thereby, prevents the normal heating of water, which requires additional energy consumption. If your machine heats water for a long time, then this is one of the symptoms that the heating element has become covered with a large layer of scale. But there may be others reasons why the machine does not heat water Or heat it up slowly.
  • Scale contributes to the breakdown of the washing machine - the heating element has to work in difficult conditions, which leads to its rapid failure, which will require the replacement of the heating element. And if the heating element is not replaced in time, the program module of the washing machine may burn out, and this is already a serious breakdown.
  • Scale buildup in your washing machine can cause fungus or mold to grow and cause you a lot of trouble.

Ways to clean the washing machine from scale

If you don’t know how to descale a washing machine, but you heard somewhere that it needs to be done, then let’s figure out together how to do it using various tools that you can find in your kitchen.

How to clean a washing machine with citric acid

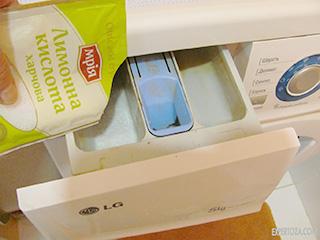
This is probably the most effective way, which allows you to most likely remove scale from the washing machine. To clean the washing machine from scale with citric acid, you will not need anything other than citric acid itself in an amount of 100-200 gr.
Clean the washing machine with citric acid
Pour acid into the washing compartment and start the longest washing program for maximum temperature at 90-95°C. If there is a function extra rinse, then turn it on, if not, then after the end of the washing program, turn on the rinse machine again.

After this procedure, the elements of your washer will be like new. Repeat this procedure regularly every six months, and you will not face the problem of scale in your washing machine.

How to descale a washing machine with vinegar

Another old-fashioned way to clean the washer from scale is to use vinegar, although we do not welcome this method, we will still talk about it.

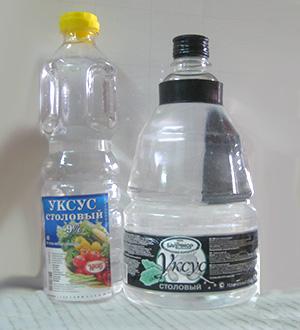
You will need 1 cup white 9% vinegar, which you pour into the powder department, then choose any short wash program 60°C with extra rinse and run it.
Clean the washing machine with vinegar
After the end of the program, all scale will be removed.

We recommend that you use citric acid rather than vinegar to clean your washing machine, because vinegar leaves a strong smell after the cleaning process and can have a bad effect on the elements of the washing machine.
During the cleaning procedure of the washing machine, scale will fly off and may clog the drain hole. After the end of the process, unscrew the drain valve and clean it. Where is the drain filter and how to clean it you can find out on our website.

How to clean a washing machine from mold

If you did not descale your washing machine on time, then mold could form in it, which emits an unpleasant smell from the washing machine and is harmful to health. The instructions below will help you clean the washing machine from mold.

How to clean a washing machine with blue vitriol

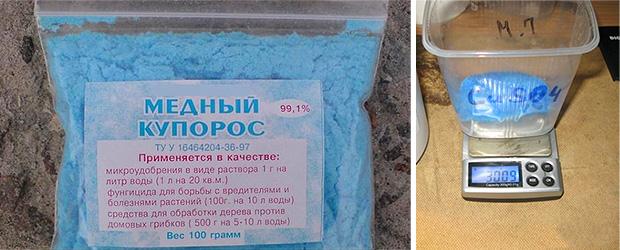
The most effective agent for cleaning mold from washing machines is blue vitriol, which was used by our parents to remove mold from walls in bathrooms and other places. Copper sulphate is a blue crystal type powder that you will need to dilute in proportions 30 g of powder per 1 liter of water. Then treat the entire inner surface of the washing machine. Thereafter leave the processed unit for a day.
Clean the washing machine with blue vitriol
After this time, pour any detergent into the powder compartment and start the washing program. After that, it is desirable to start another washing program already without powder.

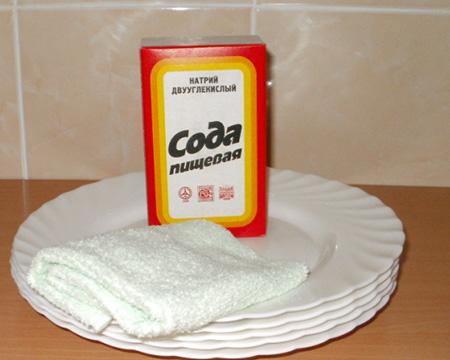
How to clean a washing machine with baking soda

If you do not have blue vitriol, then there is another old way to get rid of mold with soda. For it you will need half a glass of soda and half a glass of waterthat you will need to mix.
Clean the washing machine with baking soda
This solution needs clean the inside of the washing machine: drum, seals and other parts affected by the fungus, after which turn on rinse to wash the drum.

All these methods do not guarantee 100% mold removal. To completely remove the fungus, regularly clean and check the washing machine for mold.

How to clean a washing machine from smell

The smell in the washing machine appears for several reasons, and if you want to know Why does the washing machine smell like rotten stuff?then read about it on our website. But in a nutshell, we can say that the smell is caused by the appearance of a fungus. To get the answer to the question of how to clean the washing machine from the smell of fungus, read the information above on cleaning the washing machine from mold.

Each of us has at least one woolen item in our wardrobe, and if you are reading this article, then you have probably ignored the instructions written on the clothing label, which indicates that the item is not suitable for machine washing or requires a special washing machine mode. . What to do if the wool thing has shrunk after washing, and how to stretch it back to its previous size so that it can be put on again and not look like an “overgrown”?

Why did the woolen thing shrink after washing

If you don't know how to wash woolen clothes in a washing machine, then we recommend that you read about it, but if the thing has already been washed without following these rules, then read on. To deal with the consequences of improperly washed clothes, you must first understand the reasons and find out why the woolen thing sat down after washing. The following factors are very detrimental to wool:

  • High water temperature - the temperature for washing woolen fabrics should be chosen low, no more than 30 ° C - this will help you save your clothes.
  • Using regular laundry detergent - Regular laundry detergents contain powerful detergent chemicals that can be harmful to delicate fabrics like wool. Therefore, for washing such things, choose a product whose packaging indicates that it is intended for washing woolen clothes.
  • Using a machine wash - in general, many modern machines have a program for washing woolen items, which involves more careful handling of clothes and the absence of a spin function. If you washed your sweater or knitted hat on a normal wash cycle, then your item naturally sat down.

What to do if a woolen thing has sat down

If you washed your clothes correctly, and clothes still fit or you have neglected some washing rules and now you don’t know what to do, then read below on how to stretch a woolen item. We will tell you all the existing ways to return the shape of woolen things after washing.We note right away that it is not always possible to restore a thing damaged by washing, but in many cases it is possible.

What to do, if wool hat shrinks after washing - the first thing to do is to soak the headgear again in cold water for 10 minutes and then gently squeeze the water out of it so that the water does not flow from it. Next, the most effective method is to pull a knitted hat over a large jar or other object resembling the shape of a head and leave it to dry.
wool hat shrinks after washing
After the hat dries, it will be exactly the size of the jar and will not shrink.

If a sela woolen jacket, scarf or small item - then it should also be re-soaked in cold water for 10 minutes and squeezed out so that water does not flow from it. Next, on a horizontal surface, for example, on a table, lay out a dry terry towel, on which you place your jacket or scarf on top.
Drying a wool sweater
The towel will absorb water into itself and, as it gets wet, you will need to replace the towel with a dry one while gradually stretching your woolen thing with your hands.

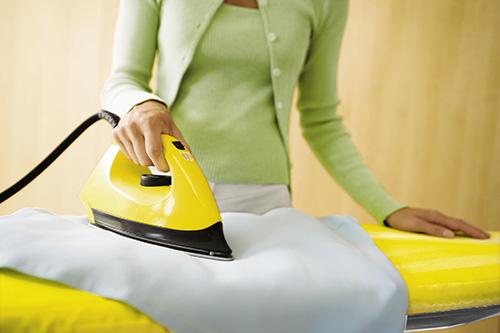
If a after washing, a woolen dress or other item with a mixed composition has shrunk, then the following method is perfect - put the shrunken thing on the ironing board and cover it with a wet cotton towel or cloth on top and iron it well, while stretching the thing to the desired size. If the iron has a steam function, then use it for the best effect.
Sela woolen thing with a mixed composition
Please note that the method is only suitable for mixed fabrics and will be ineffective for pure wool.

There is also a great 100% way to stretch wool items after washing - you also need to soak the item for 10 minutes in cold water, then put it on yourself and walk in it until it is completely dry, constantly pulling up the sleeves and bottom of the clothes so that it does not sat upright. The method is not the most pleasant, but effective.If you have a mannequin, you can put clothes on it, or build a construction from improvised means, on which you can stretch wool clothes and fasten around the edges.

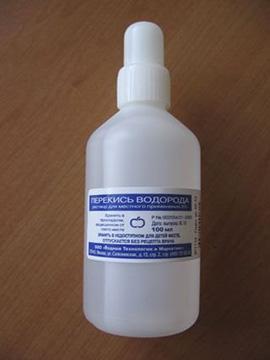
For greater elasticity of woolen threads, you can do the following - pour 10 liters of cold water into a basin and add 2 tablespoons of hydrogen peroxide to them, then mix the solution and place a woolen thing in it, soaking it for 1 hour.
Add hydrogen peroxide to wash woolen clothes
After the procedure, the clothing attribute becomes elastic and stretches well. Now you can dry it simply by laying it on a terry towel, which you constantly change, and stretching the thing to give the desired shape.

What to do so that the woolen thing does not sit down

In order for you not to have to resort to the above tips again, follow a few simple rules:

  • Always look signs of proper washing on clothing labels, the manufacturer indicates on them how and where you can wash or not wash things so as not to spoil them.
  • Try to avoid machine washing if it does not provide the ability to wash this type of fabric.
  • Woolen clothes are afraid of high temperatures, so wash them only in cold water no more than 30 ° C.
  • Do not use ordinary powders, wash wool only with special products that are designed for this, preferably liquid, which are well washed out of the fabric.
  • Do not wring out woolen items - do not twist them and do not try to remove all the water, but wring out lightly and let the rest of the water drain on your own.
  • Do not dry items in an upright position - lay the washed wool item on a horizontal surface and let it dry completely.
  • Do not use the dryer - Do not use the dryer function in washing machines or special dryers. Also, in no case should such things be dried on heating radiators (batteries).

If you follow these simple rules when washing your clothes, then you should not have problems with their shrinkage.

One of the most common failures in washing machines is that it does not heat the water during washing.Those who are professionally engaged in the repair of washing machines know all the possible causes of this breakdown and can easily determine them. But for ordinary users, such a breakdown is equal to a disaster, because it is difficult to wash clothes in cold water. In the current economic situation in the country, not everyone can afford to call the master and try to fix the problem on their own.

Here we will analyze all the causes of breakdowns associated with heating water in the washing machine and help to eliminate them.

How to know that the machine does not heat water

First you need to make sure that the washing machine does not really heat the water. Many housewives, when taking clothes out of the washing machine, notice that it is cold, after which they decide that the machine has broken down and does not heat the water. In fact, the laundry after washing should be cold, because it is rinsed with cold water.

In order to determine whether the unit heats the water, you need to start washing after about 15 minutes, but before the first drain of the water feel the glass of the loading hatch with your hand. It should be hot or warm, depending on the heating temperature. If within half an hour from the start of washing the hatch remains cold, then you have a problem with heating the water or you have set the washing program incorrectly.

Wrong choice of washing program

As a rule, all washing machines have a variety of washing programs with different water heating temperatures. If it seemed to you that the washing machine stopped heating water, then first of all check which washing program you have set And what is the heating temperature.

Also on some models there is an opportunity to manually select the required washing temperature. Check if the washing temperature is correct and if it is sufficient. Also note that with a separate setting you cannot set the heating temperature higher than that set by the default washing program.

Heating element malfunction

If you are convinced that the water in the tank does not heat up and the washing programs are set correctly, then one of the most obvious malfunctions is the failure of the heating element (heater). But, before removing the heating element itself, need to check the wiring, which goes to him for defects. Although this is unlikely, wires can still be damaged during operation of the unit. If the wires are damaged, then you should solder them and insulate them, and then check the operation of the washer.

But, most often, the heating element itself fails, because it constantly heats up, then cools down, thereby reducing its lifespan. Also, the heating element is constantly in the water, which leads to the formation of scale on it, which also has a bad effect on its performance. To remove scale, you need to use one of the ways to clean the heating elementdescribed in the article at the link.

If the heating element is not working, and you continue to operate the machine, then the programmer may break.

If you take good care of your washing machine and regularly descale it with Antiscale, then such a malfunction will visit you less often.

To check its performance, you will need a multimeter, with it you can check the integrity of the heating element, for more information on how to do this, see this video:

If you are convinced that the malfunction is exactly in the heater, then the next step is to buy a new one. TEN for washing machine.

The heating elements for each model of the washing machine are different, so look for a heating element specifically for your model, it is best to do this on the Internet.

Once a new heater is purchased, you just need to replace it, it's not very difficult to do, but you need to approach this matter responsibly.Different washing machines may have heating elements in different places, but usually you need to remove the back cover to access it, then find the heating element, disconnect the wires, unscrew it, remove it and then insert a new one, twisting everything back.
Detailed instructions for heating element replacement you can see in this video:

Broken water temperature sensor

The heating sensor in the washing machine is responsible for turning on the heater in time and turning it off when the water reaches the set temperature. If this sensor fails, then, accordingly, the washing machine can no longer heat water and replacing it will correct this situation. As a result of this breakdown the washing machine can continue washing for a long time or vice versa to finish it faster.

Check the temperature sensor can be done in the following way:

  • Remove the sensor from the washing machine and measure its resistance with a multimeter.
  • After that, place the sensor in hot water and measure its resistance again.
  • If the resistance of the sensor is very different in the heated and cooled state, then it is working, if not, then the thermostat needs to be replaced.

How to replace the temperature sensor in the washing machine, see the video:

Broken programmer

If you have checked all of the above options and all the details are in good order, and the washing machine still does not heat the water, then it is most likely that the programmer in the washing machine has broken down, which is essentially its “brain” and controls all programs.

The programmer breaks due to various reasons: it can be a power surge, a faulty heating element, or just a factory defect.

In the event that a software module breaks down, it most often requires replacement and, in rare cases, must be repaired.Unfortunately, or fortunately, but without the help of a specialist here you are unlikely to be able to do. That's why we we recommend calling the masterwhich will help fix the damage.

Washing machine takes a long time to heat water

It often happens that the machine heats the water, but it does it much longer than the time set for it, and, as a rule, the owners do not even pay attention to it or simply close their eyes resigned to the problem.

However, this problem can lead to more serious consequences, such as failure of the heater and failure of the software module.

This situation arises due to the fact that over time, the heating element is formed large amount of scale, which prevents the normal heating of water.

To fix this problem you need in the powder tray put a couple of tablespoons of citric acid and run the longest washing program at the maximum temperature (90-95°C) with an empty drum, plus include an additional rinse. After washing, rinse the powder tray under water.

All of the above methods have been tested in practice and are used in the repair of washing machines, but in any case, you yourself are responsible for the malfunction of the equipment caused by your incompetence in the matter of repair. That's why we recommend that you call the master and entrust the matter to a professional.

As you know, in a washing machine you can wash not only light items, but also clothes such as down jackets.In order for outerwear not to deteriorate during washing, you need to use special detergents for washing down jackets in a washing machine. In this article, we will tell you how choose the "right" tool and how to apply it in your case.

Liquid detergent for down jackets

Today, manufacturers of household chemicals offer a great variety of different “miracle remedies” that will help you not only freshen up a thing, but also remove difficult stains. One such product is a liquid detergent for down jackets.Let's look at all its positive and negative sides.

What should you pay attention to when choosing a liquid product? On the packaging or on the bottle itself it should be indicated that the product is intended for washing down jackets or other things containing natural down. The fact is that natural fluff has its own natural properties that help to save heat, and with ordinary detergents you simply destroy these properties, and the fluff will warm you less effectively. Also, special detergents for washing downy things do not allow the fluff to roll and bunch up, by the way, for greater confidence that the fluff does not crumple, use special balls for washing down jackets.

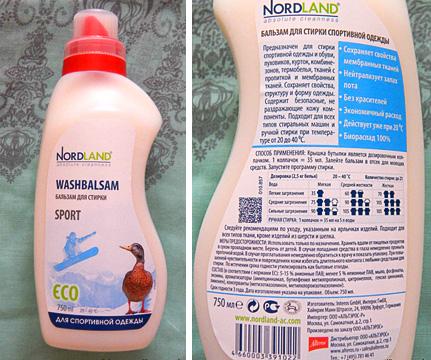
One of these liquid detergents for washing down jackets is Nordland Washbalsam Sport, which you can buy both in specialized sports stores and in ordinary retail chains such as "Magnet".
Liquid detergent for down jackets "Nordland Washbalsam Sport"
This product is intended for washing not only downy clothes, but also suitable for washing membrane clothes. To wash lightly soiled clothes with this product, you will need 1-2 caps.On the bottle itself you will find more detailed information about the doses and rules for using this detergent.

Washing powder for down jackets

Modern housewives most often use liquid products, but some people do not trust this trend and believe that liquid products are just a marketing ploy designed to “pull” more money out of buyers. In fact, this is not entirely true. Let's try to figure out if there are special powders for down jackets and whether it is possible to wash downy things with ordinary washing powder.

Let's say right away that ordinary washing powders are not suitable for washing down jackets, and do not even try to wash clothes with them if you do not want to ruin them.

Fluff perfectly absorbs detergents, but does not give them back, so they must have a special composition in order to wash well.If you still decide to wash downy clothes with ordinary powder, then be prepared that it will become stained and the fluff will clump into a large lump that you will have to shake out.

On the Internet, you can find a bunch of tips and stories that housewives wash down jackets with ordinary powder and do not know troubles, but if you look the other way, there are just as many housewives who ruined their things by washing jackets with ordinary powder.

The fact is that the quality of down jackets is different for everyone, and the down itself can be artificial and natural, there are also various conditions that affect washing: water quality, washing mode, rinsing time, washing machine, in the end. All this, to one degree or another, affects whether your down jacket will deteriorate or not after washing with ordinary powder.

If we talk about special washing powders, then make sure that their packaging indicates that the powder is intended for washing down clothes, and is exactly right for your case. We recommend that you use liquid products that have already been tested in practice.

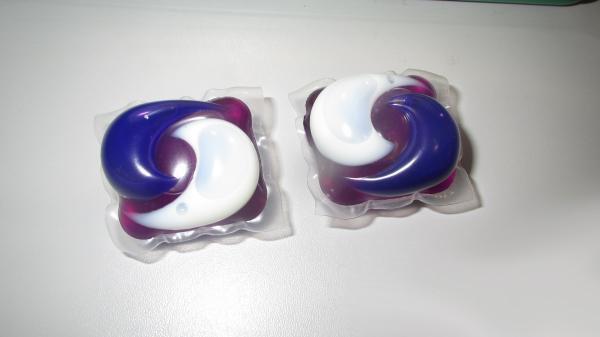
Capsules for washing down jackets

Recently, various washing products in the form of "bags" with liquid inside, the so-called capsules for washing down jackets, which are simply thrown into the tank of the machine along with the clothes, have begun to appear more and more often.
Capsules for washing down jackets
The convenience of this type of detergent is that you do not have to measure the dose each time, the manufacturers have already dosed the detergent for you. Otherwise, these capsules contain the same liquid laundry detergent as in a regular bottle. So, if you do not want to overpay money for imaginary convenience, then we recommend that you use the usual tool.

Do I need rinse aids for down jackets?

As we wrote above, down perfectly absorbs all chemicals and odors, respectively, so the use of rinse aids for down jackets is highly undesirable.It is better to use a special detergent for washing down clothes, which already contains everything you need for a quality wash. Air conditioners, on the other hand, can either give a good smell to a jacket or ruin it so that you simply cannot wear it later.

Details on how wash your down jacket in the washing machine at home, read on our website.

Take your down jacket to the dry cleaners

One good option to wash your down jacket (especially if it's expensive) is to take it to the dry cleaners.The advantage of this method is that you do not have to bother and look for special detergents or experiment on your clothes. The whole thing is done for you by professionals who do this every day and know what tools to use for what.

But don't take your outerwear to the first dry cleaner you find. First, find an organization that has established itself in the market and that people trust with their clothes, for this, read reviews on the Internet and ask your friends.

Automatic washing machines freed a person from the burden of washing clothes, shoes and bed linen. If earlier everything had to be done manually, today machines can heat water, wash, wring and rinse clothes, and some models are even equipped with electric dryers. By the way, if your washing machine refuses to heat water, then you can read about all the possible causes and solutions for this malfunction on our website.

Considering the spin efficiency, you should pay attention to such a parameter as the spin class. This parameter is usually indicated on one of the labels in many devices pasted on the case.

Washing machine spin class - what is it? Let's try to figure out what it is and whether you need to pay attention to this mysterious parameter.

Which spin class is better

Which washing machine spin class is better
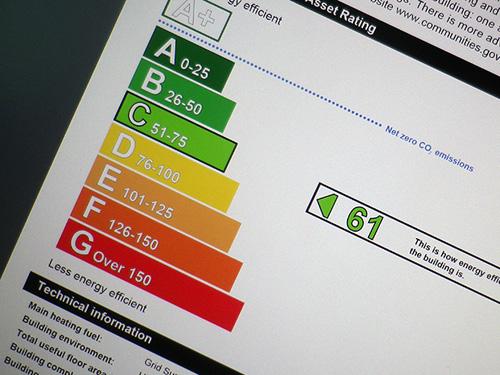
The spin class of washing machines is a parameter that directly affects the quality of the spin. We can compare this parameter with the energy efficiency class. That is, the higher the class, the better.The same applies to the spin class of washing machines. The higher the spin class, the more dry the laundry we will get the output after the completion of the wash cycle.

The spin class is determined according to the international standard. To assign a class, the level of residual moisture content of the laundry is measured. Depending on the received data, the tested model of the washing machine is assigned a certain class.

Class A is considered the highest, meaning that less than 45% moisture is left in the laundry. Today on the market you can find machines of classes A, B, C and D. Class B machines are characterized by a residual moisture content of linen at the level of 45-54%, class C machines - from 54 to 63%, class D machines - from 63 to 72%. There are also worse classes, but it is pointless to consider them, since there are practically no such models on the market for automatic washing machines.

If we consider machines with high spin efficiency, we can see that class A corresponds to the spin speed in the range of 1200-1600 rpm. Although the same 1200 can correspond to class B, in the same row with which there are machines with a spin speed of up to 1000 rpm.

Less high-speed machines belong to class C - here we can see spin speeds up to 800 rpm and less. As a rule, this includes small-sized narrow washing machines, with a maximum capacity of up to 3.5 kg.

Which spin class is best? Many may think that the more turns, the better. On the one hand, this is true. A washing machine with a spin speed of 1200 rpm spins clothes much better than a machine with a speed of 800 rpm. But it will be difficult to distinguish between machines with 1200 and 1400 rpm by the level of humidity, not to mention 1600 rpm.

By the way, you should also take into account the fact that a high spin speed makes the laundry more tightly pressed against the walls of the tank. As the speed increases, the force increases.It would seem that this is very good.But at a speed of 1400-1600 rpm, we get crumpled laundry, almost dry, but difficult to iron.

Speed 1200 rpm is justified only for roomy cars, in which up to 7 kg and more linen is placed. In other cases 1000 rpm is enough. We can say that the drying time will be the same as if we wring out the laundry at 1200 rpm. Most likely, such high numbers are nothing more than a marketing ploy - they increase megapixels on digital devices in the same way, which does not improve image quality.

It is best to spin bed linen, shirts, cotton products and other household items at a speed of 800-1000 rpm. As for delicate fabrics, 400 rpm is enough for them. Thus, chasing a high spin speed does not make much sense - consumers will not receive anything other than the inflated cost of the device.

Why do you need a high spin speed? Its use is fully justified when squeezing towels and coarse fabrics - jeans, burlap. In other cases high-speed spin can damage laundry. Puffs will appear on it, the fibers of the fabric will begin to experience overload and tear. It will be difficult to smooth out clothes wrung out at high speed even with an iron.

Does spin class affect energy consumption?

Washing machine spin classes
The higher the spin speed, the more the motor consumes. In addition, loads are growing, which leads to an increase in energy consumption. Additional costs within one wash will not be noticeable, but frequent washing will cause a slight increase in the numbers on the electric meter. From the above, it can be concluded that the most economical, inexpensive and practical are class B automatic washing machines, with spin speed up to 1000 rpm.

What to pay attention to when choosing a washing machine? It's best to take a look at energy classes and the quality of washing, as well as the ease of operation and the capacity of the tank. If you are planning to buy a washing machine, we advise you to read our article How to choose a good front-loading washing machine.

Problems with the washing machine sooner or later arise for all users. Programs stop working for someone, and someone cannot cope with problems with draining. By the way, the last problem is the most relevant for many owners of automatic washing machines. Unable to cope with the removal of water or start the pump, the machines show an error and turn off.

This malfunction can manifest itself for a variety of reasons, which will be discussed in this review. Here we will look at how such breakdowns occur, what is their cause and how to do without calling the wizard.

We also note that due to the lack of water drainage in the washing machine, your washing machine door may not open. If you are also facing this problem, then all ways to unlock the door in the washing machine find this link.

Reset program

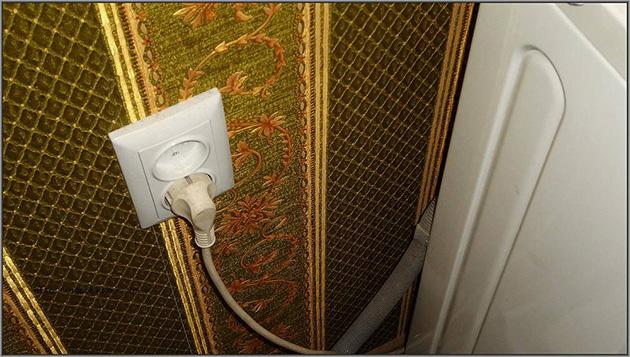
If the washing machine suddenly stops working at the stage of the last or intermediate spin, you should interrupt the program, and then try to start the machine from the same moment - for this pull it out of the socket.
Unplug washing machine
If it didn't help, interrupt the program with the buttons and try start the "Rinse + Spin" program (usually the shortest program). If it does not help, you will have to "dig deep".

Replacing the electronic module

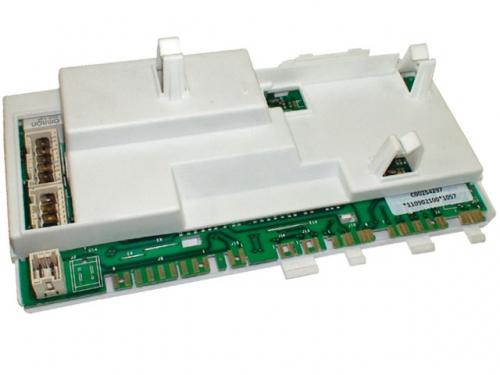
Software failures can be caused by incorrect operation of the electronics. It is impossible to do anything here without the appropriate knowledge and skills - the washing machine will have to be taken for repair. Here it will be checked and a complex of repair and restoration work will be carried out. In some cases a complete replacement of the electronic module may be required - the specialists of the service center will figure it out.
Electronic module in the washing machine

Drain does not work - check the filter

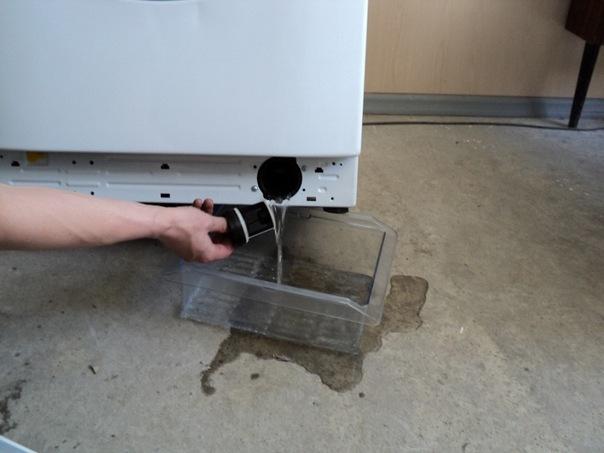
If the washing machine does not drain the water, you should deal with the filter. To do this, drain the water and unscrew the filter, by opening the door at the lower front of the machine. Here care should be taken not to flood the floor in the bathroom and not to flood the neighbors from below (if any).
Unscrew the filter in the washing machine
A drain hose is located next to the filter - removing the cap from it, you can carefully drain all the water. Next, unscrew the filter and look inside. Here you can find anything from coins to clothing details. By the way, coins are the real enemy of filters, as they are able to completely block the duct. After cleaning the filter and removing the accumulated debris from there, you can try to start the machine for spinning. If nothing helps, you need to understand further.

Draining water from the tank don't you dare open the hatch - the flow of water from the tank will lead to a real flood. To empty the tank, use the drain hose located next to the filter.

A clogged filter is the most common cause of water not draining. Pay special attention to its cleaning and arrange periodic preventive cleaning.

The drain in the washing machine is broken - check the drain hose

A drain hose can be an equally good reason for the lack of a normal drain.First of all, you need to check its patency - for this you just need to blow into it, making sure by the sound that the air reaches the tank of the car.
Drain hose in washing machine
Also follows check status siphon, it is quite possible that it is clogged with lint, threads, hair and other contaminants. A common cause of a non-working drain is the simplest drain hose bend - check its condition and make sure that it has a normal clearance. If not, and a large plaque has formed in the tube, then change the hose. Is the hose okay? In this case, you need to make sure that the pump is working.

Checking pump performance

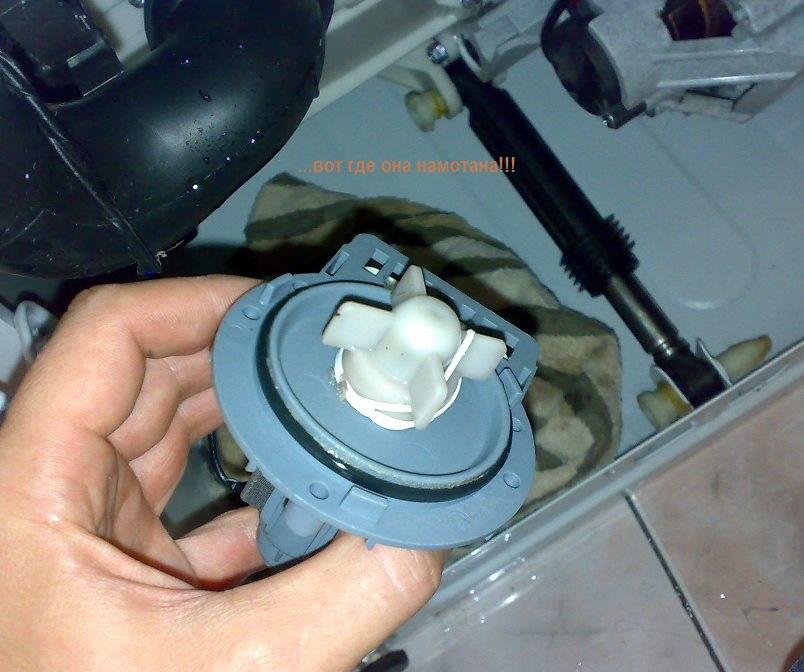
The pump can give itself away in the first minutes of a malfunction. If she makes strange sounds, then it is quite possible that she just clogged with threads and pile. This happens with machines that have been in operation for many years.
Checking pump performance
The easiest way to diagnose is to listen to the sounds coming from the bowels of the washing machine. If you hear a quiet hum, then this may mean that:

  • The pump is clogged and does not rotate;
  • The pump motor is broken.

If nothing is heard at all, then this can mean the same thing. If there are suspicions that the pump is not working correctly, it is necessary to disassemble and inspect it. If threads are wound around the shaft and it is almost impossible to turn it, you should cleanse it of impurities, assemble and test the pump again.

Do you have a multimeter at home? Then you can see if the pump is receiving voltage (when the program starts and the drain is supposed to start) - but it is better to entrust such a test to specialists.

What to do if the pump is clean? You can try replace it with a similar model, having previously agreed with the seller on the return. By the way, if the pump is about to fail, then it will "warn" about this through numerous failures. If you get tired of constantly dealing with the lack of a drain, feel free to change it!

Checking the integrity of the wires

As already mentioned, when diagnosing a drain, you can check for the presence of supply voltage at the pump. If it does not, then there can be two problems:

  • Electronics not working
  • There were problems with the integrity of the wires.

If you can deal with the wires yourself, then the repair of electronics should be entrusted to the specialists of the service center.

Preventive filter cleaning and smart washing machine diagnostics

By the way, professional cleaning of filters can be performed even on a warranty washing machine. As for deeper interventions, they should be handled by a specialist service center or repair shop.

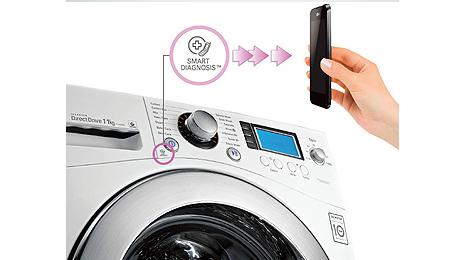
It should also be noted that some machines have diagnostic tools. First of all, this applies to LG washing machines equipped with Smart Diagnosis. Here, diagnostics is performed by calling the support service and activating the service information transmission function (reminiscent of the sound of a fax machine).
Smart Diagnosis in the washing machine
In addition, you can install a special diagnostic utility on your tablet or smartphone, and then run Smart Diagnosis. The washing machine will make a series of sounds, after which information about the causes of the breakdown will appear on the screen of the smartphone or tablet. The most advanced models are supplied NFC modulewhich greatly simplifies the diagnostic process.

Do you want to buy such a “smart” super-washer or pick up another new washing machine? Read modern rating of washing machines on our website!

Do not attempt to repair a washing machine that is under warranty. Otherwise, the warranty can be considered lost.

What to do if the washing machine does not drain water?

If the washing machine does not drain the water, there is no need to panic and calculate the losses from the upcoming repair. It is likely that you can deal with the problem yourself.

The most complex unit in a modern washing machine is the electronic module. It is very difficult to repair it at home, and every man who knows how to handle tools can deal with a broken pump. Well, even a housewife can handle checking filters and drain hoses.

Transportation of household appliances from the manufacturer to the consumer is carried out under certain conditions - in packaging and in protective frames. But if it is enough to place the music center in a box and protect it with a foam plastic frame, then with washing machines it is not so simple.

They are designed in such a way that they have moving parts - tanks rotating inside the drums. The whole structure is suspended on powerful shock absorber springs, and from above it all adheres to a heavy piece of concrete. In fact, the drum dangles freely inside the washing machine.

If it were not for fixing with bolts, then during transportation the drum could damage the walls of the machine and damage itself. The transport bolts in the washing machine serve as a kind of fuse, protecting the insides from damage.

In this article, we will look at what shipping bolts are for in a washing machine, where they are located, what they look like and how to remove them.

How to Remove Shipping Bolts on a Washing Machine

As soon as the washing machine is delivered to the buyer, it will need to be installed and connected to the water supply and sewerage. After that, you can start using it.

During the installation process, do not forget remove shipping boltsthat will interfere with the washing and spinning processes. The use of washing machines with transport bolts not removed is not allowed! Failure to do so may result in serious damage not covered by the warranty.
How to Remove Shipping Bolts on a Washing Machine
Transport bolts can be removed very easily - for this you will need the most ordinary wrench suitable size. You can also use a universal wrench with an adjustable size. If there were no keys at home, then you can use pliers - this is not very convenient, but very effective.

It is better not to throw away the removed transport bolts, but put them in a bag with a technical passport and a warranty card. If suddenly the machine breaks down, it will need to be taken to the service. And transporting washing machines without transport bolts is prohibited.

Where are the shipping bolts on the washing machine

All washing machines are designed in the same way. And the shipping bolts for all models are in one place - on the back of the case.

The only exceptions are some models with vertical loading. In such machines, transport bolts can be located on top, but this is rare. But in the case of front-loading machines, there is no doubt - the bolts are located on the back wall. Looking for them somewhere else is useless.

What do shipping bolts look like on a washing machine?

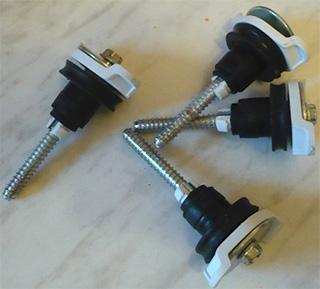
The transport bolts in the washing machine look like ordinary bolts, on the top of which plastic inserts of a special shape are put on - they help the bolts keep the drum stationary. The fixed drum does not react to the wiggles and vibrations generated during transport.
What do shipping bolts look like on a washing machine?
Depending on the model and manufacturer, the shipping bolts may have a different appearance. But the general essence of the design is that the bolt screwed into the drum should, as it were, press the drum against the back wall, preventing it from moving. Number of bolts - three to six pieces.

How to remove transport bolts from a washing machine

As already mentioned, you can remove the shipping bolts from the washing machine wrenchwhich can be found in literally every home. The key size is from 10 to 14, depending on the model and manufacturer.

As soon as you feel that the bolt has come out of the thread, it must be carefully removed and put away in a safe place. In their place should install plastic "plugs" or plugs, which are in the package with instructions or with the inlet hose. The essence of these plugs is to close the holes remaining from the transport bolts. If there are no plugs in the kit, then the holes can not be closed with anything.

If you are unable to find and remove the shipping bolts from your washing machine yourself, seek help from specialists. Thus, you protect your washing machine from damage and save the warranty. But in general, there is nothing difficult in extracting transport bolts - every man who knows how to distinguish a screwdriver from a wrench can handle this.

What happens if you do not remove the shipping bolts from the washing machine

The question is really good. If you do not remove the shipping bolts from the washing machine, then it is most likely break down. And if it doesn’t break, then already at the washing stage it will start frantically “jumping” around the room, vibrating and making strange sounds.Too often people think it's just installed washing machine not correct, but in fact it is not.

Why is this happening? It's all about the springs washing machine damperson which the drum hangs. They act as shock absorbers, softening vibrations - in much the same way shock absorbers work in any vehicle. And if the drum is clamped with bolts, then all vibrations will be transmitted directly to the body. The laundry in the tank is not balanced, which will cause just wild vibrations - this is especially noticeable in the spin mode, when the machine accelerates, and unbalanced laundry causes beating and washing machine jumps when spinning. This is true for both conventional and direct drive machines.

A fixed drum with no ability to soften the beats will cause huge stresses on all moving parts. In particular, bearings and the engine suffer. Vibrations are harmful to all components of washing machines without exception. If a breakdown occurs, it will be possible to do not count on repairs under warranty. If you do not remove the shipping bolts from the washing machine, then any breakdowns will cost the owner a lot of money.

To avoid this, be sure to remove the shipping screws from the drum - just look at the back of the machine and make sure that there are plugged or non-plugged holes where the bolts were.If you do not know where the shipping bolts should be located - open instructions. This is the most affordable way to avoid serious damage.